AWS Gateway deployment
This article explains how to install the BlastShield™ Gateway AMI in AWS EC2.
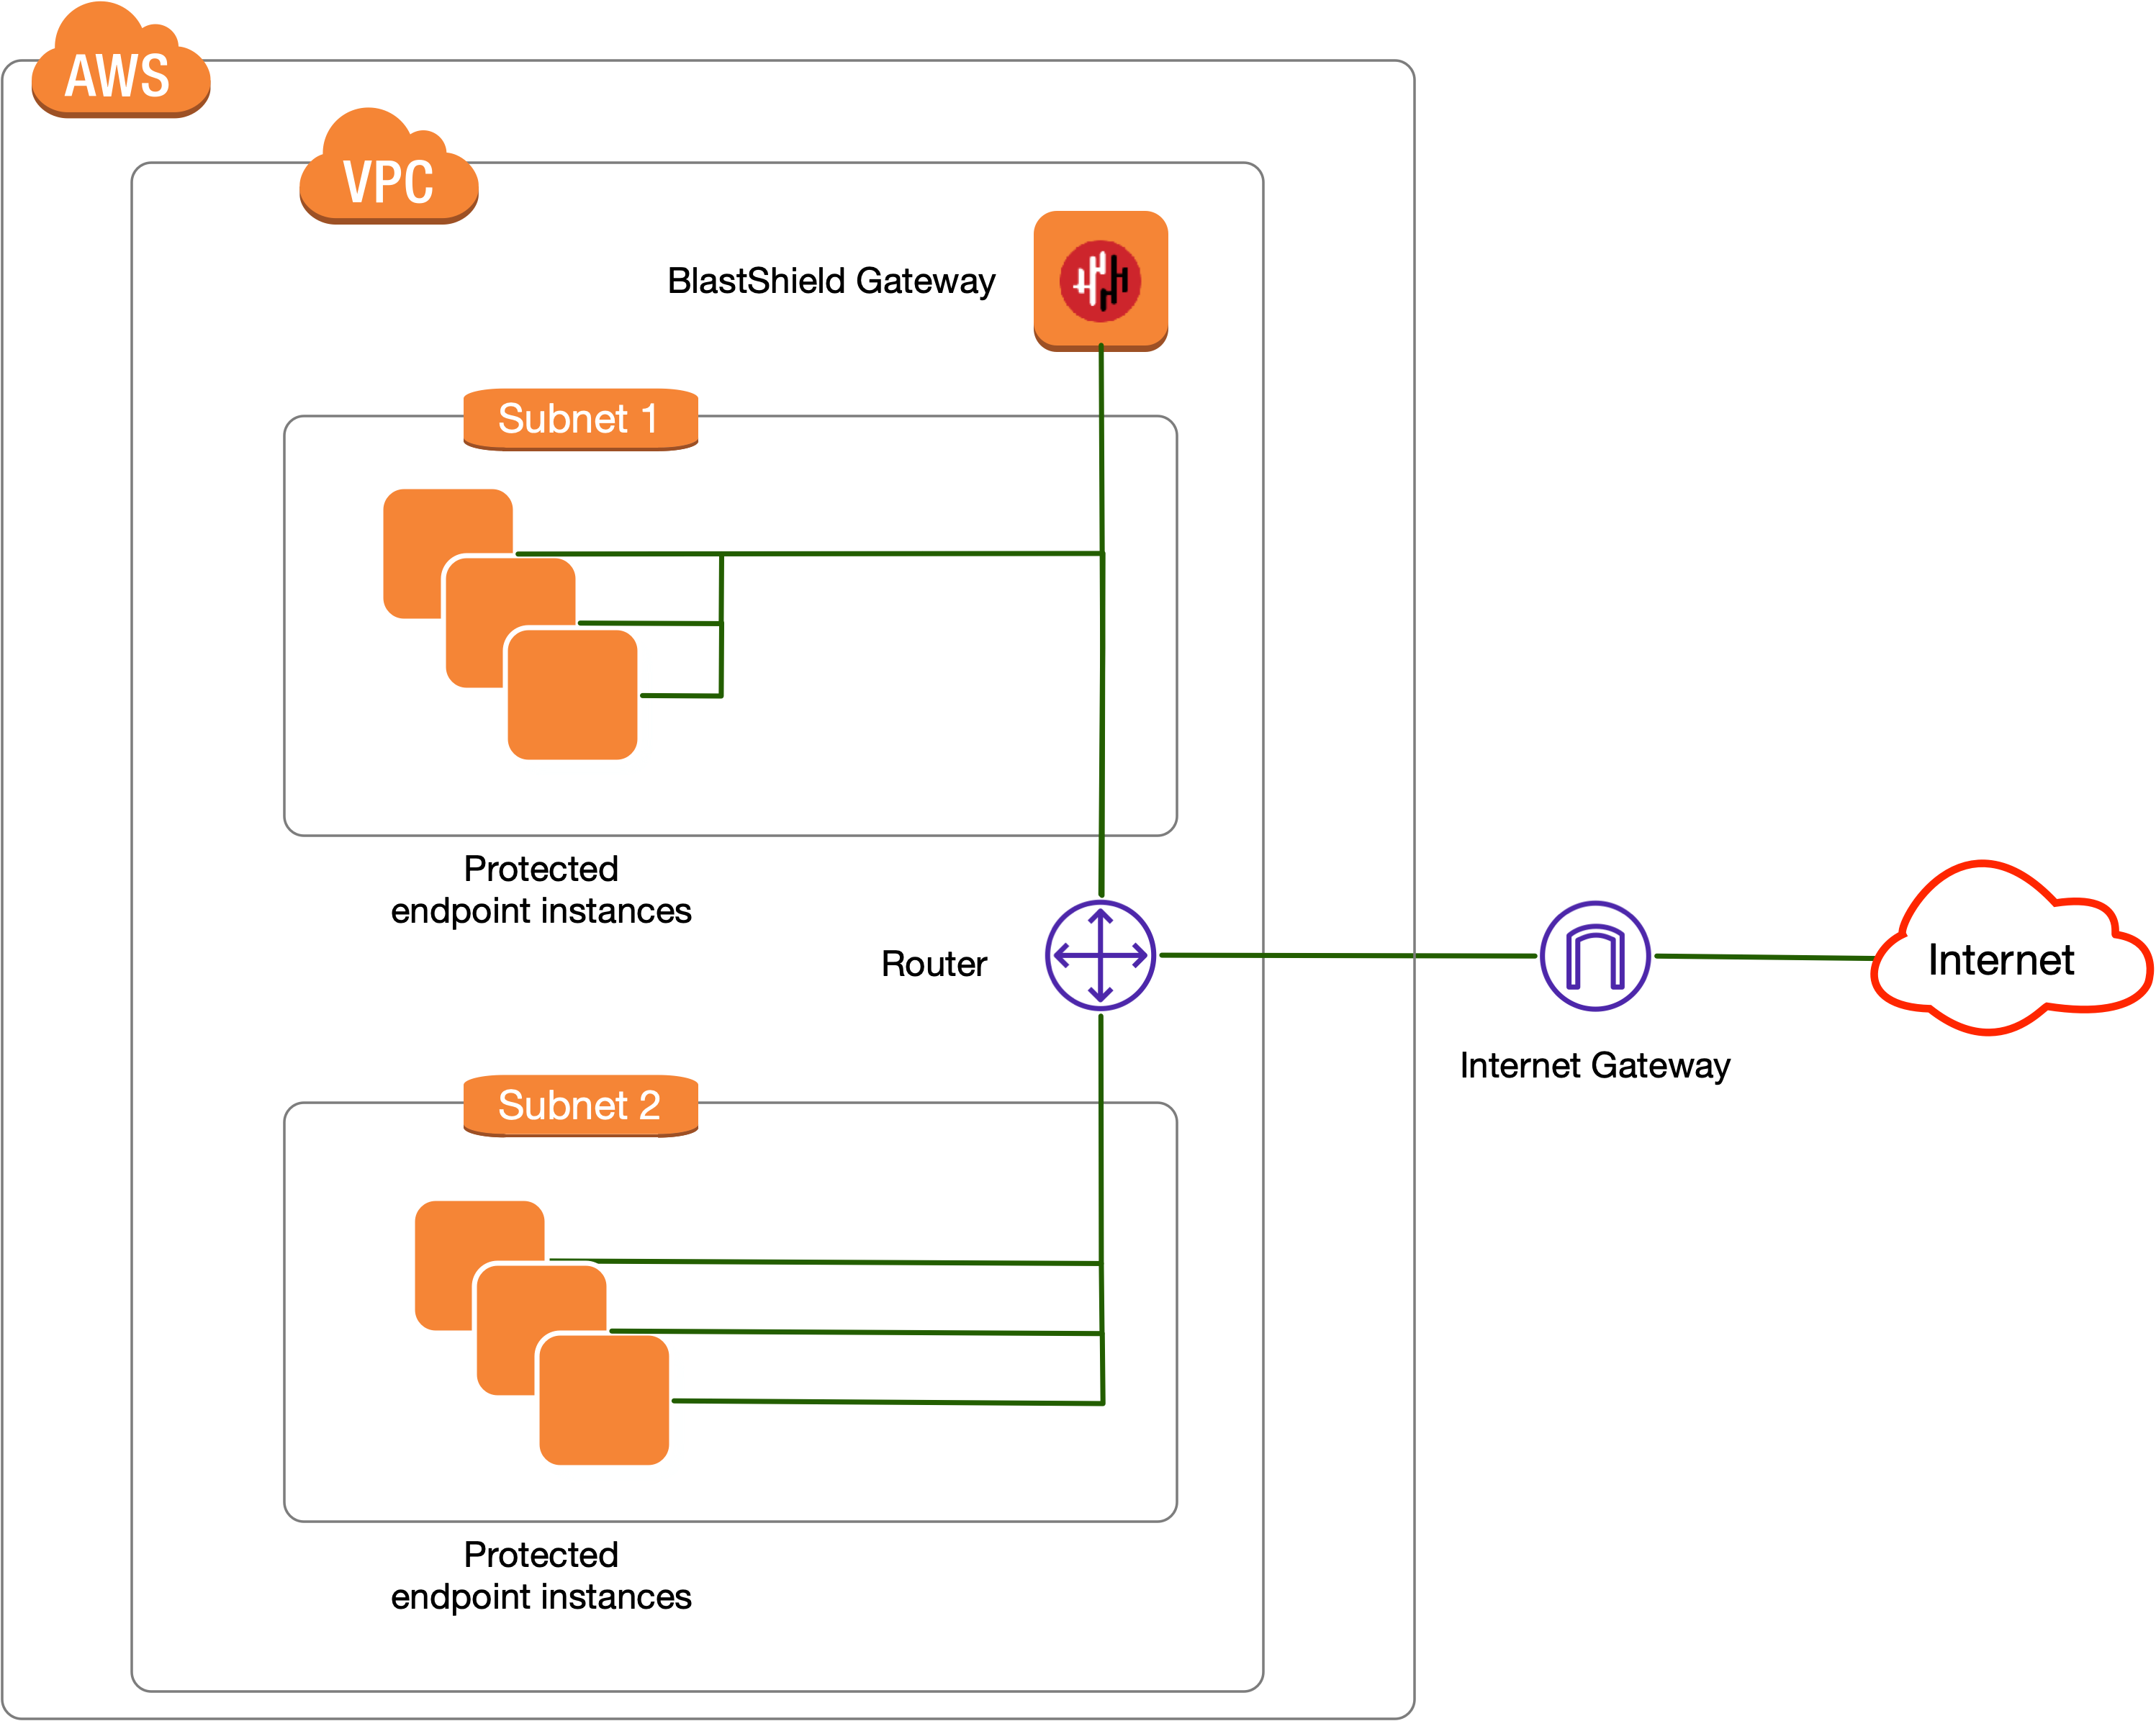
The BlastShield Gateway software is available as an AMI to deploy as a virtual Gateway in AWS EC2. The Virtual Gateway provides protection of EC2 and RDS instances by providing micro-segmentation and zero-trust access controls plus built-in password-less multi-factor authentication of connected users. Protected instances will be rendered invisible and isolated from unauthorised users.
 |
A Gateway deployed in AWS EC2 can be configured to support either of the following addressing modes:
Source+Destination NAT
Destination NAT
Gateway addressing modes are explained in more detail here: Gateway Addressing Modes
Gateway use cases are described here: Gateway types and their use cases
You have read/write access to your BlastShield™ Orchestrator.
You have created a standard AWS VPC with an internet gateway and at least one subnet.
Outbound UDP ports to all required destinations.
Resolution of DNS requests must be supported by the network.
Connect to the Orchestrator and select Gateways from the left Menu.
Select Add New Gateway.
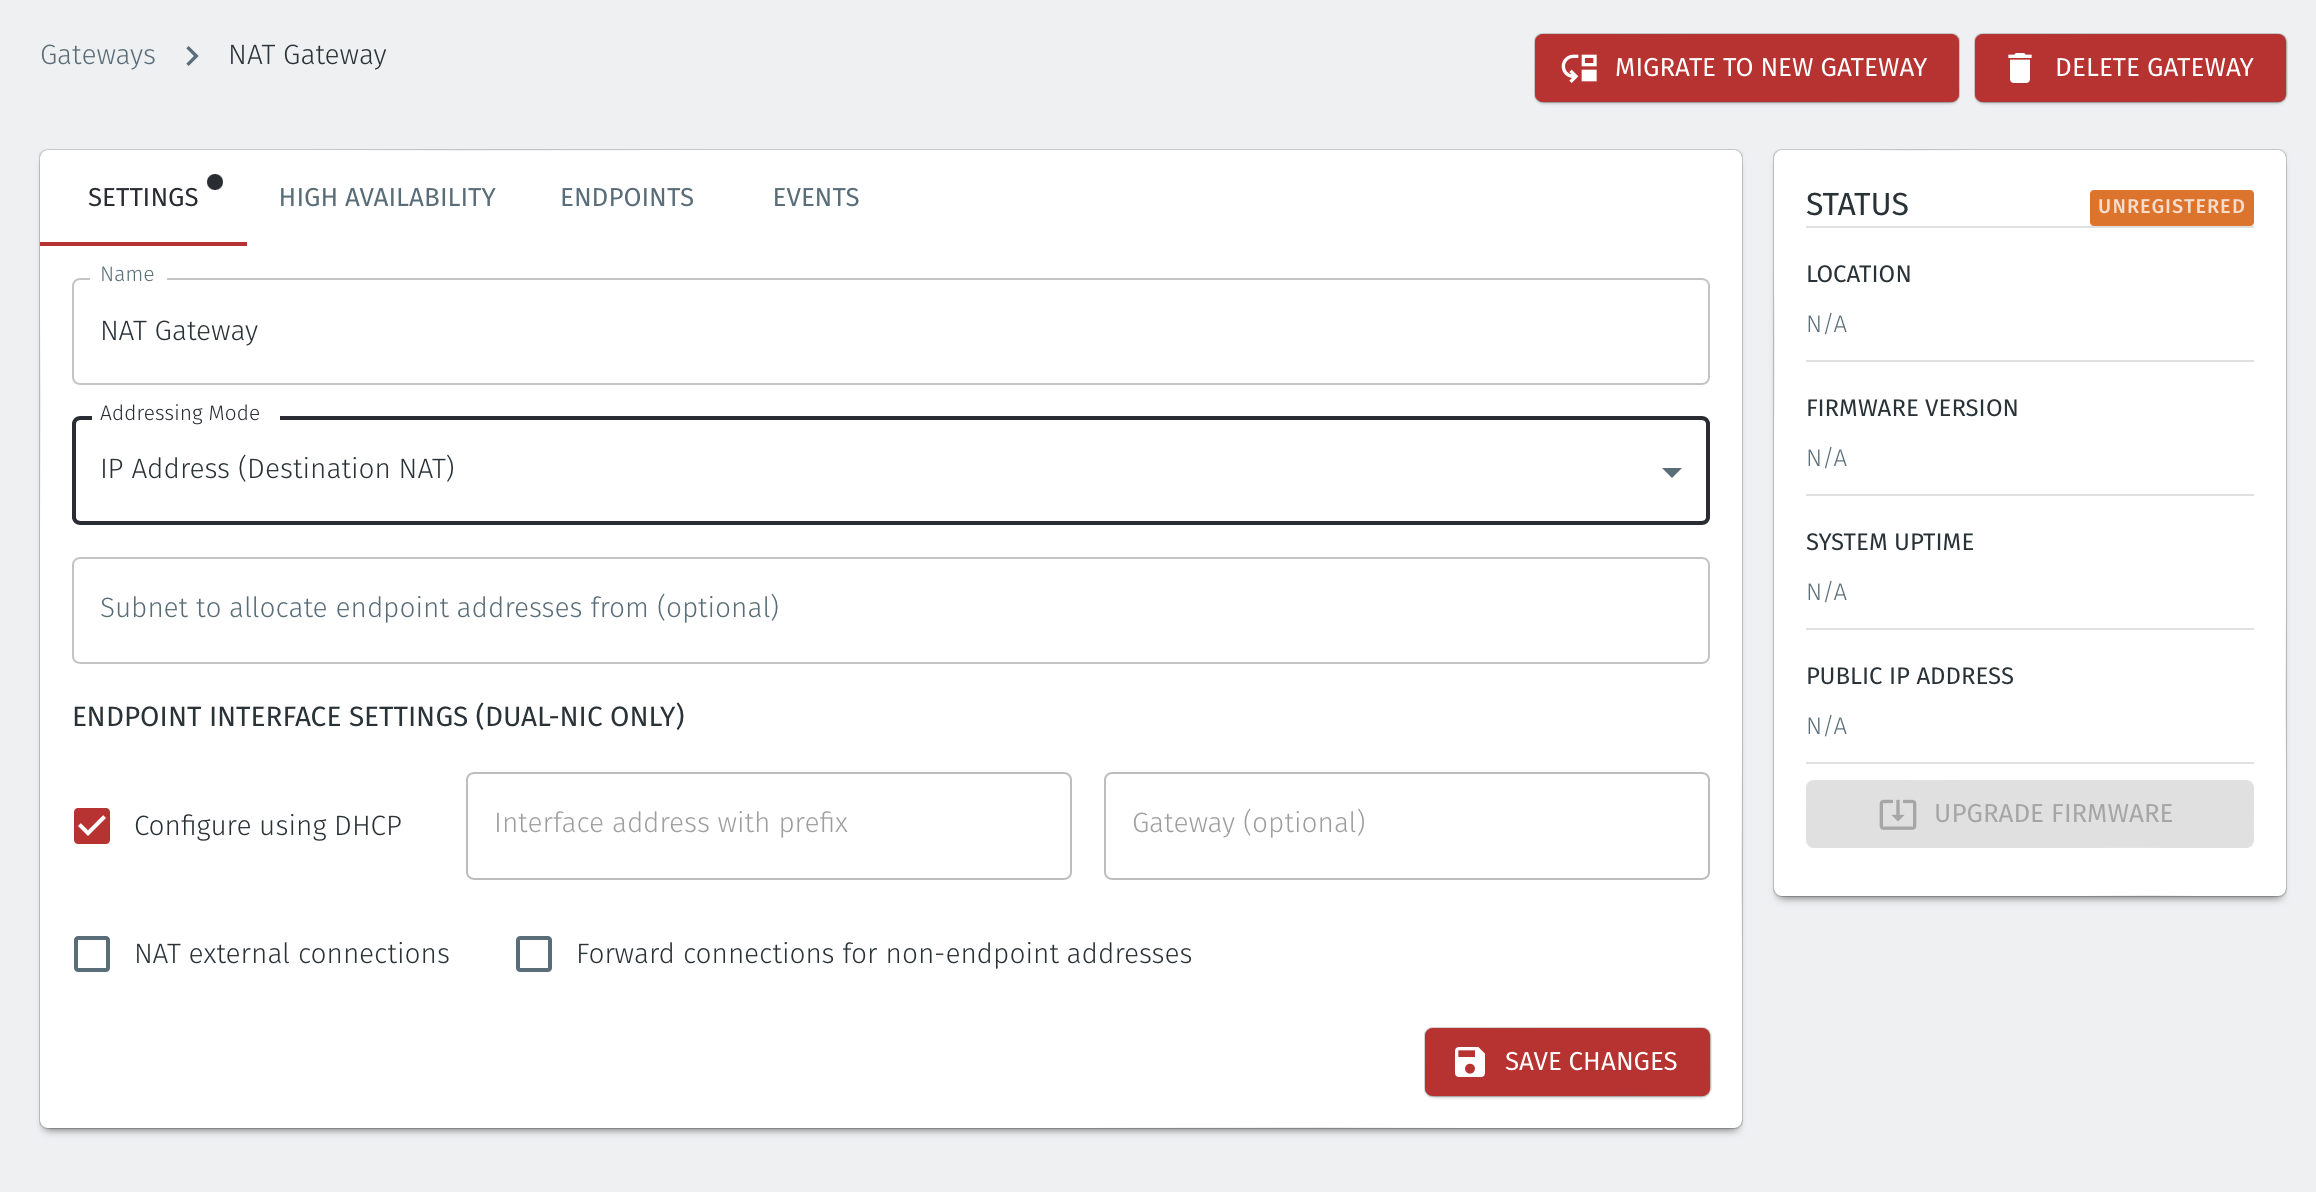
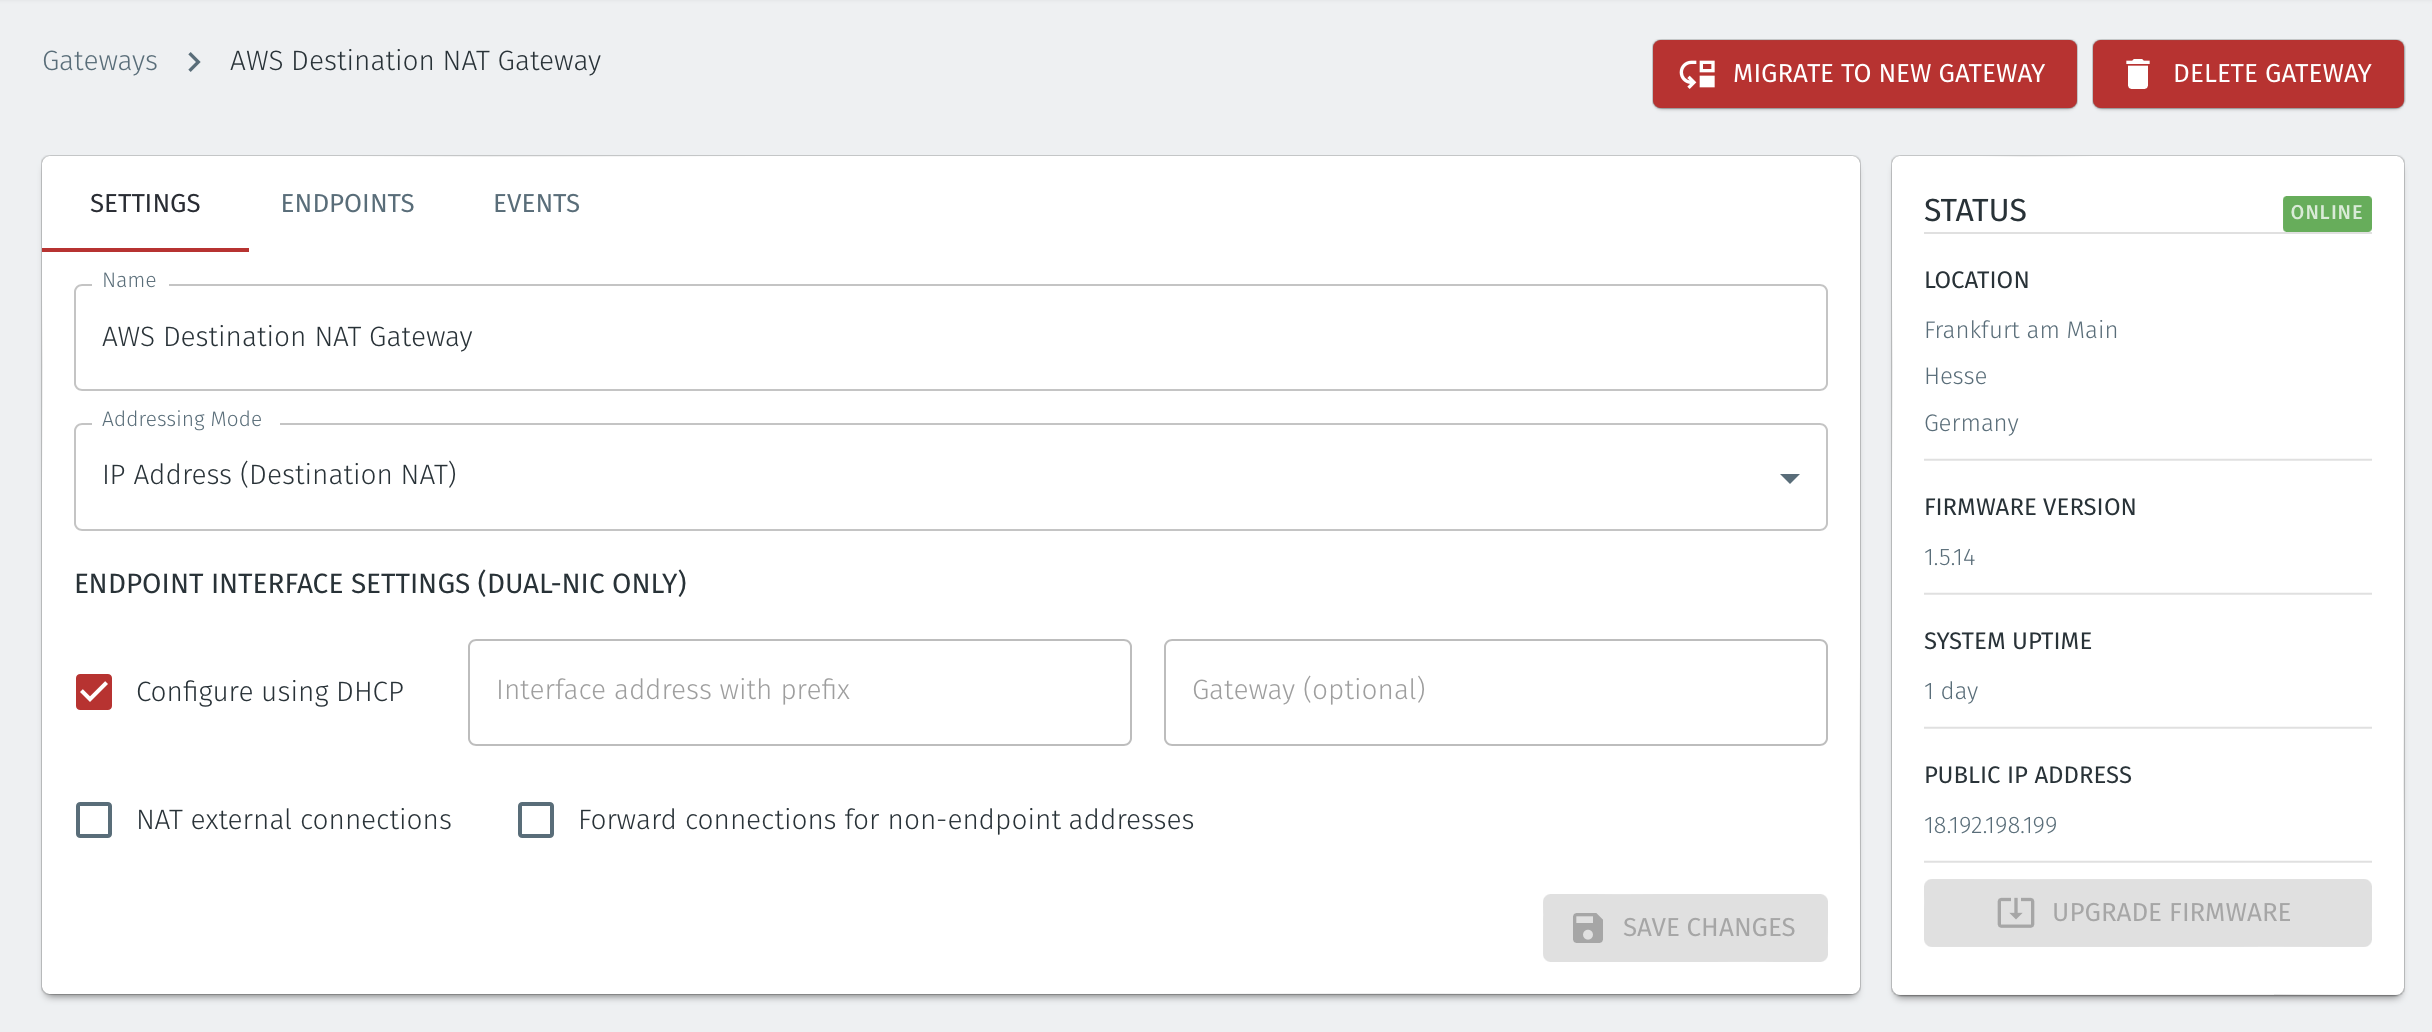
Enter a name for the new Gateway.
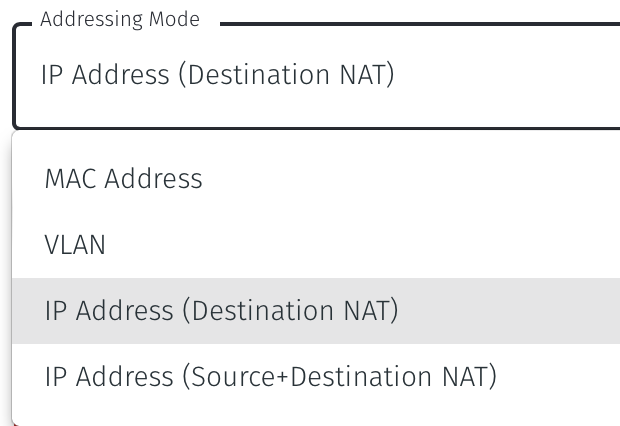
Set the Addressing Mode for the Gateway. Choose from the following options:
For Destination NAT addressing mode, click on IP Address (Destination NAT).
For Source and Destination NAT addressing mode, click on IP Address (Source+Destination NAT).
Select Save and Download Invitation and copy the invitation contents to clipboard. Keep the invitation data as you will need it during the configuration of the gateway AMI.
Connect to your AWS EC2 account and go to the AWS EC2 Dashbord >> Instances.
Choose 'Launch instance' and add a name for the instance.
Then go to the 'Application and OS Images (Amazon Machine Image)' box.
Search for the name 'blastshield' in the search function and choose the latest available BlastShield™ Orchestrator/Gateway instance.
Click on 'Select'.

Choose an instance type and key pair.
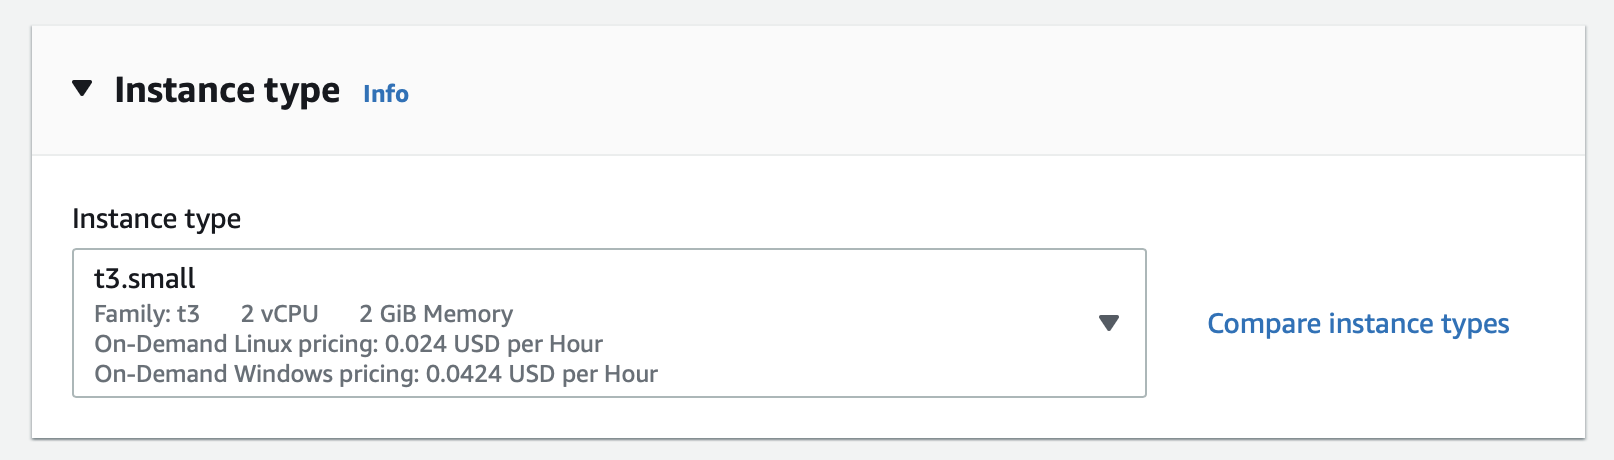
Next, go to the 'Instance type' box.
Select a t3.small instance.
Set your key pair as required.
Configure the network settings.
Go to the network settings box and configure the following
Network: Choose your desired VPC.
Subnet: Choose your desired subnet.
Auto-assign public IP: Enable.
From the security group section, configure as follows:
No inbound rules are required.
For outbound, ensure all traffic is allowed to all destinations.

Configure Storage
Add Storage: leave as default
Click next
Add the registration information into the user data field
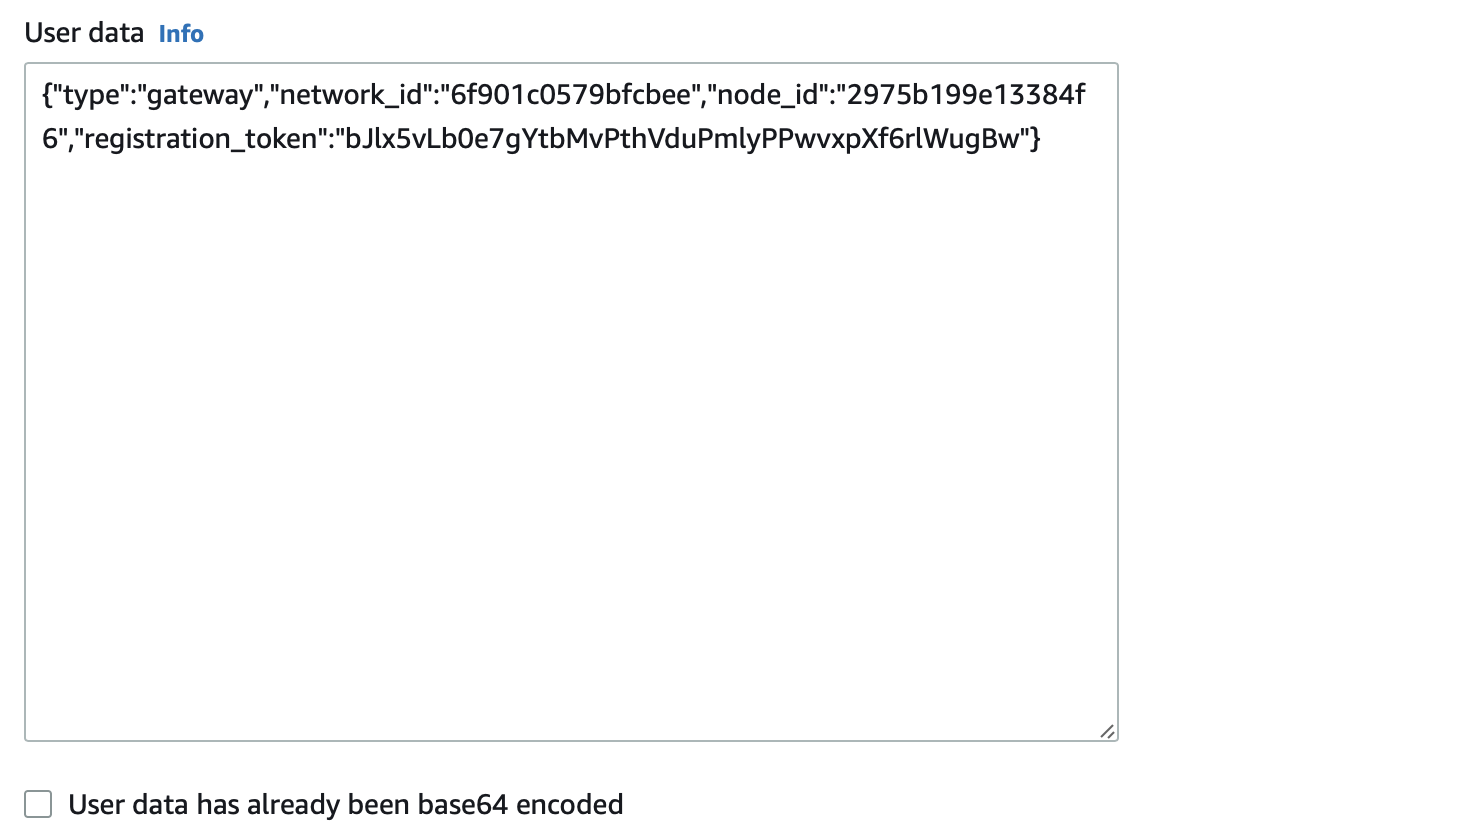
In the 'Advanced details' box, scroll to the 'User data' section at the bottom.
Select User Data.
Paste the invitation information which you copied from the Orchestrator in step 1 into the User data window.
Leave the 'User data has already been base64 encoded' box unchecked.
Review and Launch the instance.
Click launch to launch the AMI.
Monitor your instance in the EC2 console until it has launched successfully.
Once the Gateway is online, the online status will be shown in the Orchestrator.
Disable the source / destination checking on the Gateway AMI
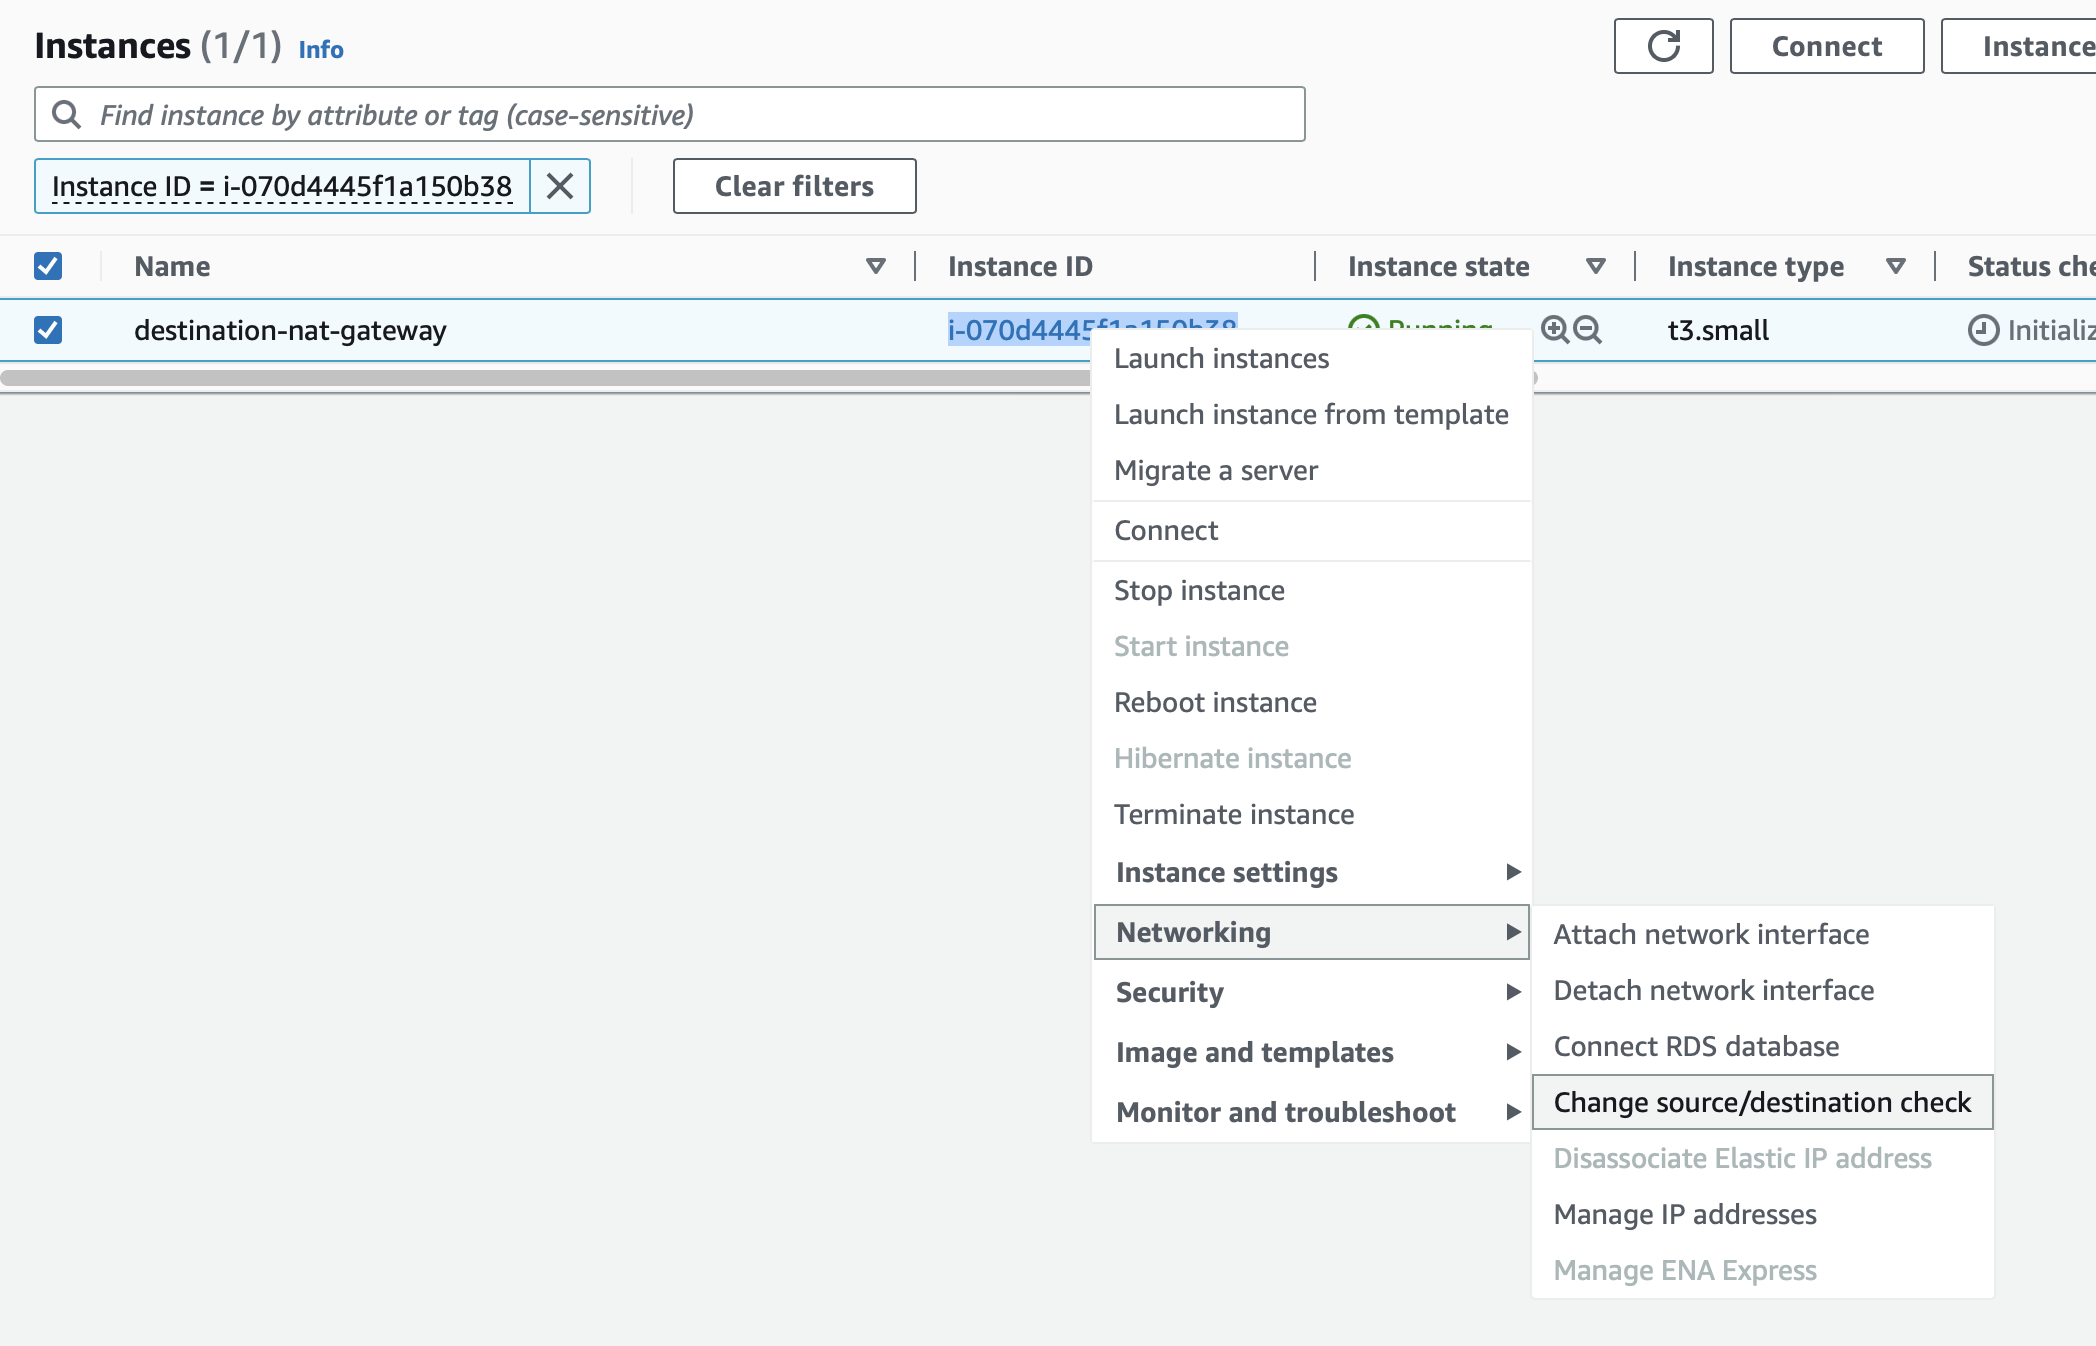
From the EC2 console, select the Gateway instance
Right Click on the instance and click on Networking, then click on Change source/destination check.
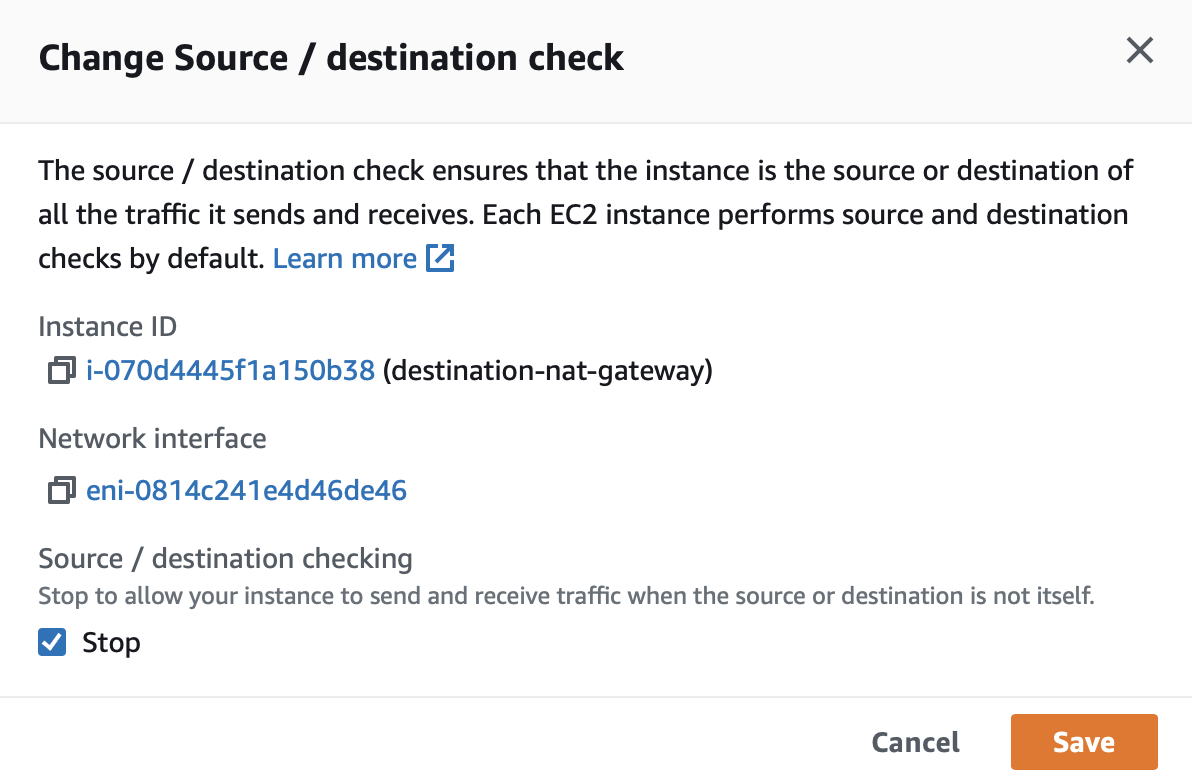
The Change Source / destination check window will open.
Go to the Source / destination checking option at the bottom and check the box marked Stop.
For each asset to be protected by the Gateway, you will create an endpoint instance in the Orchestrator. The endpoint configuration identifies the EC2 instance by its private IPv4 address. The Gateway will NAT the BlastShield™ IP address to the EC2 private IPv4 address. The following procedure explains how to configure new endpoints in the Orchestrator.
Connect to the Orchestrator.
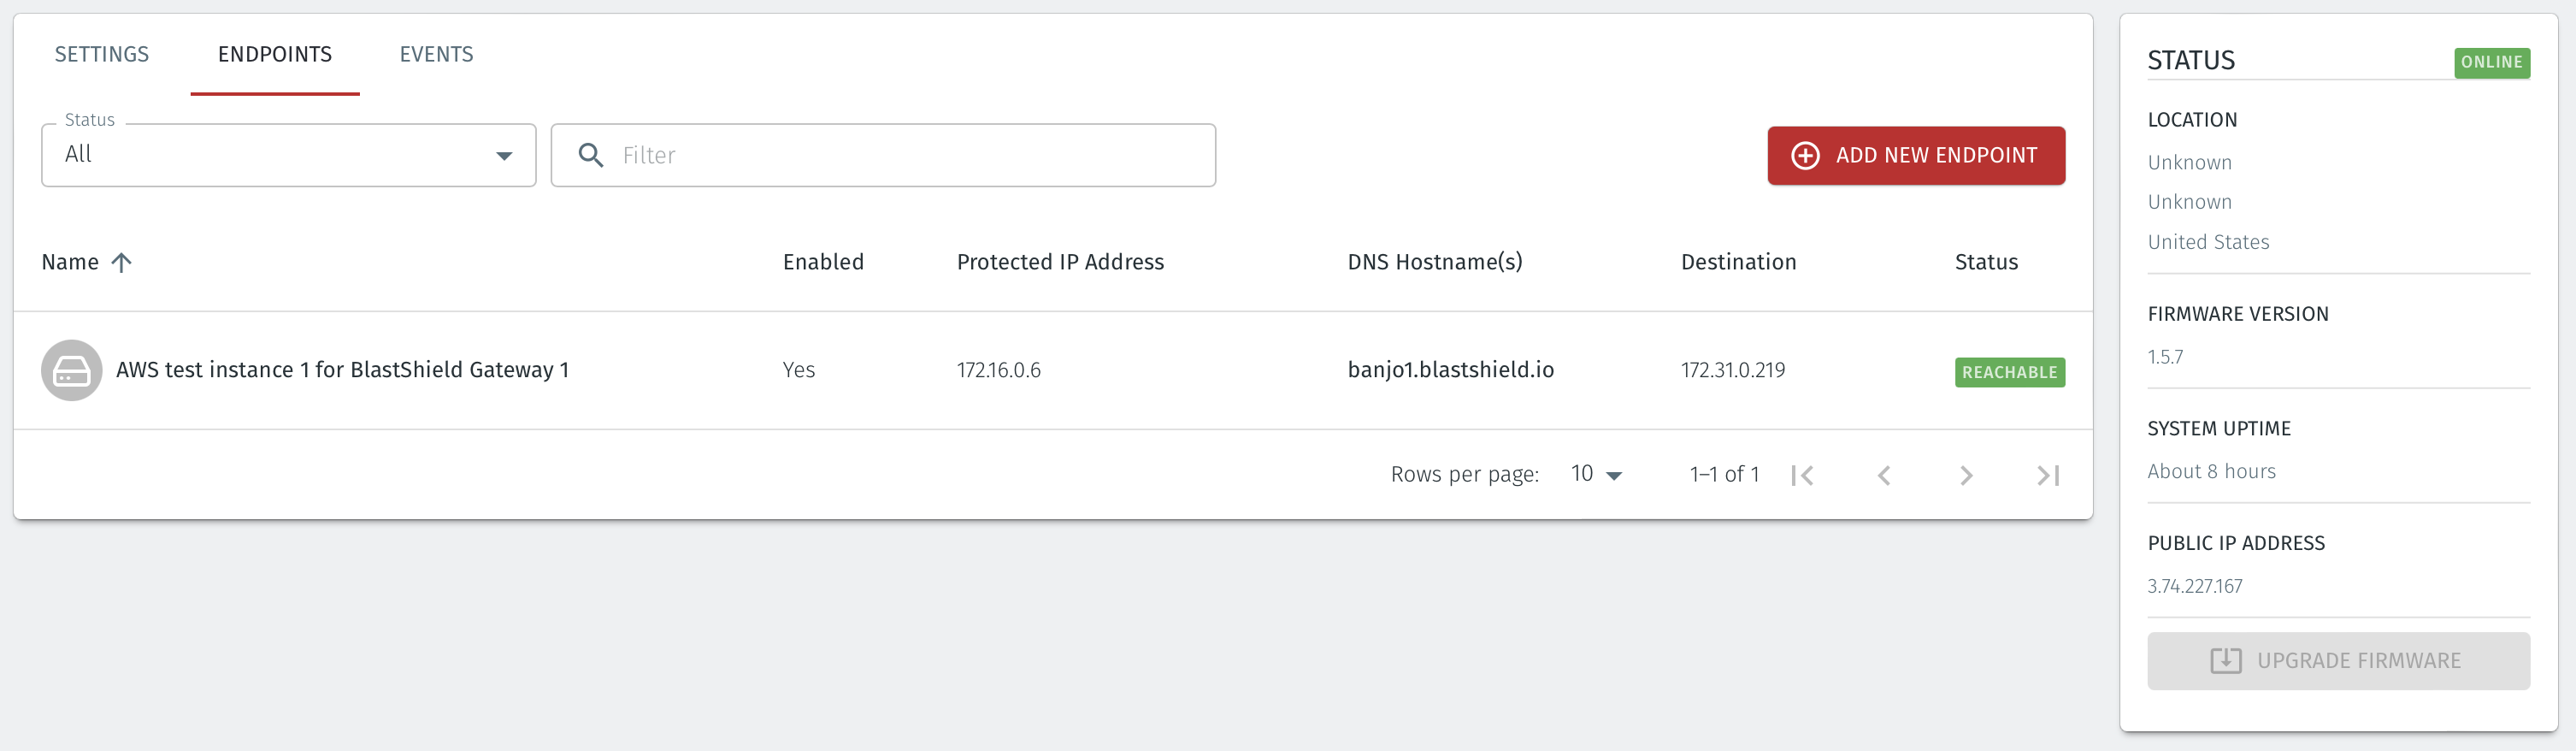
Select the Gateways , then select the AWS Gateway and click on the Endpoints tab.
Click the 'Add New Endpoint' button and click on the 'Endpoint Enabled' button.
Enter a name for the Endpoint in the Name field.
In the DNS Hostname field, enter a hostname for the BlastShield™ Network.
In the Destination field, enter the EC2 instance's Private IPv4 address or hostname.
Click on 'Save Changes'.
The status of the Endpoint will show as 'Online'.
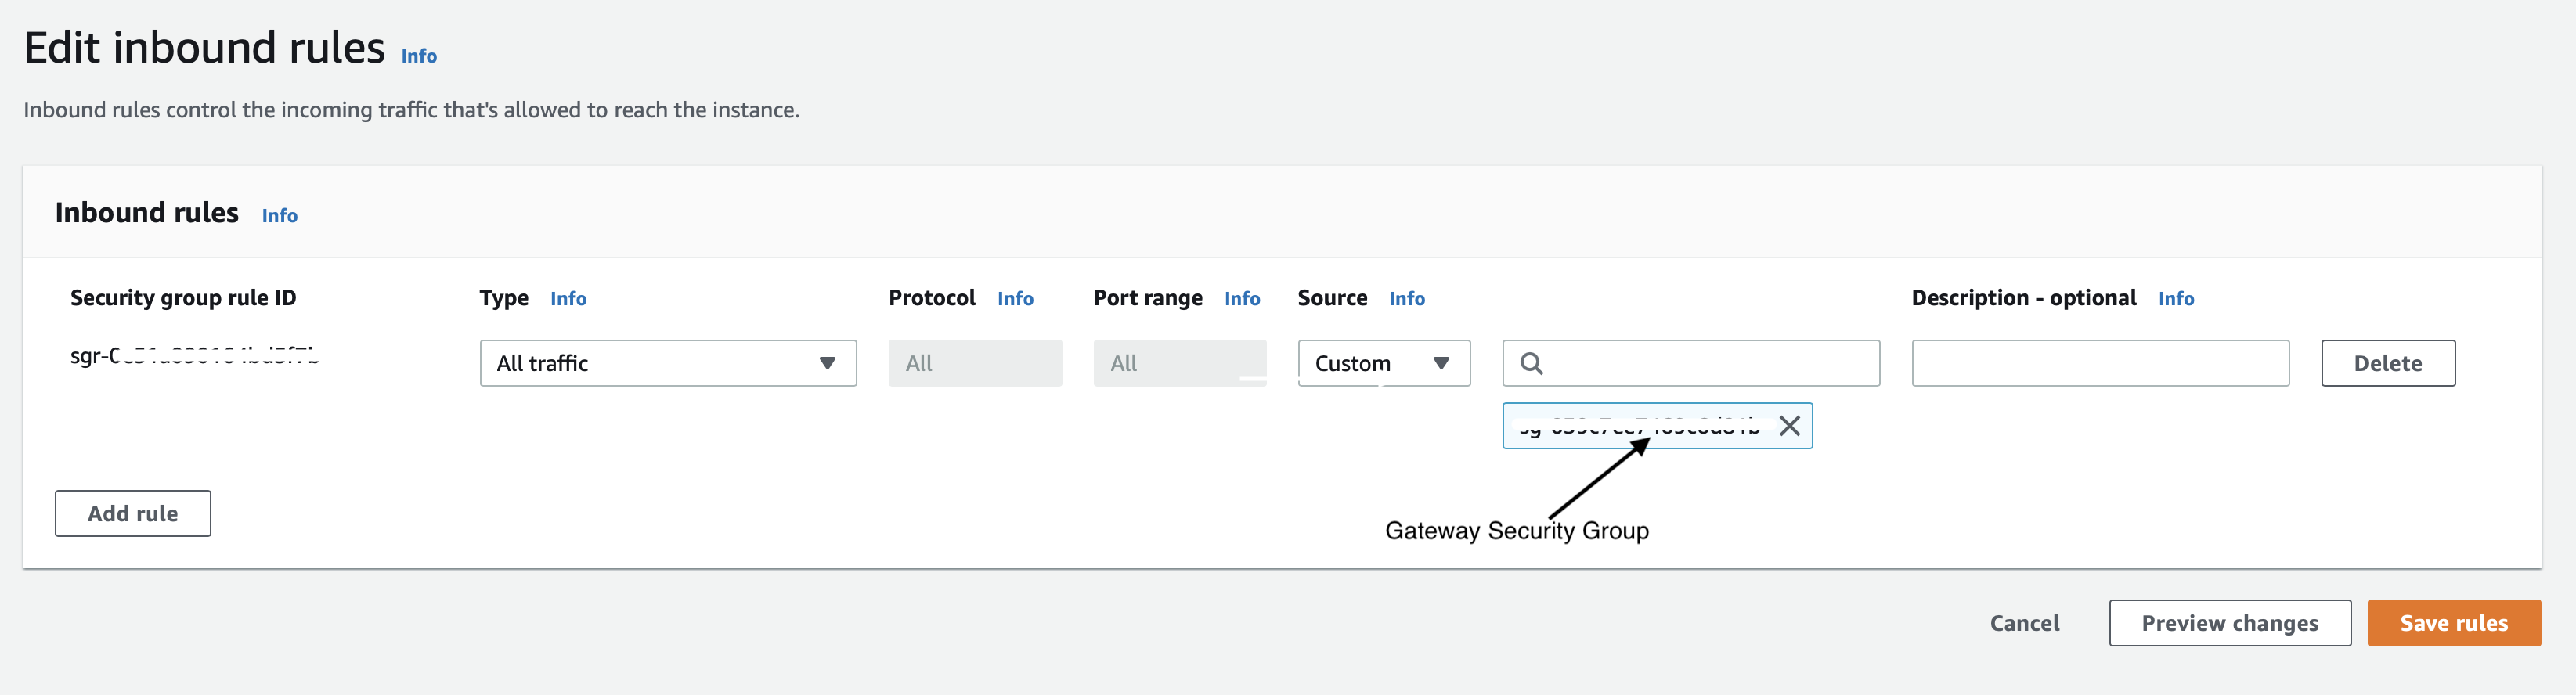
Select the Endpoint instance's Security Tab. From the 'Security details' table select the Security Group.
Click on the 'Inbound rules' tab and then click on 'Edit inbound rules'.
Add a new rule to allow all traffic from the BlastShield™ Gateway Security Group and click on 'Save rules'.
If the Gateway is configured to use Destination NAT addressing mode, configure the route table on the endpoints to add a route to the BlastShield network prefix.
This step is only required for Destination NAT addressing mode. If the Gateway is using Source+Destination NAT addressing mode then you should skip this step.
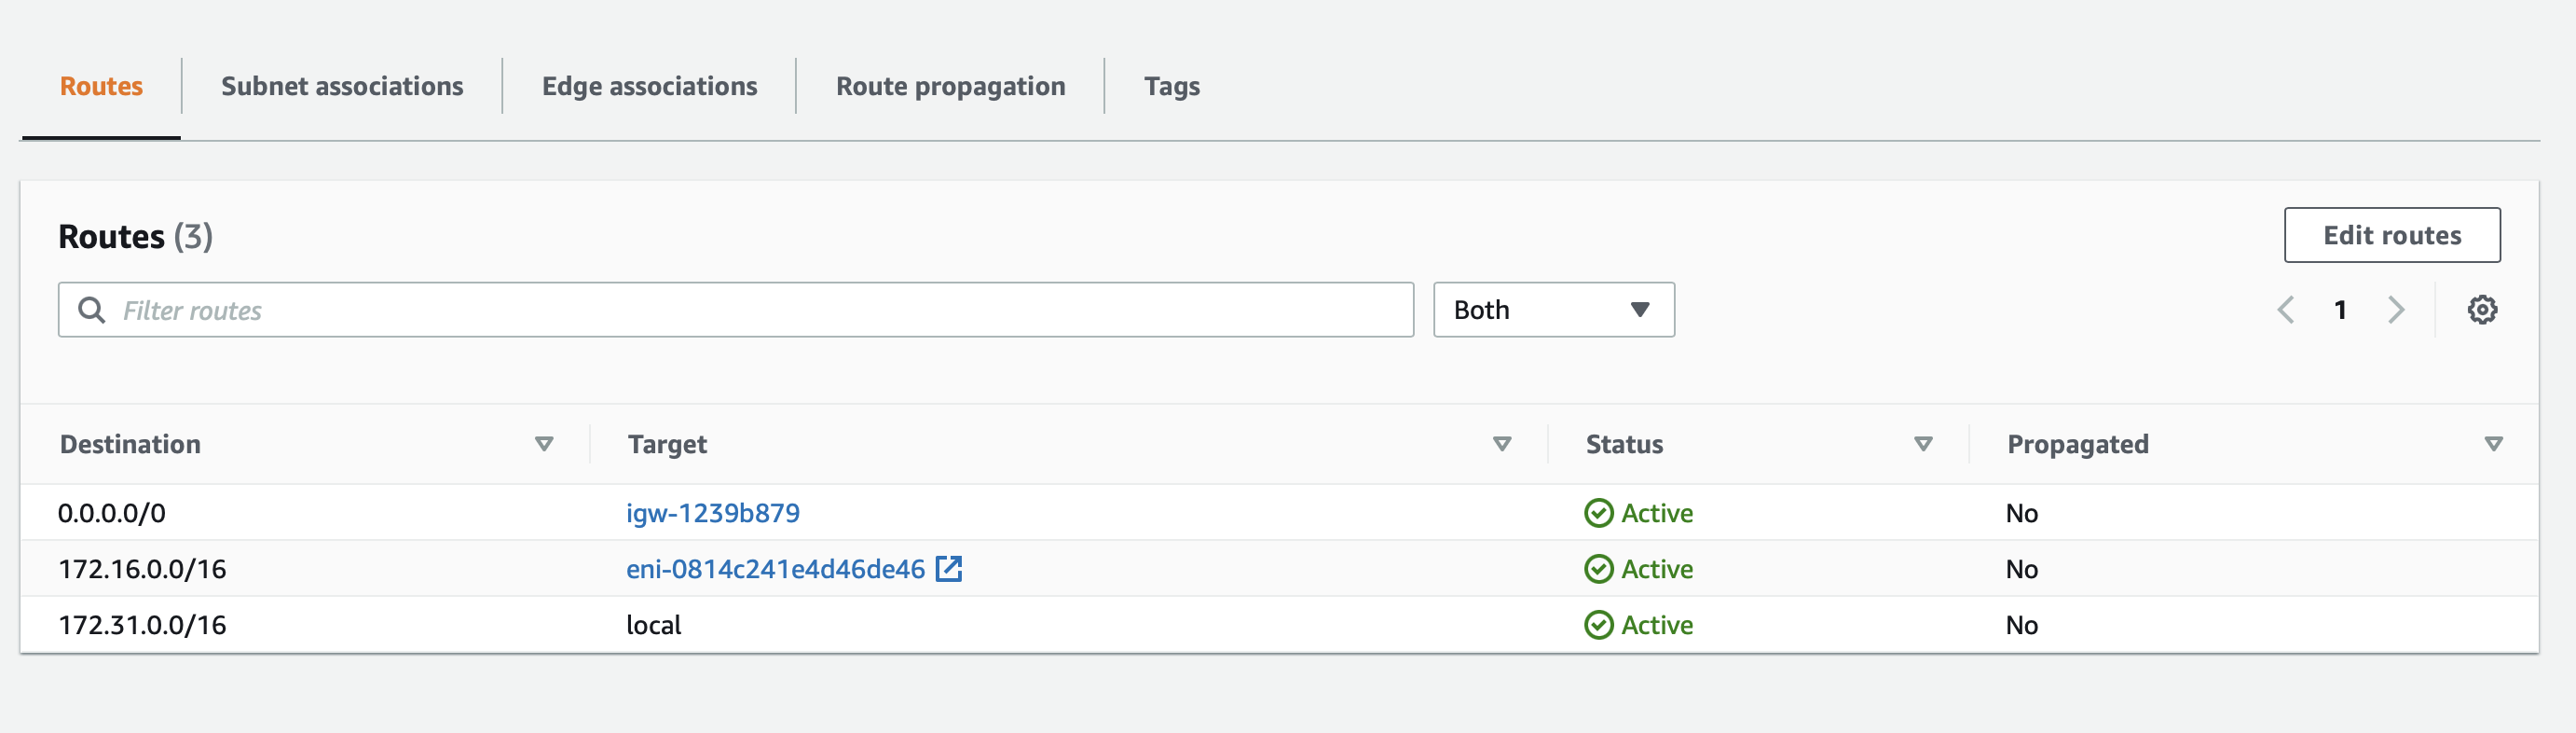
From the AWS console, go to VPC/Route Tables.
Select the route table for the protected AWS endpoints which use the BlastShield™ Gateway.

Click Edit Routes
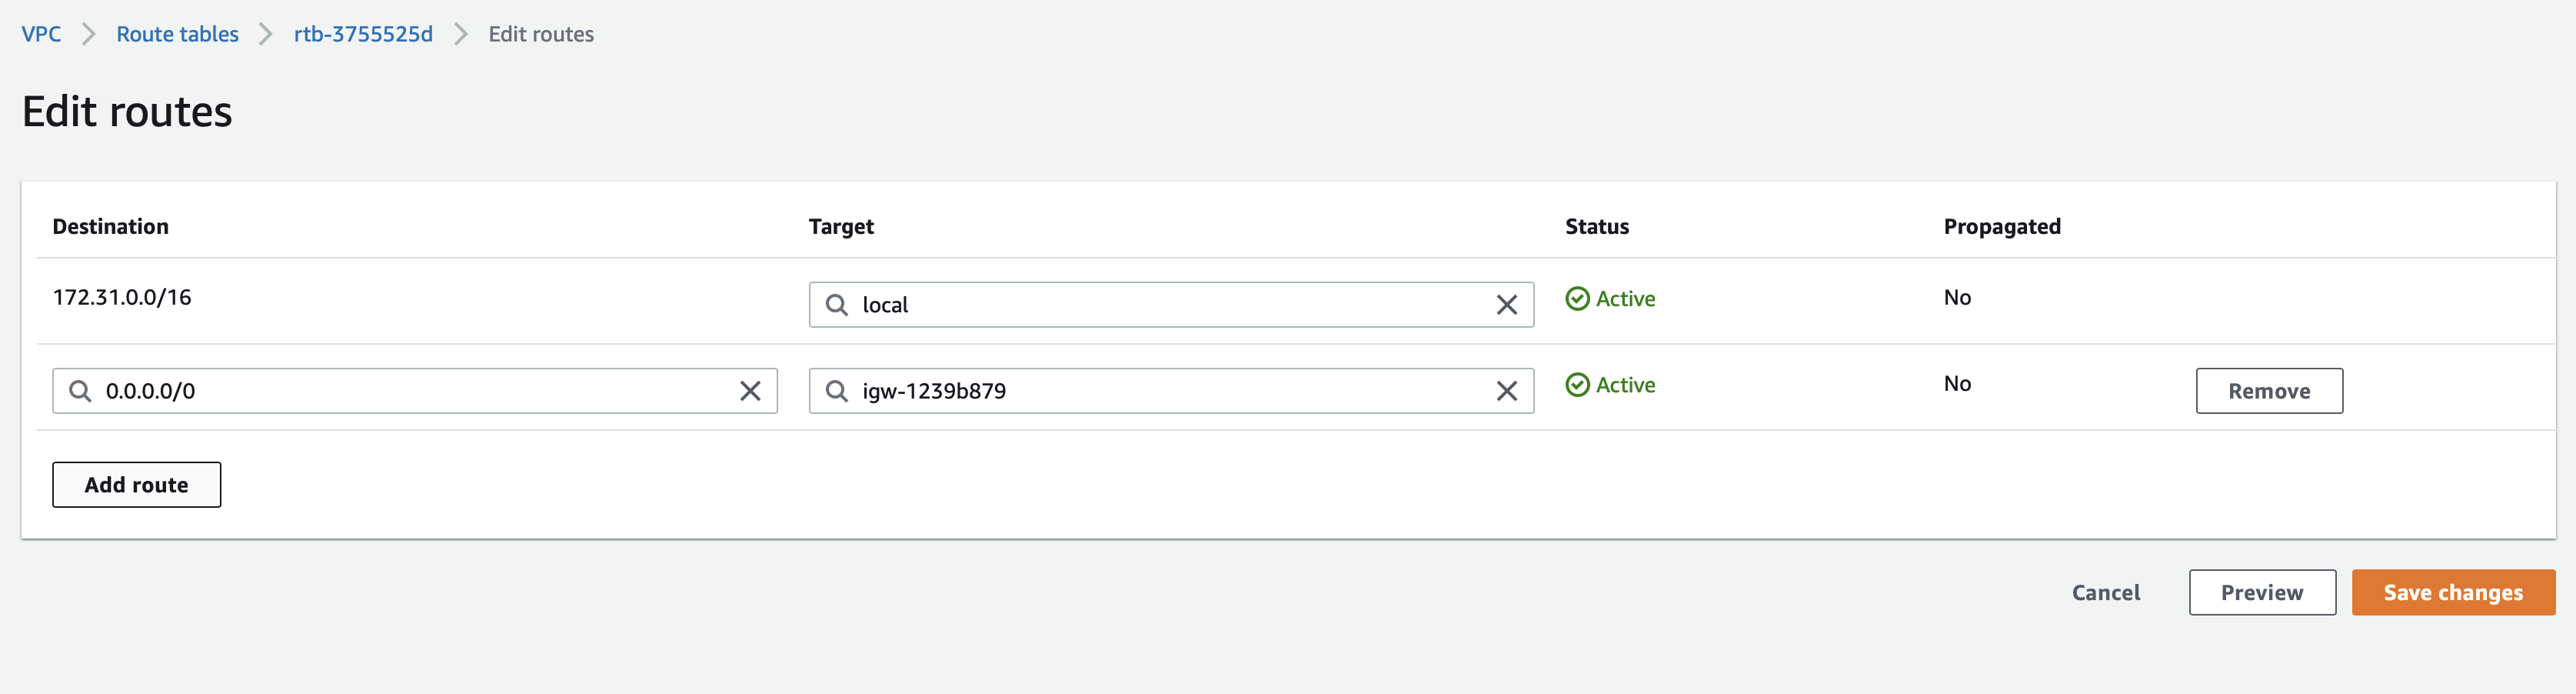
Click Add route and add a route for the BlastShield 172.16.0.0/16 network prefix and connect it to the BlastShield™ Gateway interface as the next hop.
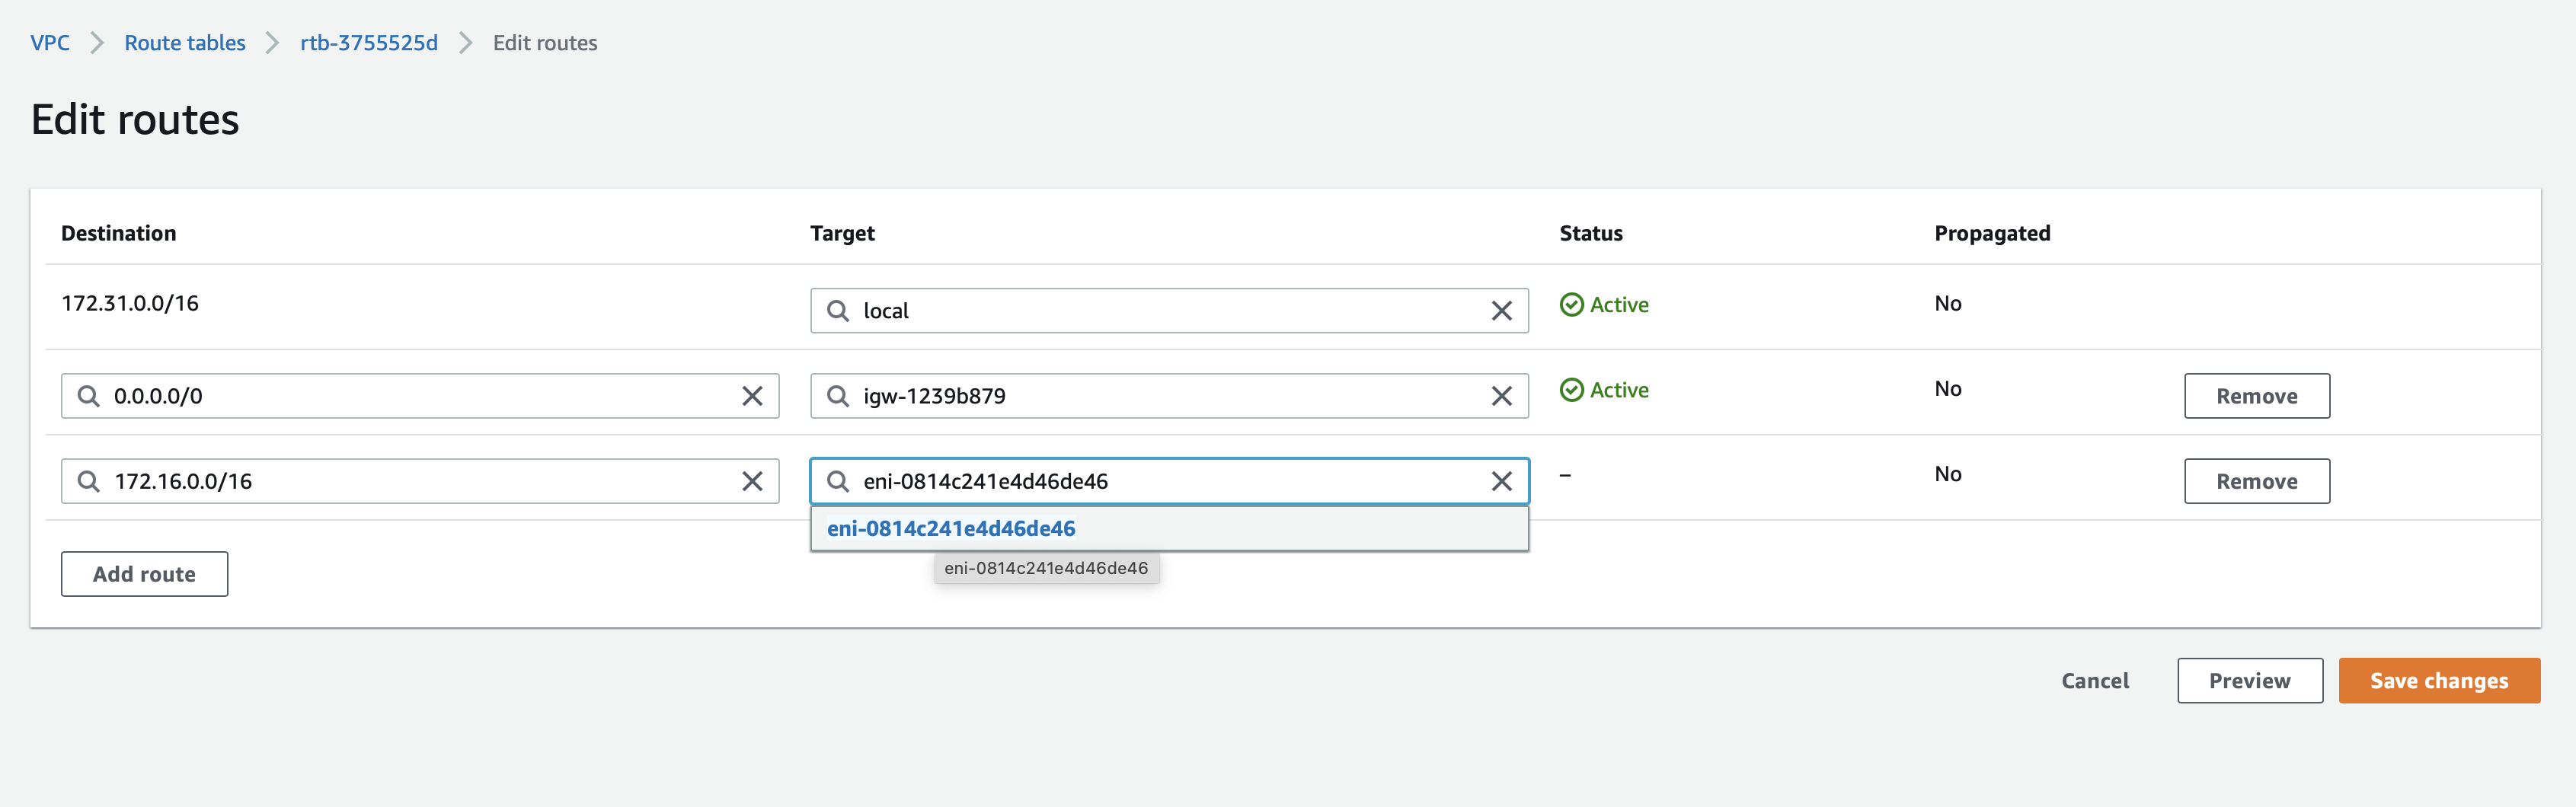
Click Save changes.
About Groups
Groups allow you to micro-segment users and endpoints. A group is a logical collection of endpoints and/or users that are grouped together. Groups are connected via policies, which form the foundation for BlastShield access control and segmentation management.
Any combination of endpoints and/or users can be grouped together.
There is no limit to the number of endpoints and/or users that can be in a group.
Endpoints and users can be in one or multiple groups simultaneously.
Groups are linked together via policies to provide access between endpoints.
By default, endpoints/users cannot access or have visibility to other endpoints/users unless they are granted access via a policy
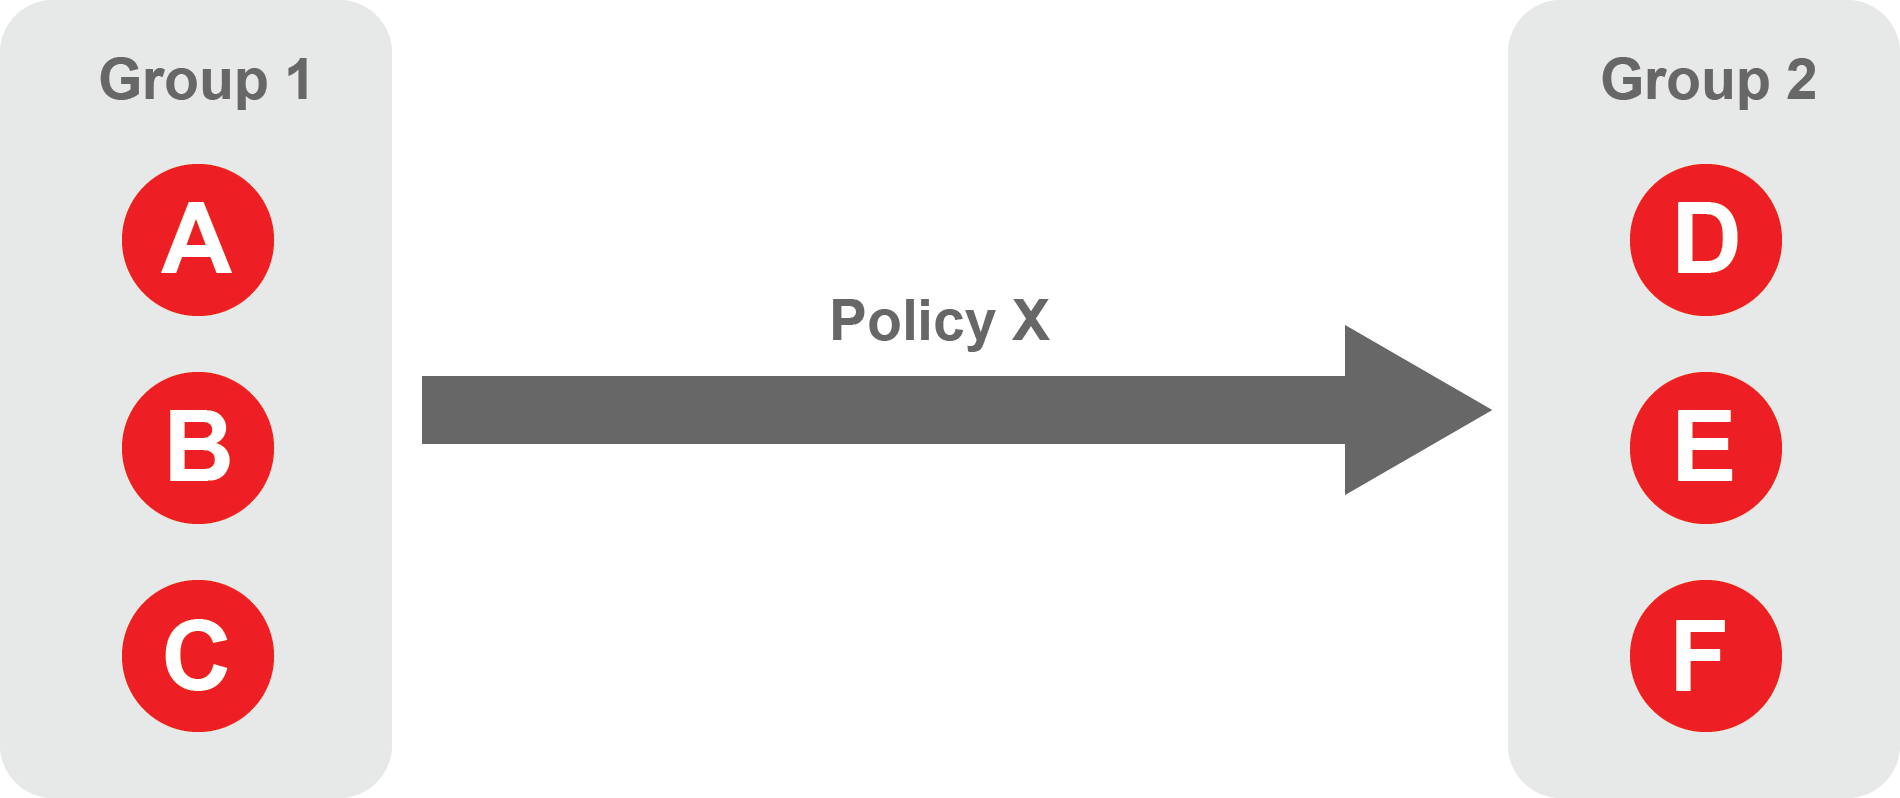
About Policies
A policy defines how groups can interact. Groups are connected via policies, which form the foundation for BlastShield access control and segmentation management.
Each policy will have two sets of groups - "From" and "To".
The "From" set is one or more source groups.
The "To" set is one or more destination groups.
There is no limit to the number of groups in a given policy.
"From" Groups will have access to "To" Groups within the policy.
"To" Groups will not have access to "From" Groups within the policy.
Groups can be in one or multiple policies simultaneously.
 |
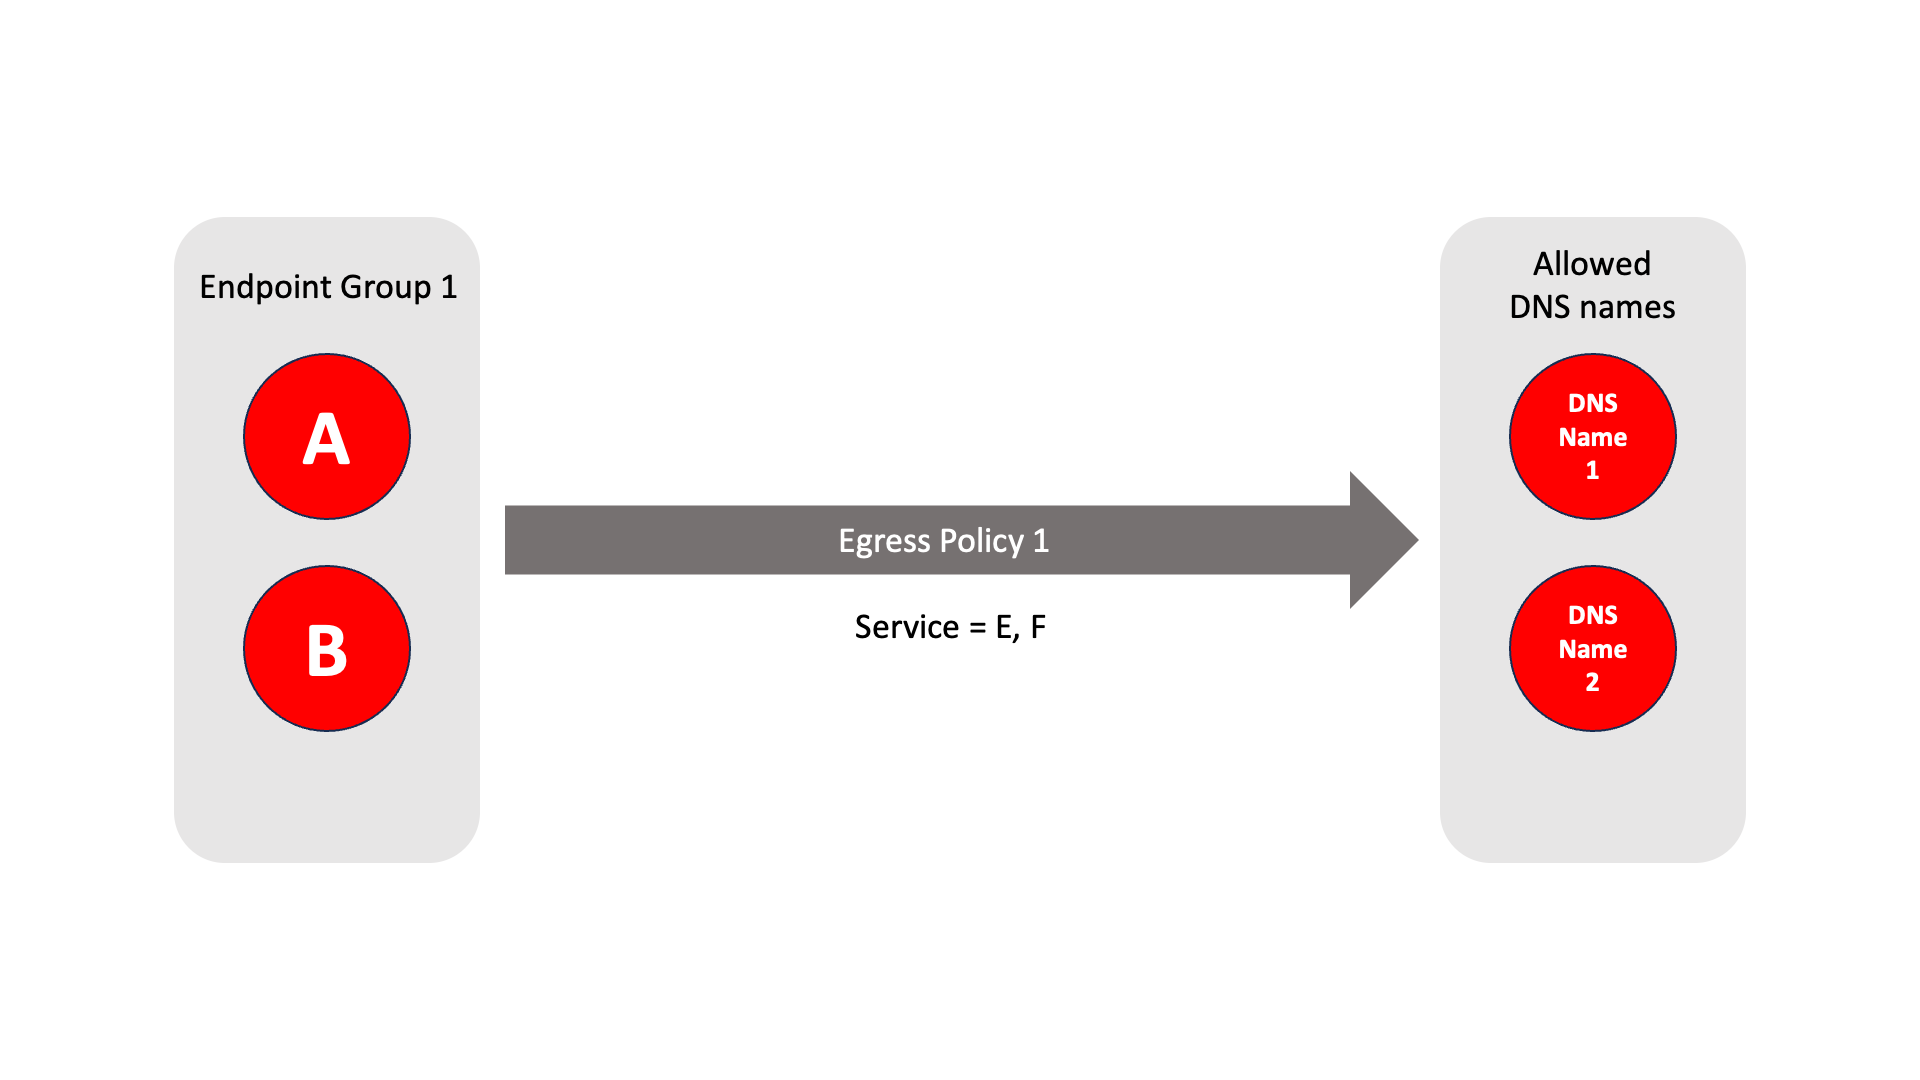
About Egress Policies
Egress policies allow you to control external network access for Gateway endpoints which are isolated behind a Gateway. This enables endpoints to connect to external entities, for example to download a software update or to connect to an NTP server.
The endpoint group contains the endpoints which the policy applies to.
The allowed services are E and F.
The network prefixes or DNS names define the allowed external network destinations for the endpoint group.
 |
Create Groups
From the Orchestrator, select "Groups" from the left menu.
Select "Add New Group" from the Group List.
Enter a name for the new Group.
To add members to the new group, click the "Add Members" button.
If you adding users to the group then select the desired Users which you want to be associated with the Group from the "Users" box.
If you are adding Agents to the group then select the desired Agents which you want to be associated with the Group from the "Agents" box.
If you are adding Gateway Endpoints then select the desired Endpoints from the "Endpoints" box.
Alternatively, you can leave the members list empty and add/modify new members later.
Click "Add Members" to save the members.
Click "Save" to save the new group.
Repeat, if required, to ensure you have one group for your endpoints and one group for your users, which is the minimum you will need in order to define the access policy.
Please refer to the following video, which is an example of creating one group for your users and one group for Host Agents.
Create a Policy to link your Groups
Note
Users and Agents must be a member of a group for them to be used in a policy.
Select "Policies" from the left menu.
Select "Add New Policy" from the Policy List.
Enter a name for the new Policy.
Select desired "From" Groups to be associated with the new Policy.
Select desired "To" Groups to be associated with the new Policy.
Save the new Policy.
Policies are directional, so that you can control the direction in which connections may be initiated. Typically for remote access use-cases your policy would be from the "user group" to the "server group" so that users may start connections to the servers, but servers cannot start connections to users. You can create bi-directional permissions by using two policies.
The following video shows an example of creating an access Policy between a group of remote workers and a group of servers. The policy gives the remote workers authorisation to access the server group.
Create an Egress Policy
Egress policies are required only if a Gateway endpoint requires external network access.
Egress policies allow you to control external network access for Gateway endpoints which are isolated behind a Gateway. This enables endpoints to connect to external entities, for example to download a software update or to connect to an NTP server.
The Egress Policy menu in the Orchestrator allows policies for external network access to be configured on a per-endpoint group basis, where the groups are defined in the Orchestrator Groups menu. Allowed destinations may be defined either by network prefix or by DNS names and the policy may be further controlled by specifying an allowed service. An egress policy may be enabled or disabled from the Orchestrator if the external network access is only temporary.
From within the Orchestrator, select Egress Policies from the left Menu.
Select the red "Add New Policy" icon.
Enter a name for the new Policy.
Check the Policy Enabled box to enable the policy and continue with the configuration.
Select the desired endpoint Groups to be associated with the new Egress Policy in the Endpoint Groups dropdown box
Select any optional Services groups to be associated with the new Policy in the Services dropdown box.
If you want to allow external DNS queries in the policy, then check the Allow all DNS queries box.
Specify the allowed destinations for the Egress Poicy as required using the following options:
In the Allowed Prefixes box, define an allowed external IP address and prefix
in the Allowed DNS Names box, define an allowed external DNS name.
To allow recursive DNS queries, check the Recursive box.
Click Save Changes to save the new Egress Policy.