Configure Okta as an external identity provider
BlastShield™ is SCIM 2.0 enabled and supports integration with identity providers such as Okta, Azure AD and One Identity. SCIM support allows user accounts to be automatically created in BlastShield™ when new user accounts are assigned to the SCIM application in the IdP. User account status and their information are automatically updated in BlastShield™ based on updates in the IdP. BlastShield supports OIDC (OpenID Connect) to authenticate the SSO of the IdP for the user registration with the Orchestrator.
Users and user groups will be provisioned by the identity provider and the user authentication can either use the BlastShield™ Mobile Authenticator app or the Identity Provider's SSO credentials, depending on the configuration.
Your Orchestrator must have an SSO portal hostname configured for your network. Please contact support@blastwave.com to get one configured.
You must have administrative read/write access to the BlastShield™ Orchestrator and to the Okta configuration portal.
Set up OpenID Authentication.
Configure the SCIM Provisioning.
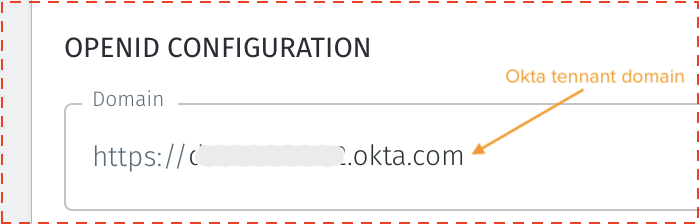
Find your Okta domain and copy it. To find your Okta URL (also called an Okta domain), sign in to your Okta organization with your administrator account, and look for the Okta domain in the global header located in the upper-right corner of the dashboard.
Open the BlastShield™ Orchestrator and from the settings menu on the left, go to the “Identity Provider” settings page..
Click on the Enable External Identity Provider checkbox.

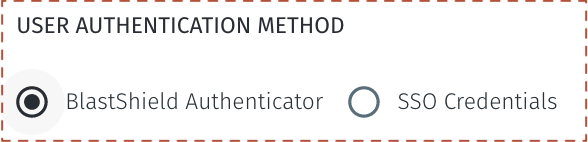
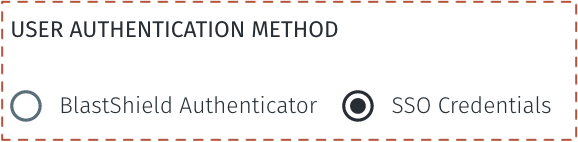
In User Authentication Method, choose from one of the following two options:
To use the BlastShield Mobile Authenticator as the authentication method, select the option for BlastShield Authenticator.
To use the IdP's own SSO as the authentication method, select the option for SSO Credentials.
In the OpenID configuration section, enter your Okta tenant domain (i.e mycorporation.okta.com) as the “Domain”. Make sure to leave out any trailing slashes.
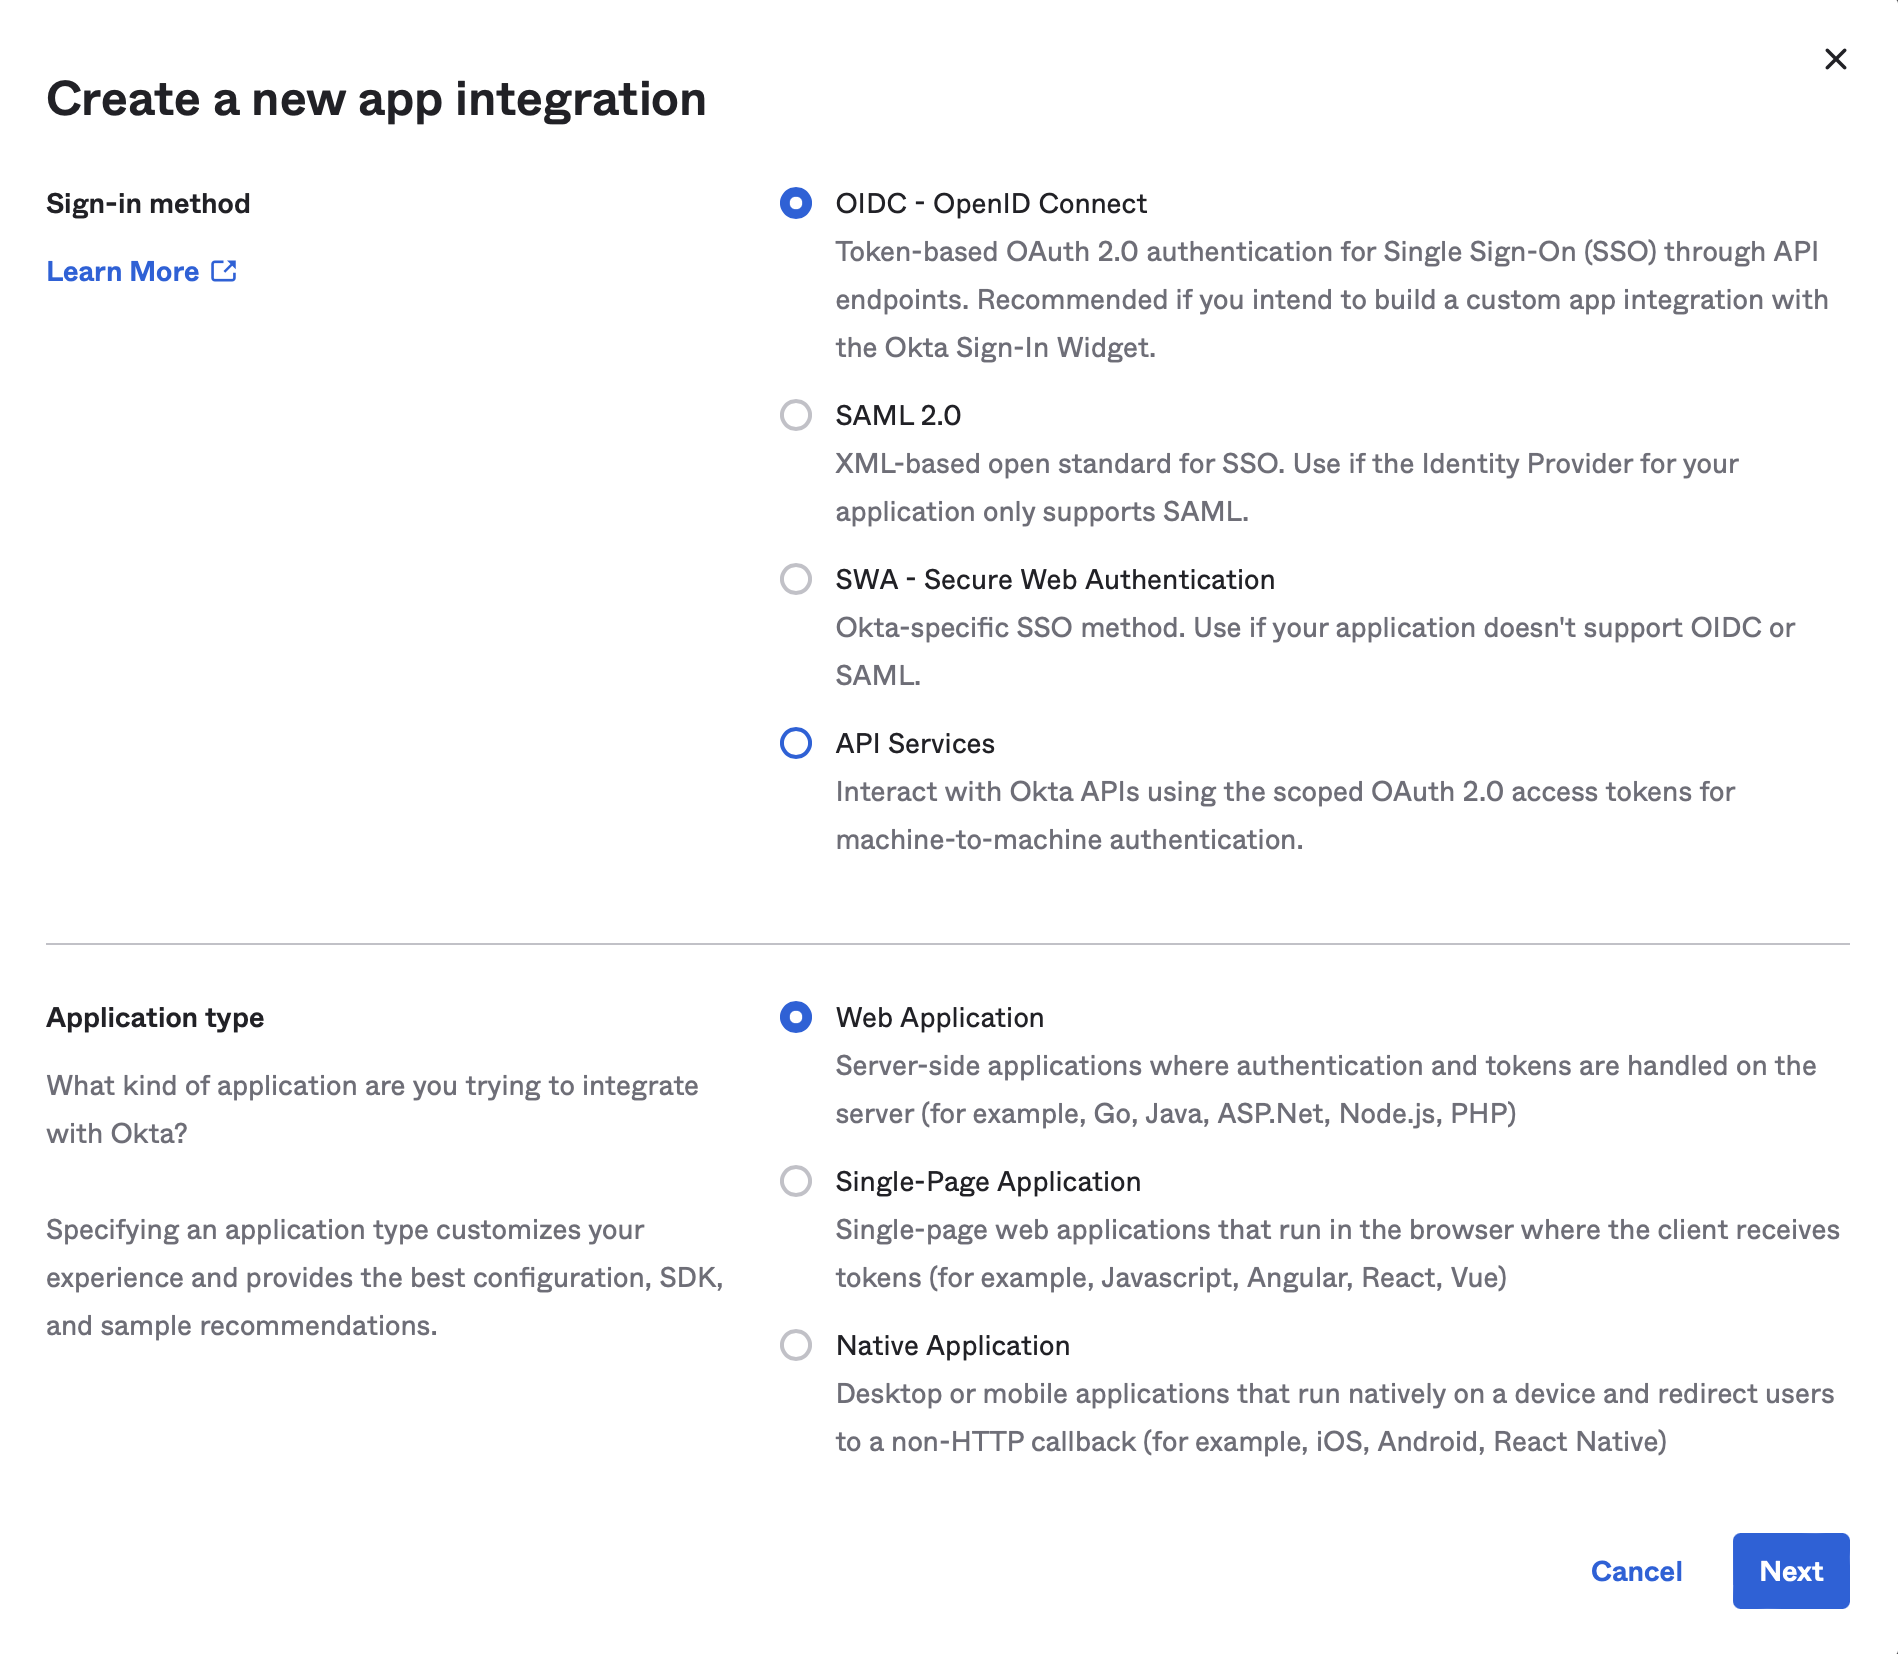
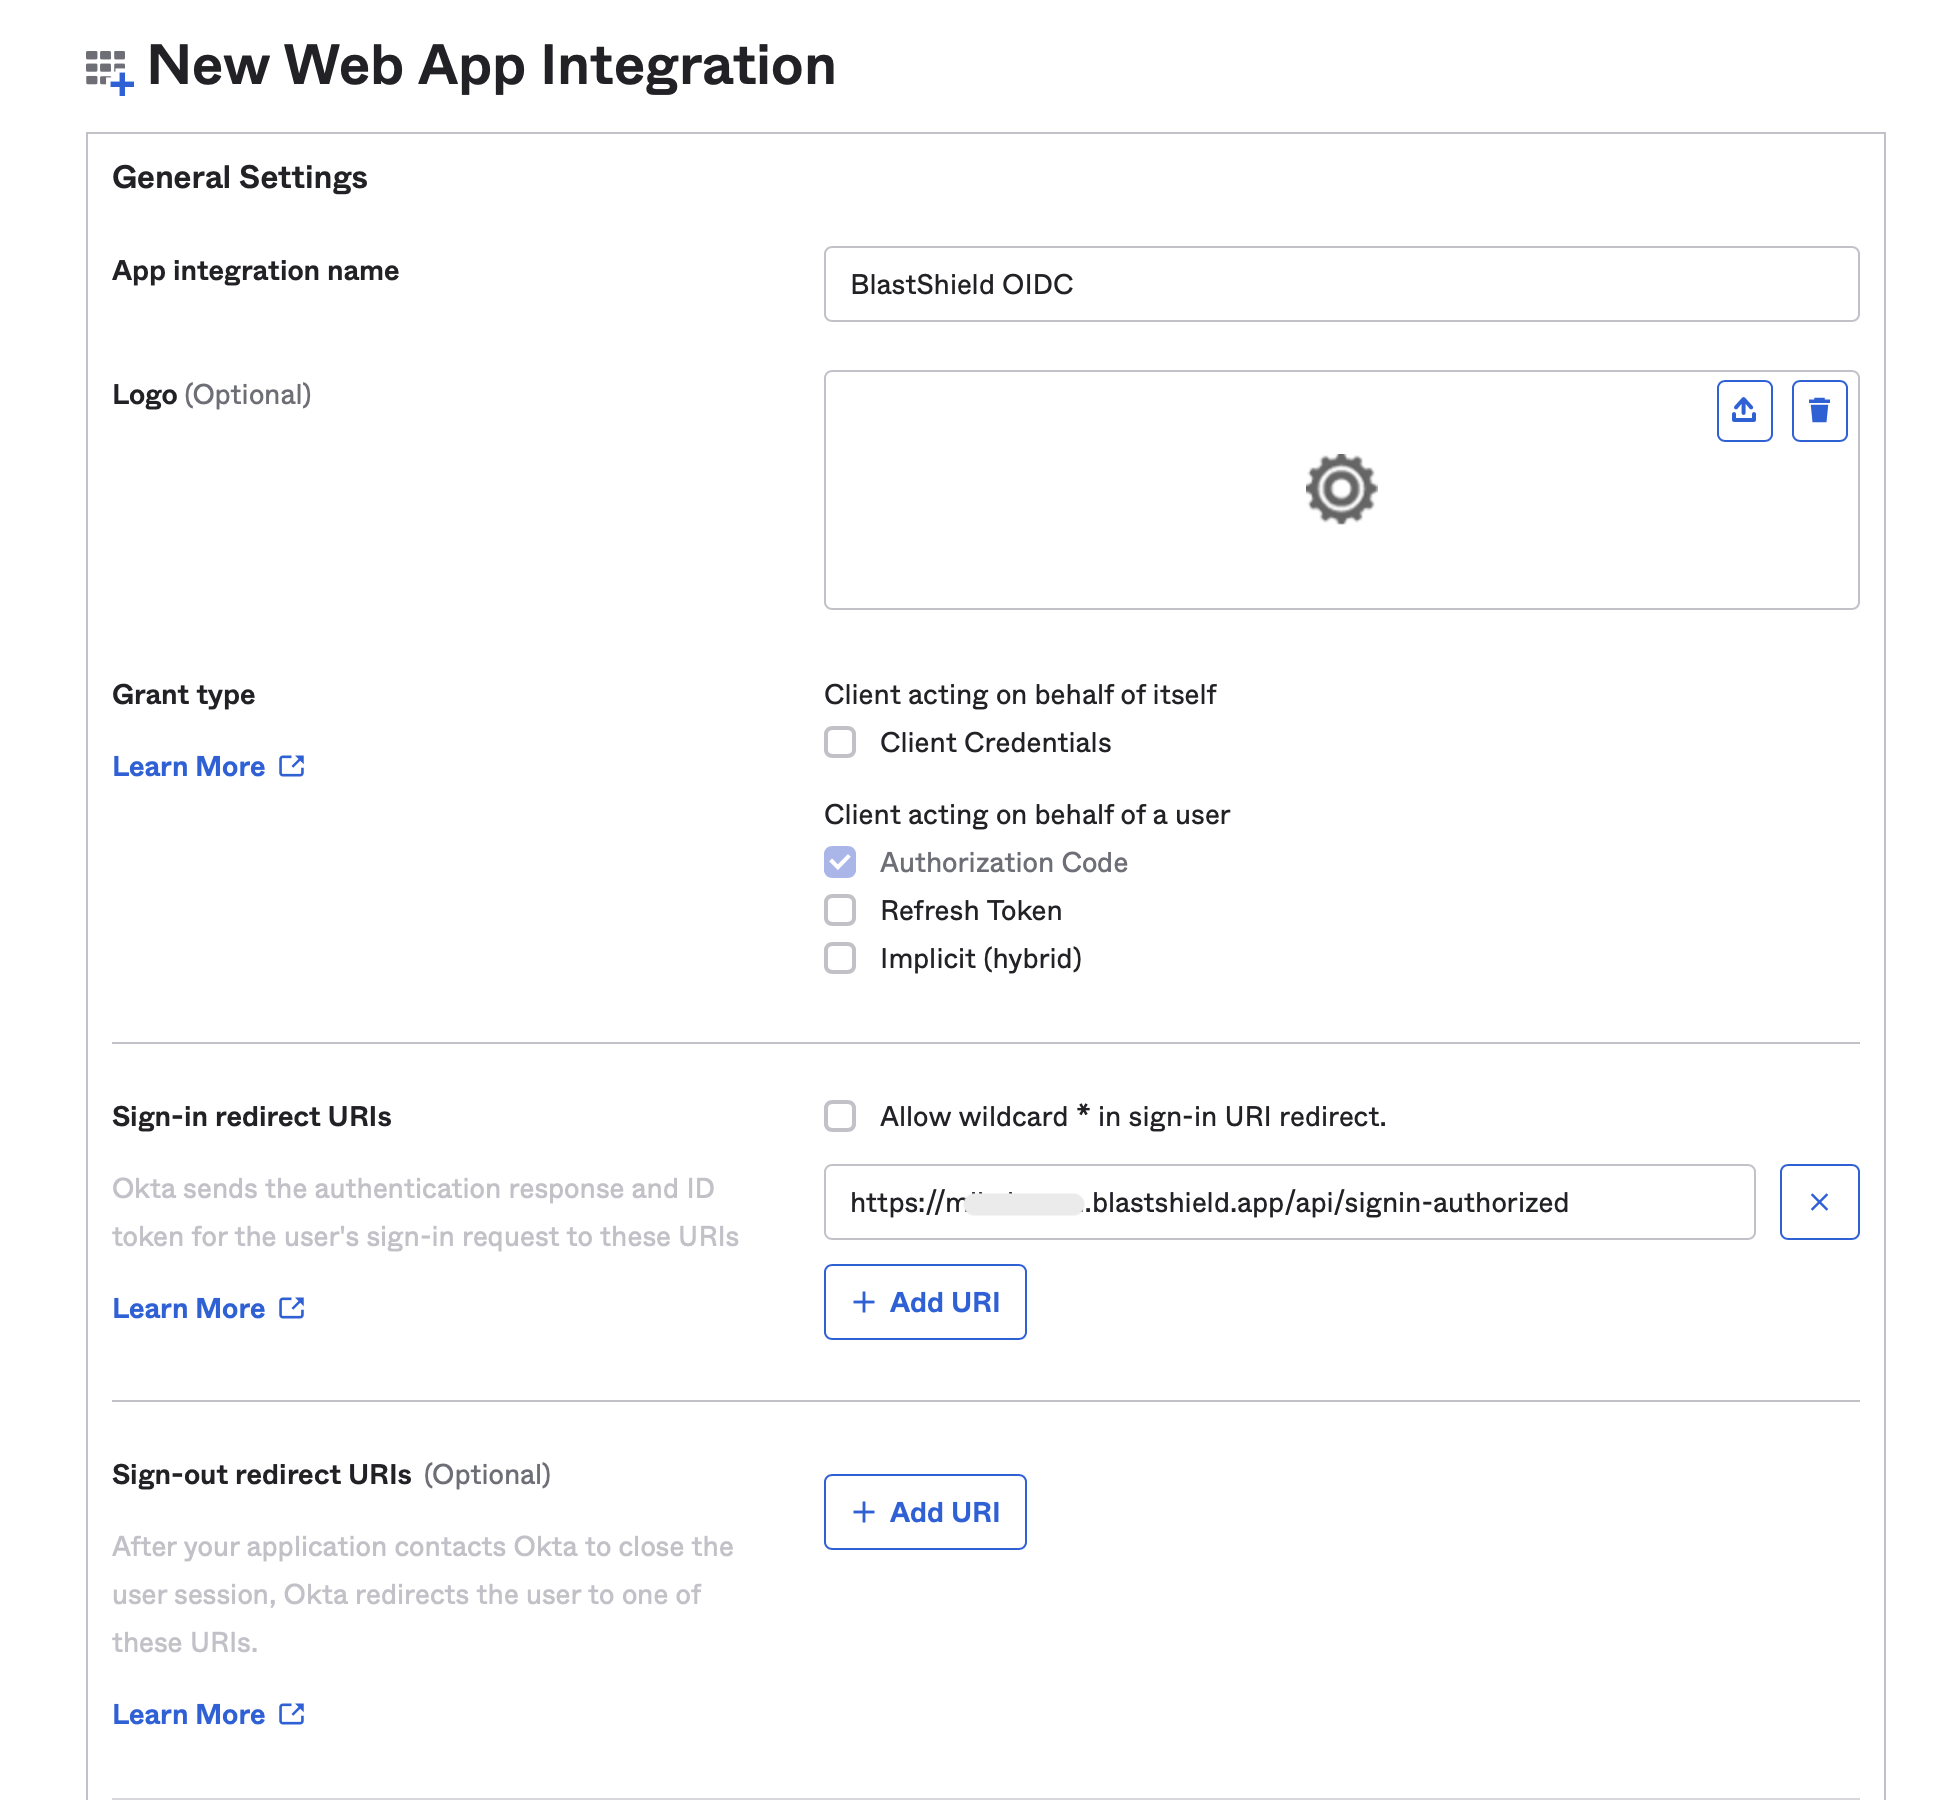
In Okta, click “Create App Integration” and select “OIDC - OpenID Connect” followed by “Web Application” and click “Next”.
Name the App integration “BlastShield OIDC”.
Find the "Redirect URI" from the OpenID configuration in the BlastShield™ Orchestrator. This is in the format https://<your-domain>.blastshield.app/api/signin-authorized and is located as shown here:
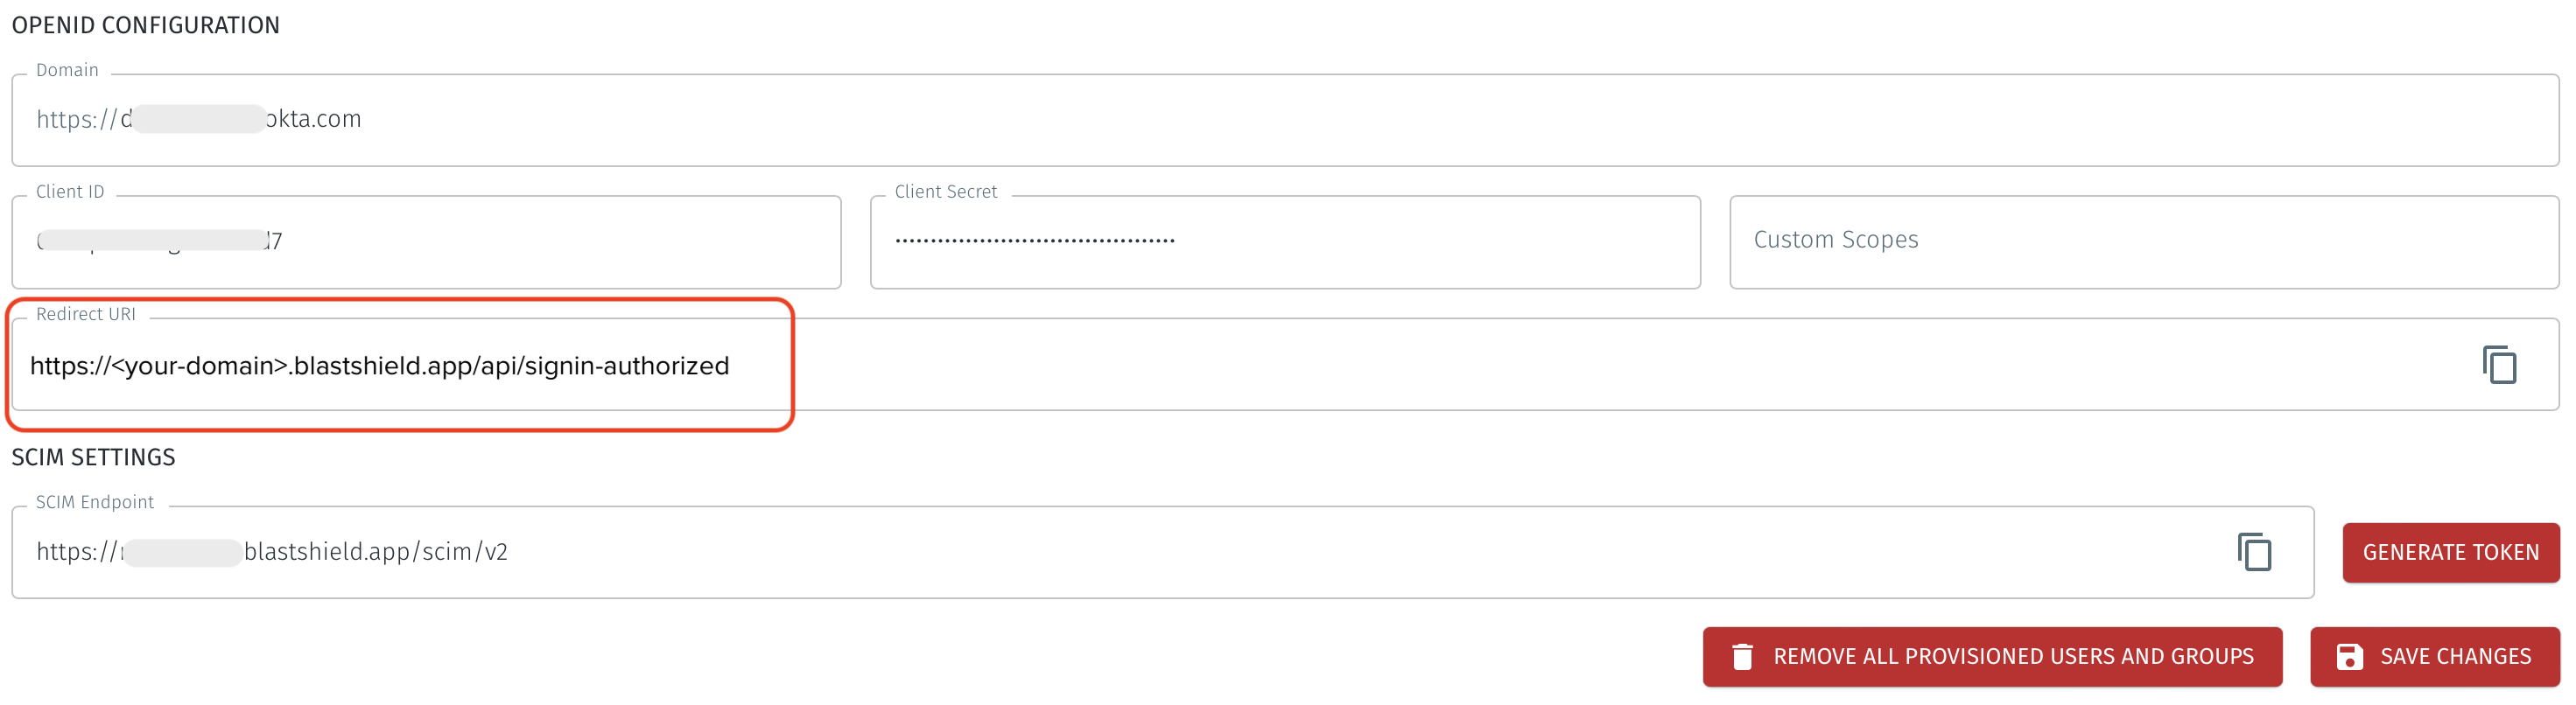
Copy the “Redirect URI” from the BlastShield™ Orchestrator and paste it in as the “Sign-in redirect URI” in Okta. Remove any default “Sign-out redirect URIs”.
Under “Assignments” select your preferred option and click “Save”.
Copy the “Client ID” and the generated “Client Secret” from Okta and paste it into the corresponding text fields in BlastShield.
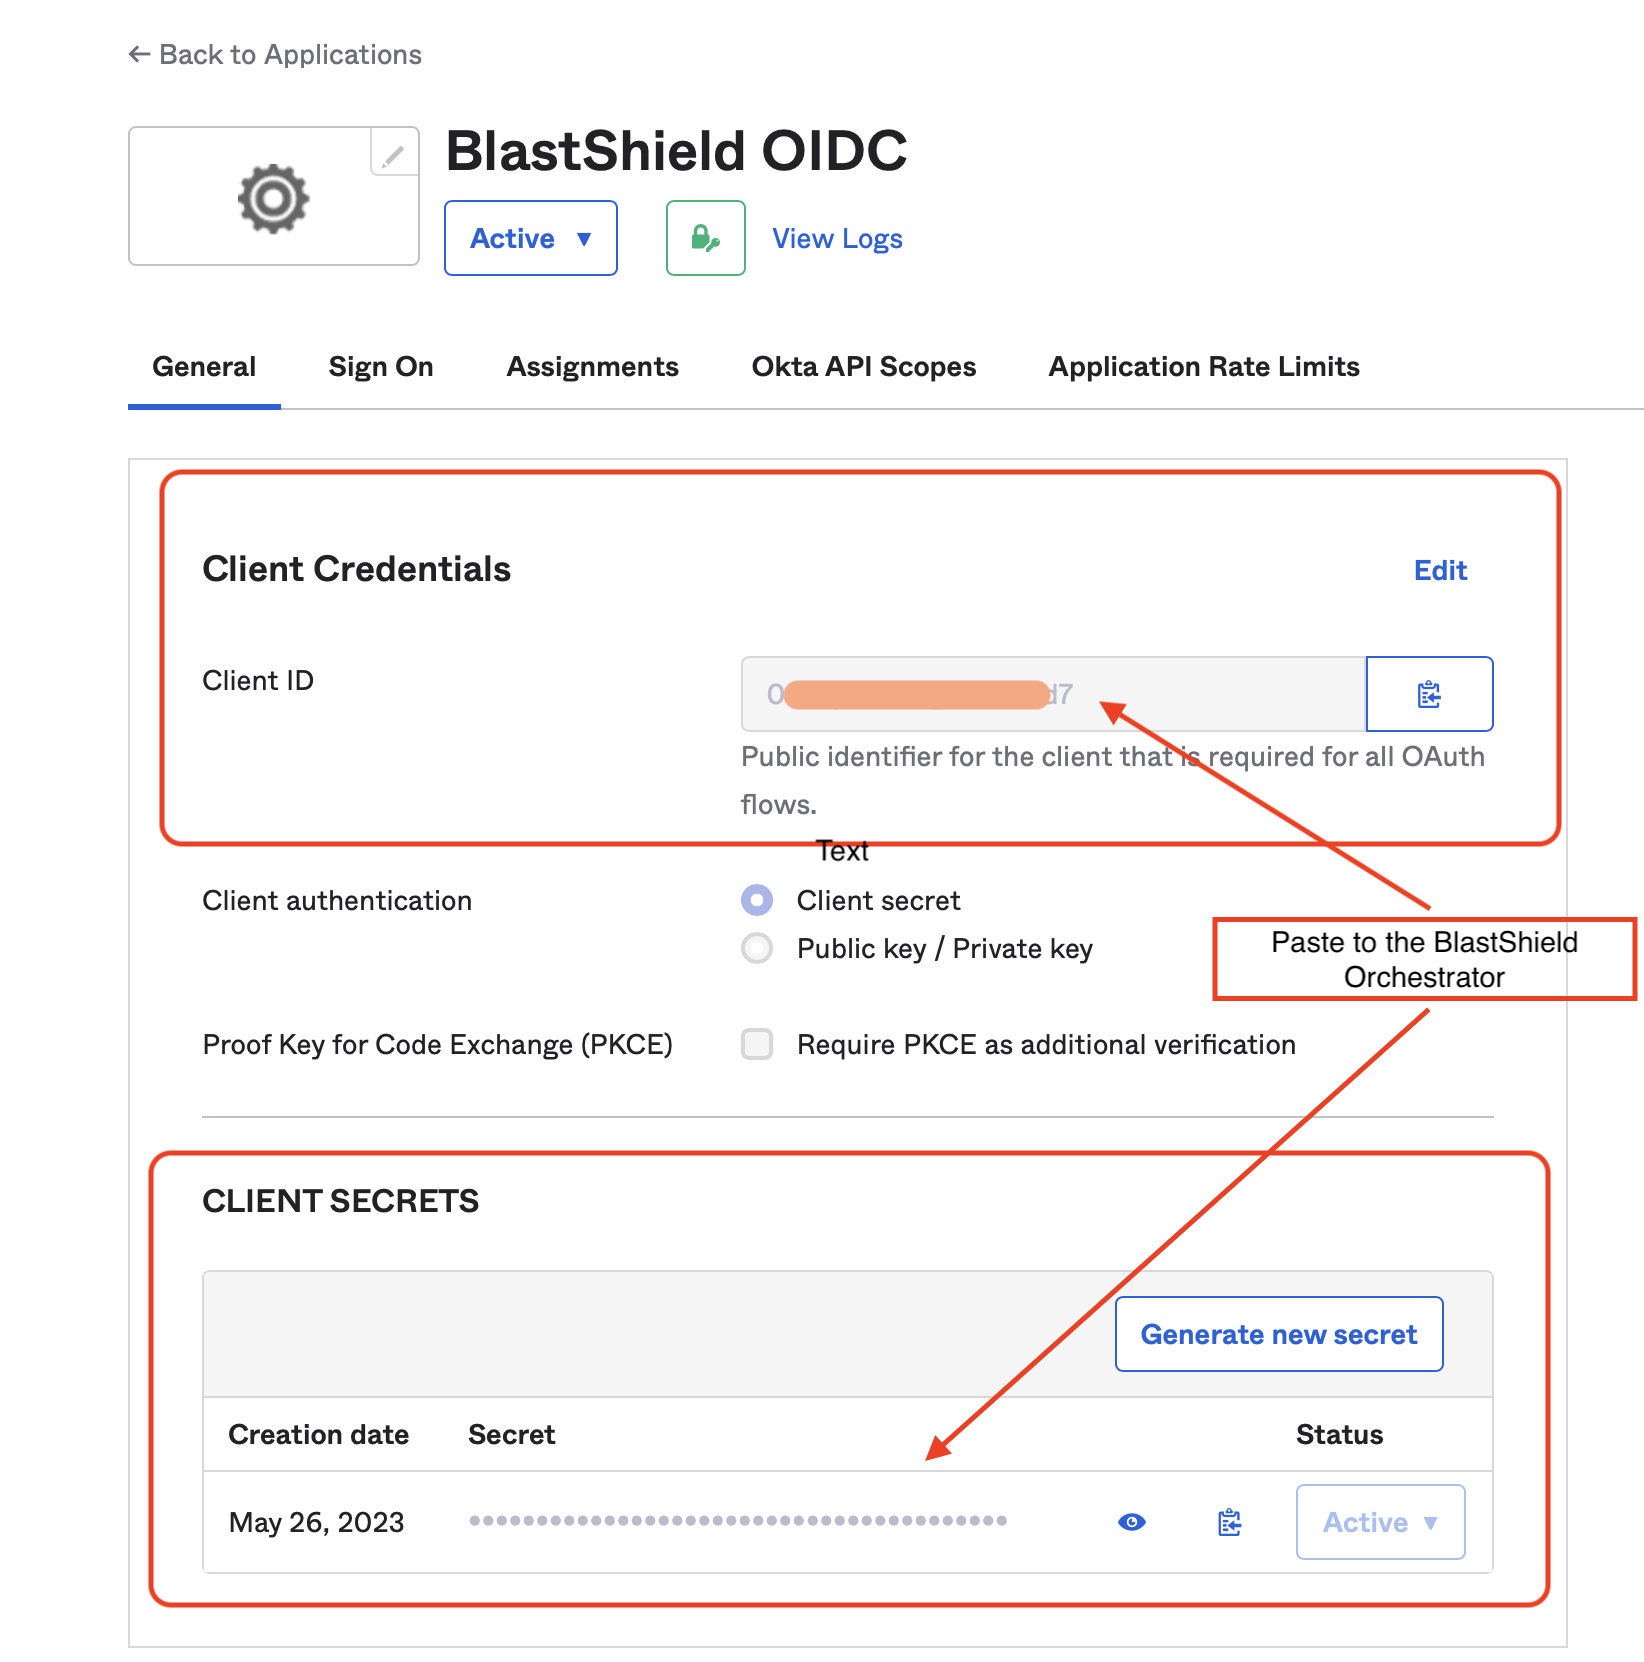

Click “Back to Applications”.
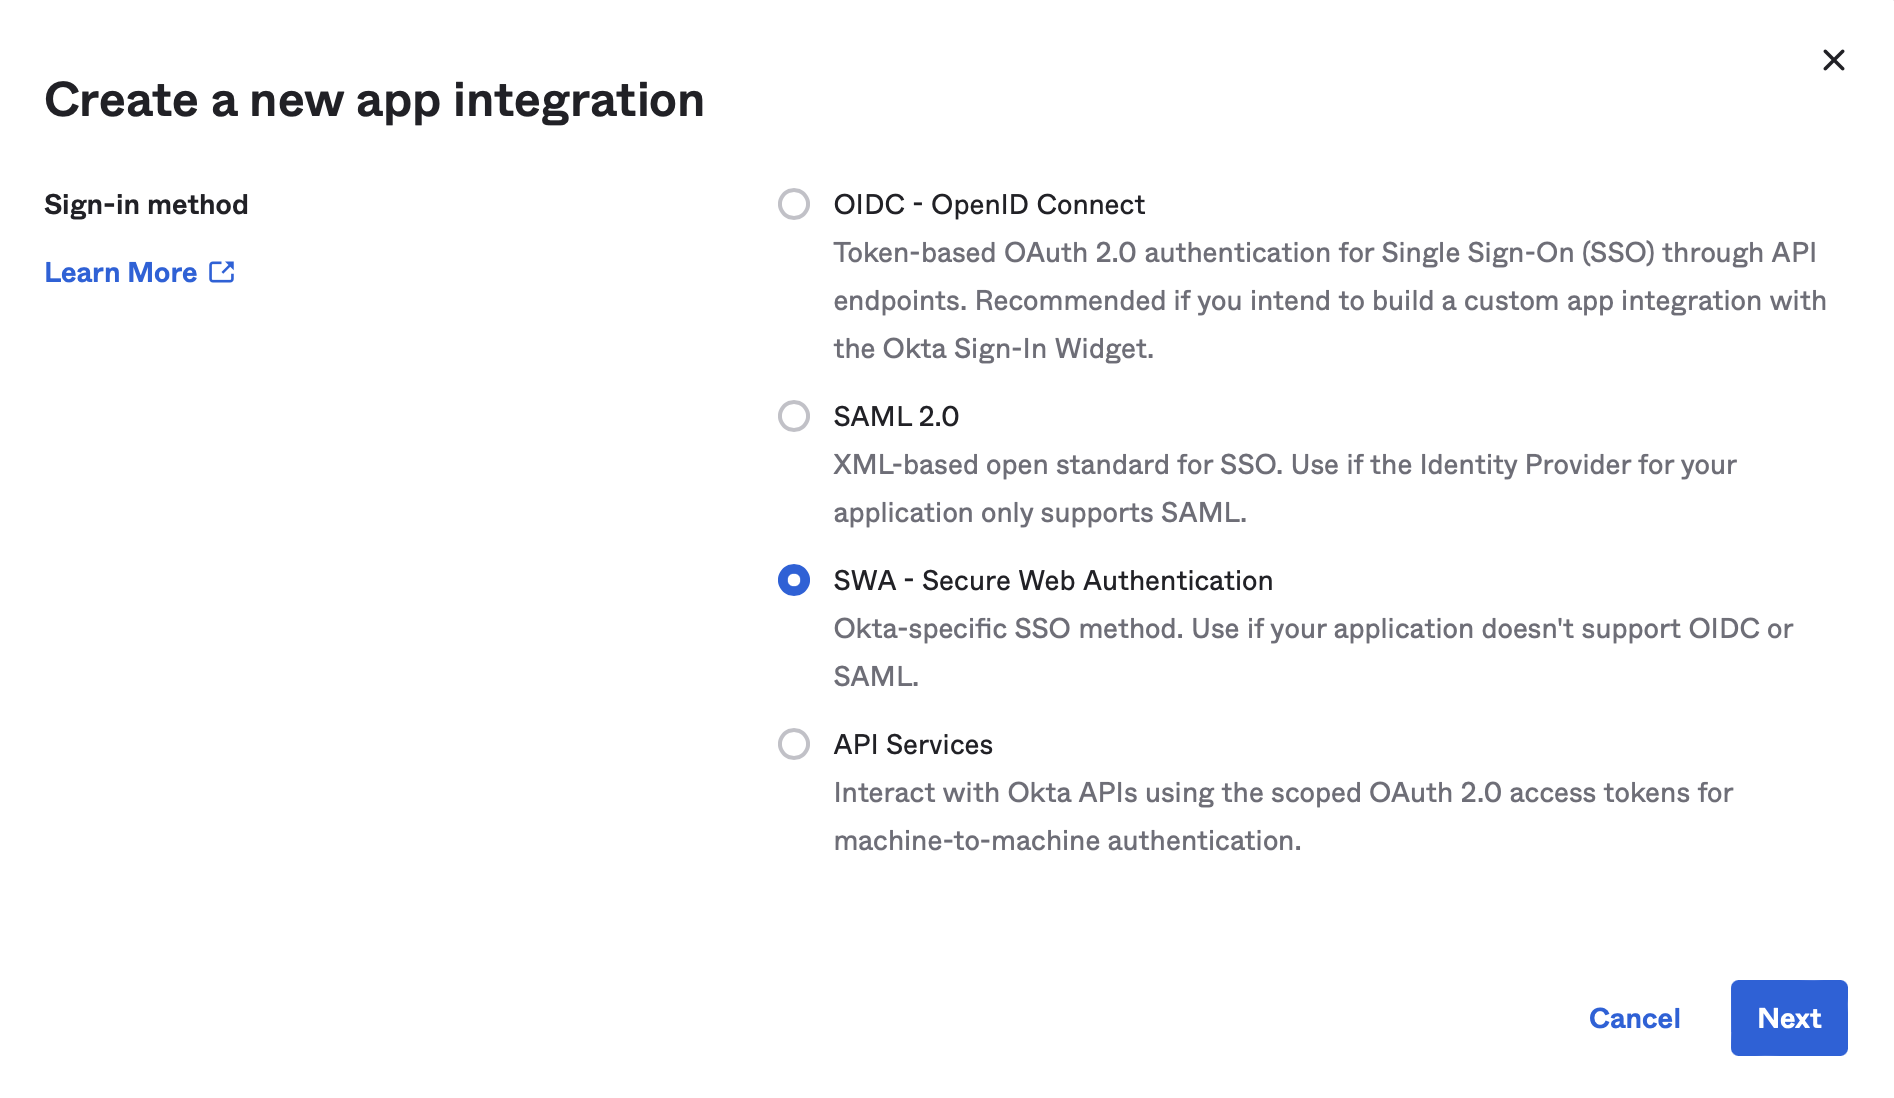
In Okta, click “Create App Integration” and select “SWA - Secure Web Authentication” and click “Next”.
Enter
BlastShield SCIMas the “App name” and copy the “REGISTRATION PORTAL > Registration URL” from the BlastShield Orchestrator and enter it as the “App’s login page URL” in Okta and click “Finish”.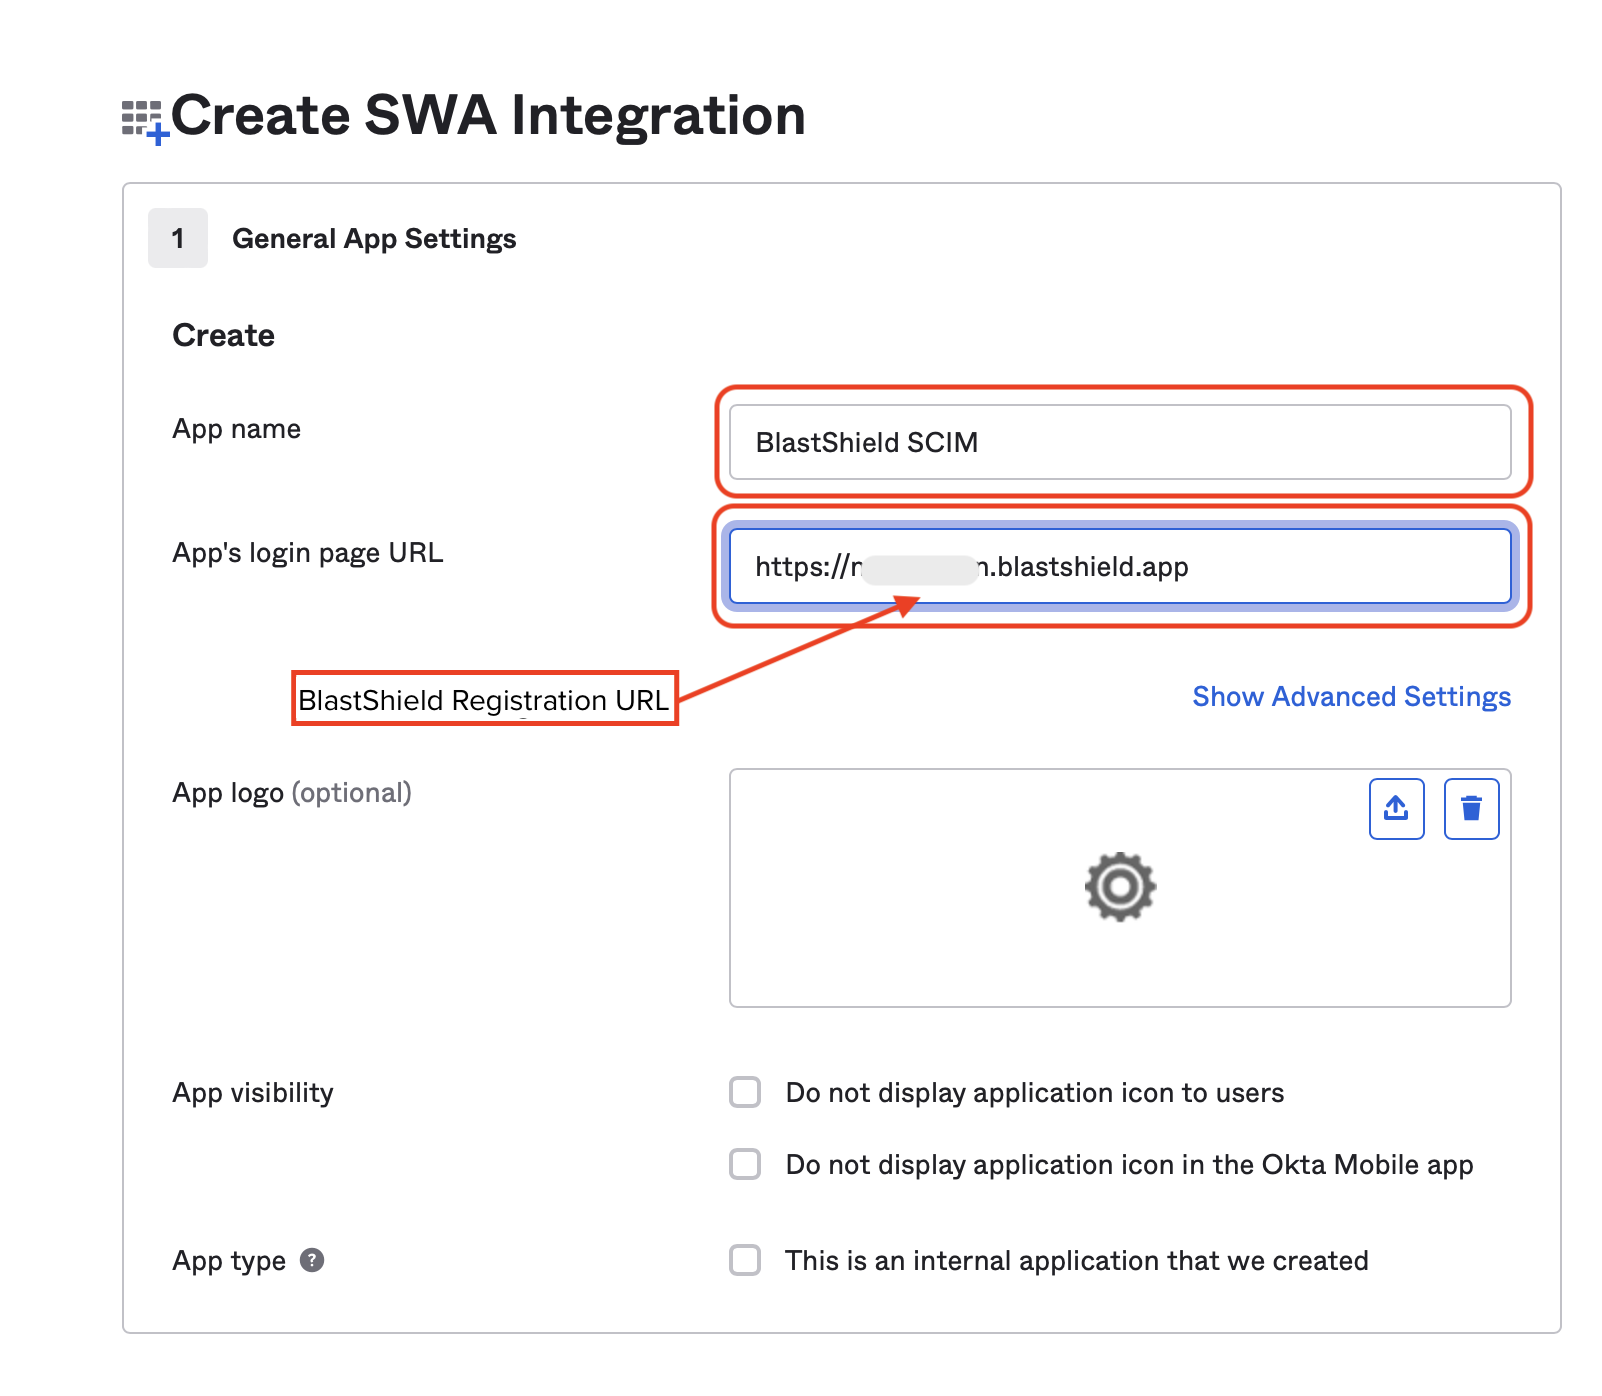
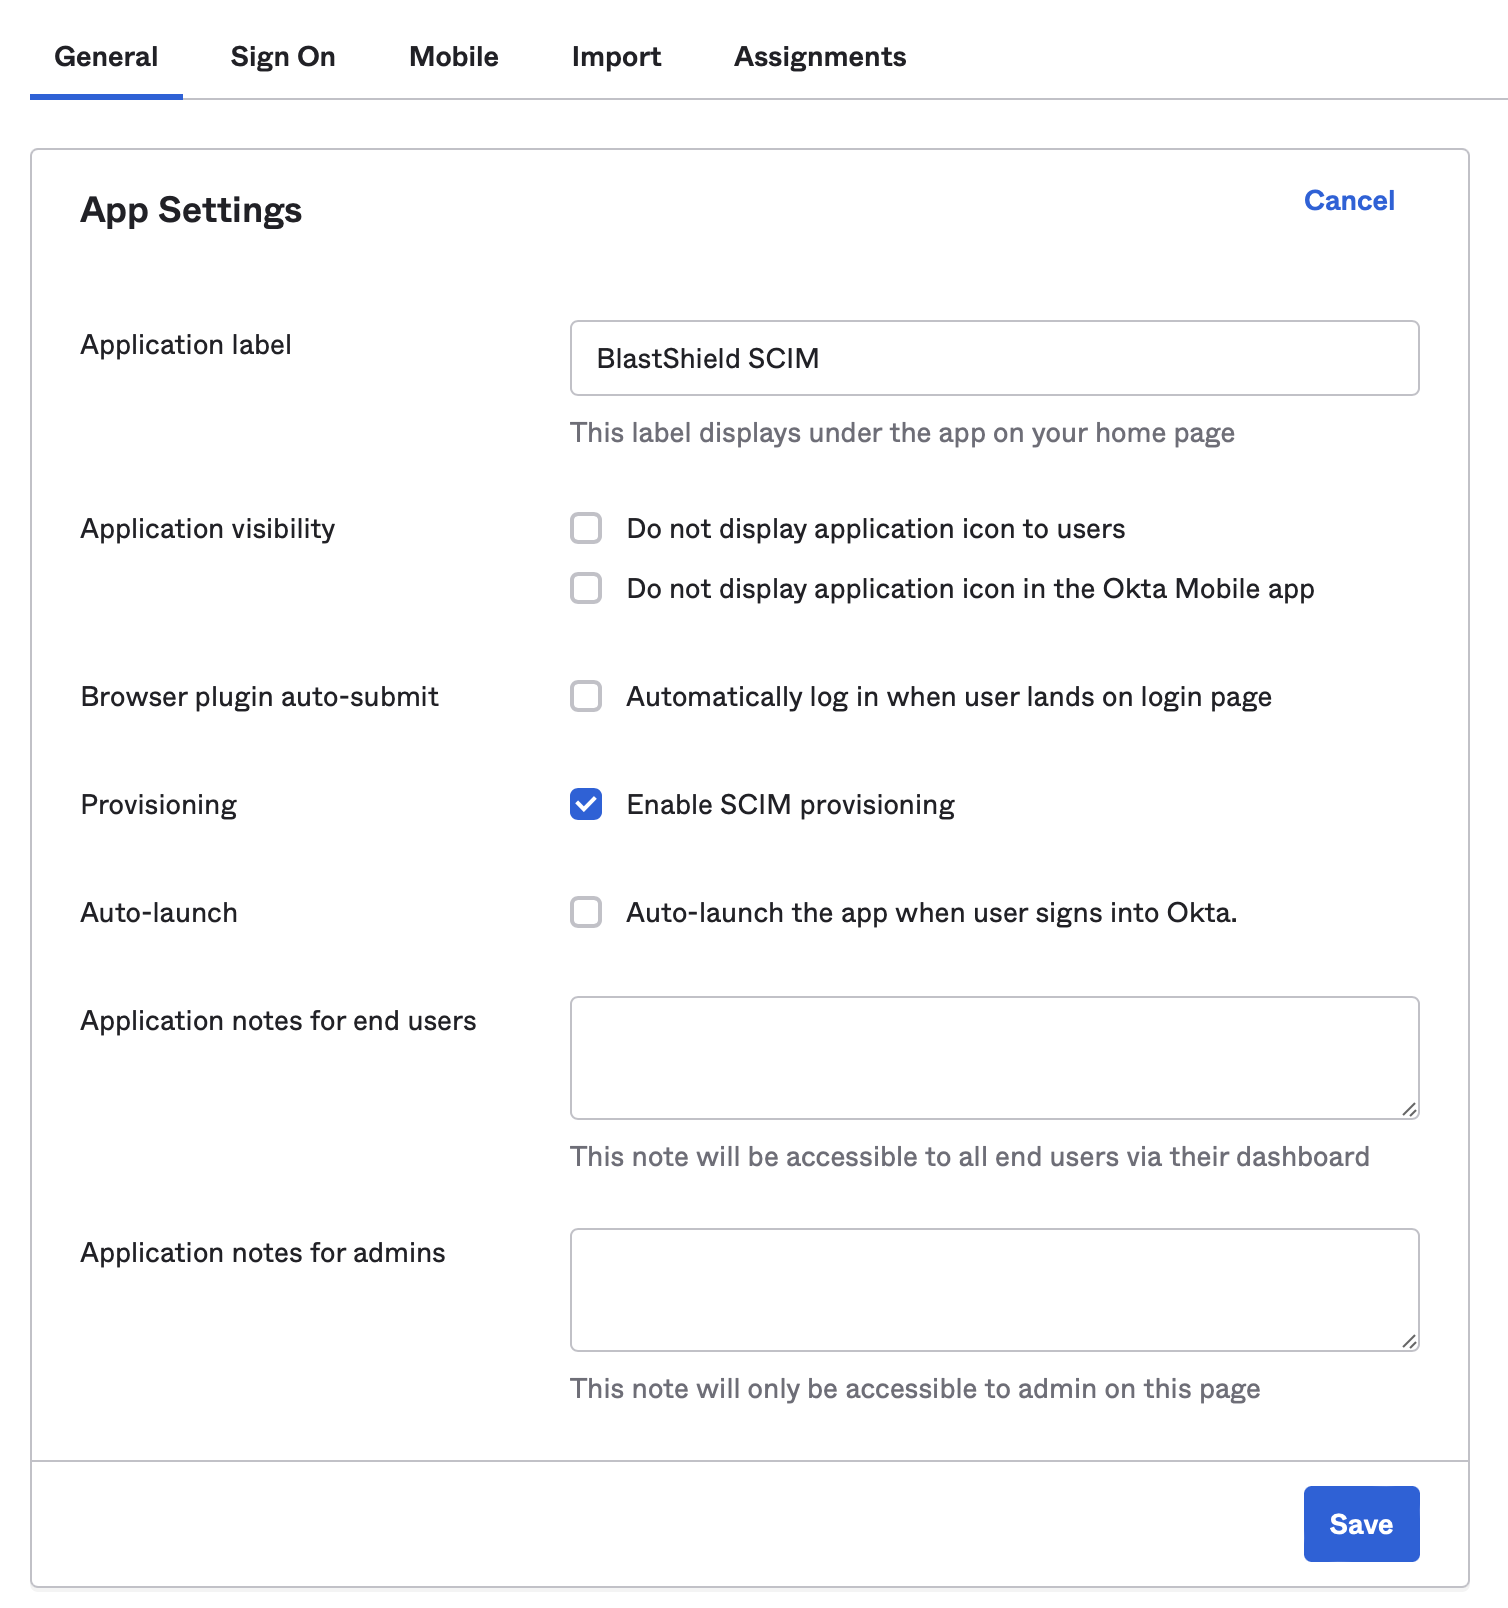
Click on the “General” tab and select “Edit” in the “App settings” box. Select “Enable SCIM provisioning” and click “Save”.
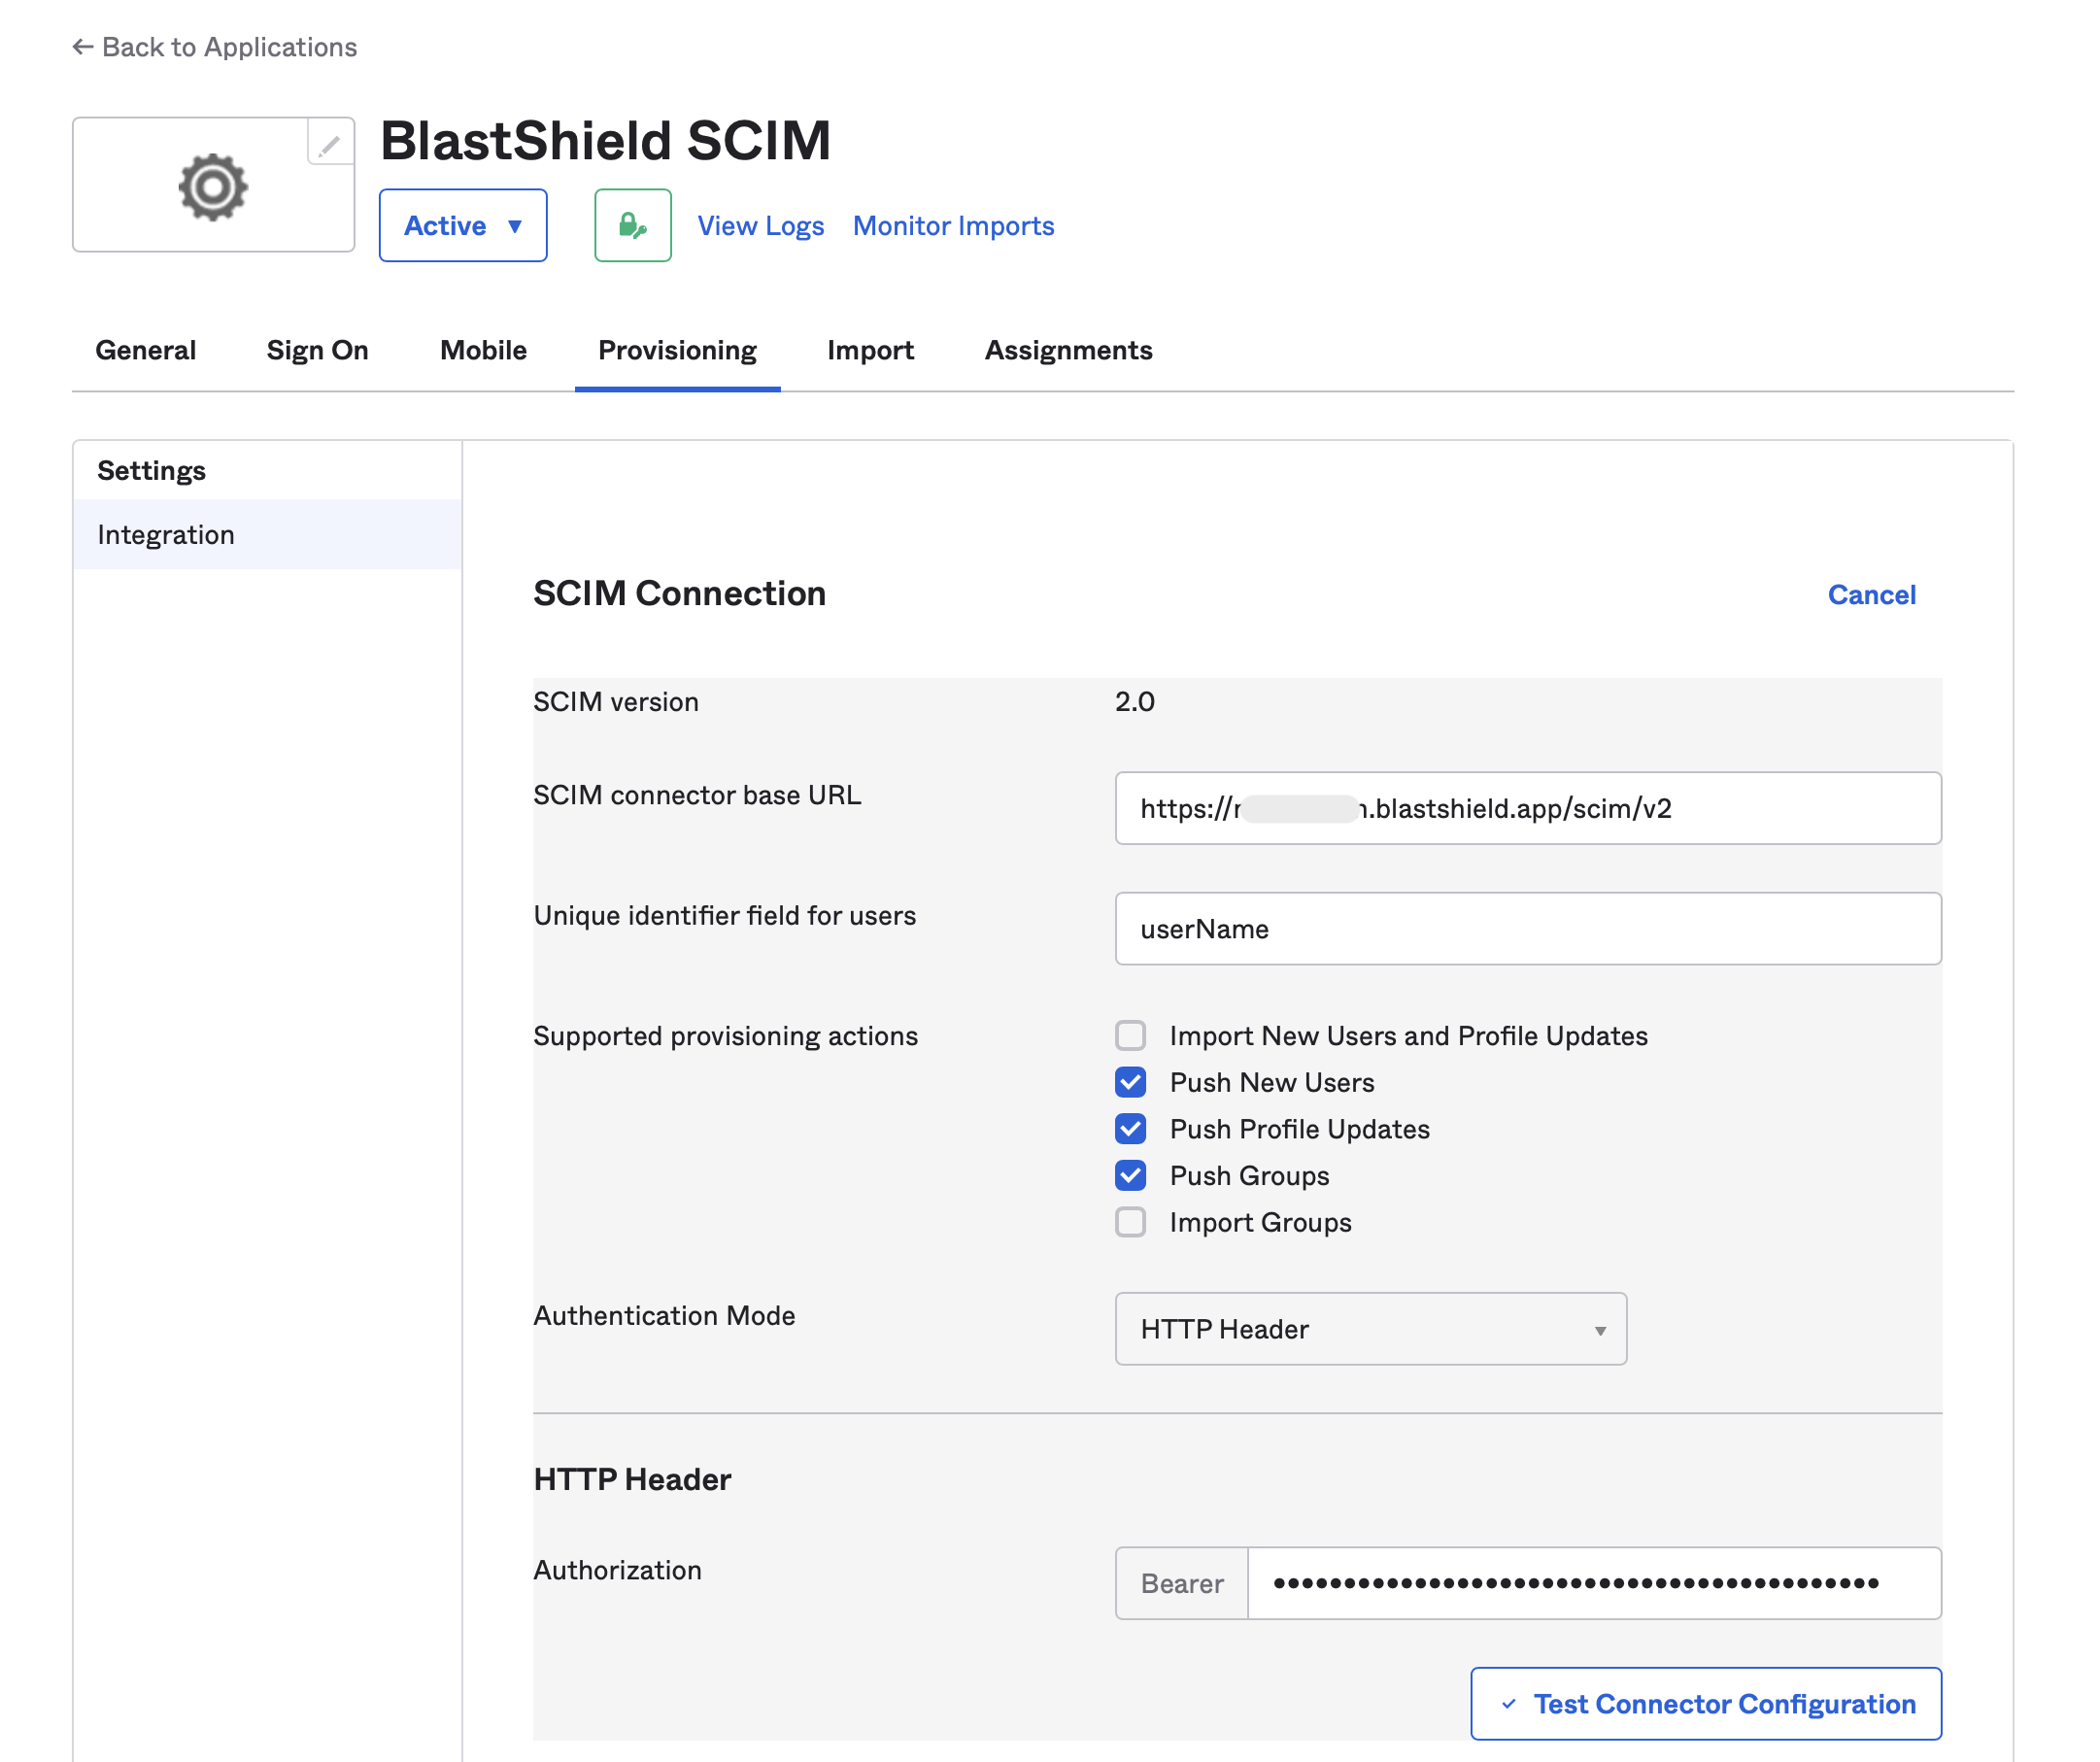
Click on the “Provisioning” tab and select “Edit” next to “SCIM Connection”.
Copy the “SCIM Endpoint” from BlastShield and enter it as the “SCIM connector base URL” in Okta.
Enter
userNameas the “Unique identifier field for users”.Under “Supported provisioning actions”, check “Push New Users”, “Push Profile Updates” and “Push Groups”.
Select “HTTP Header” as the “Authentication Mode”.
In BlastShield, click the “Generate Token” button and copy the token to the clipboard. Click “Save Changes” before going back to Okta.
Paste the copied token into “Authorization” field and click on “Test Connector Configuration”.
Make sure that the test results show “Connector configured successfully”, then click “Save”.
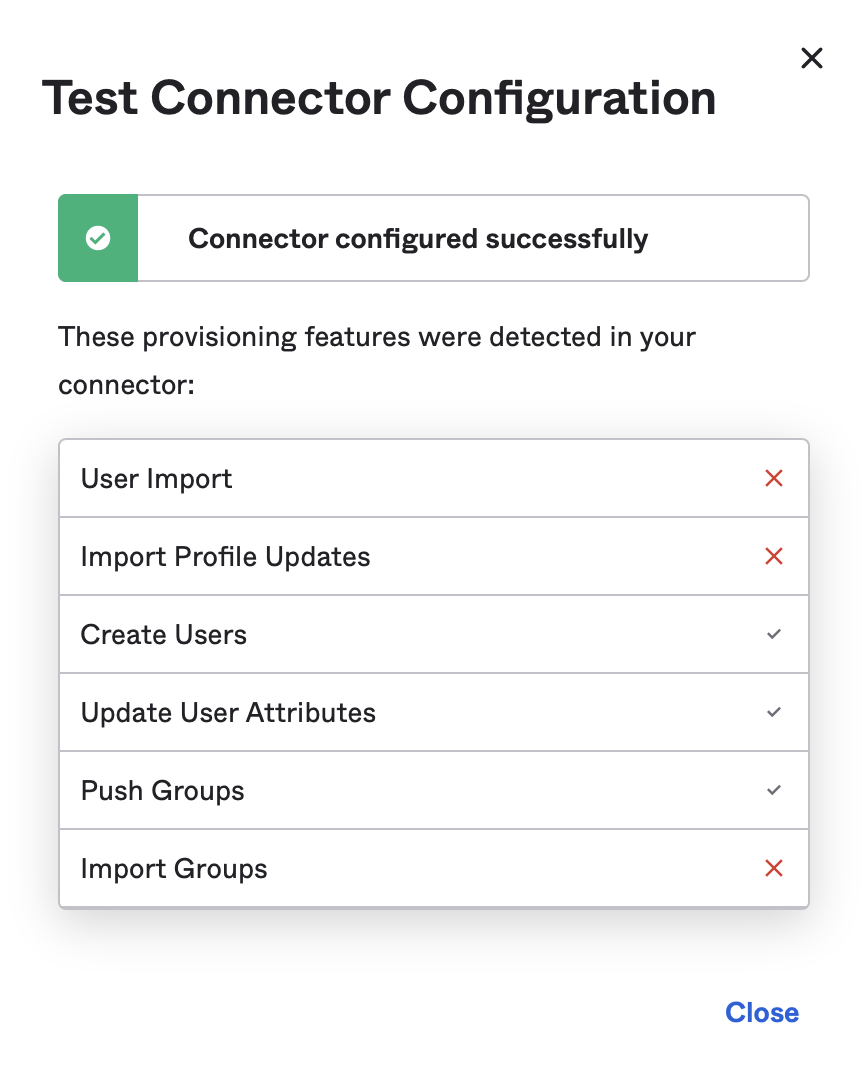
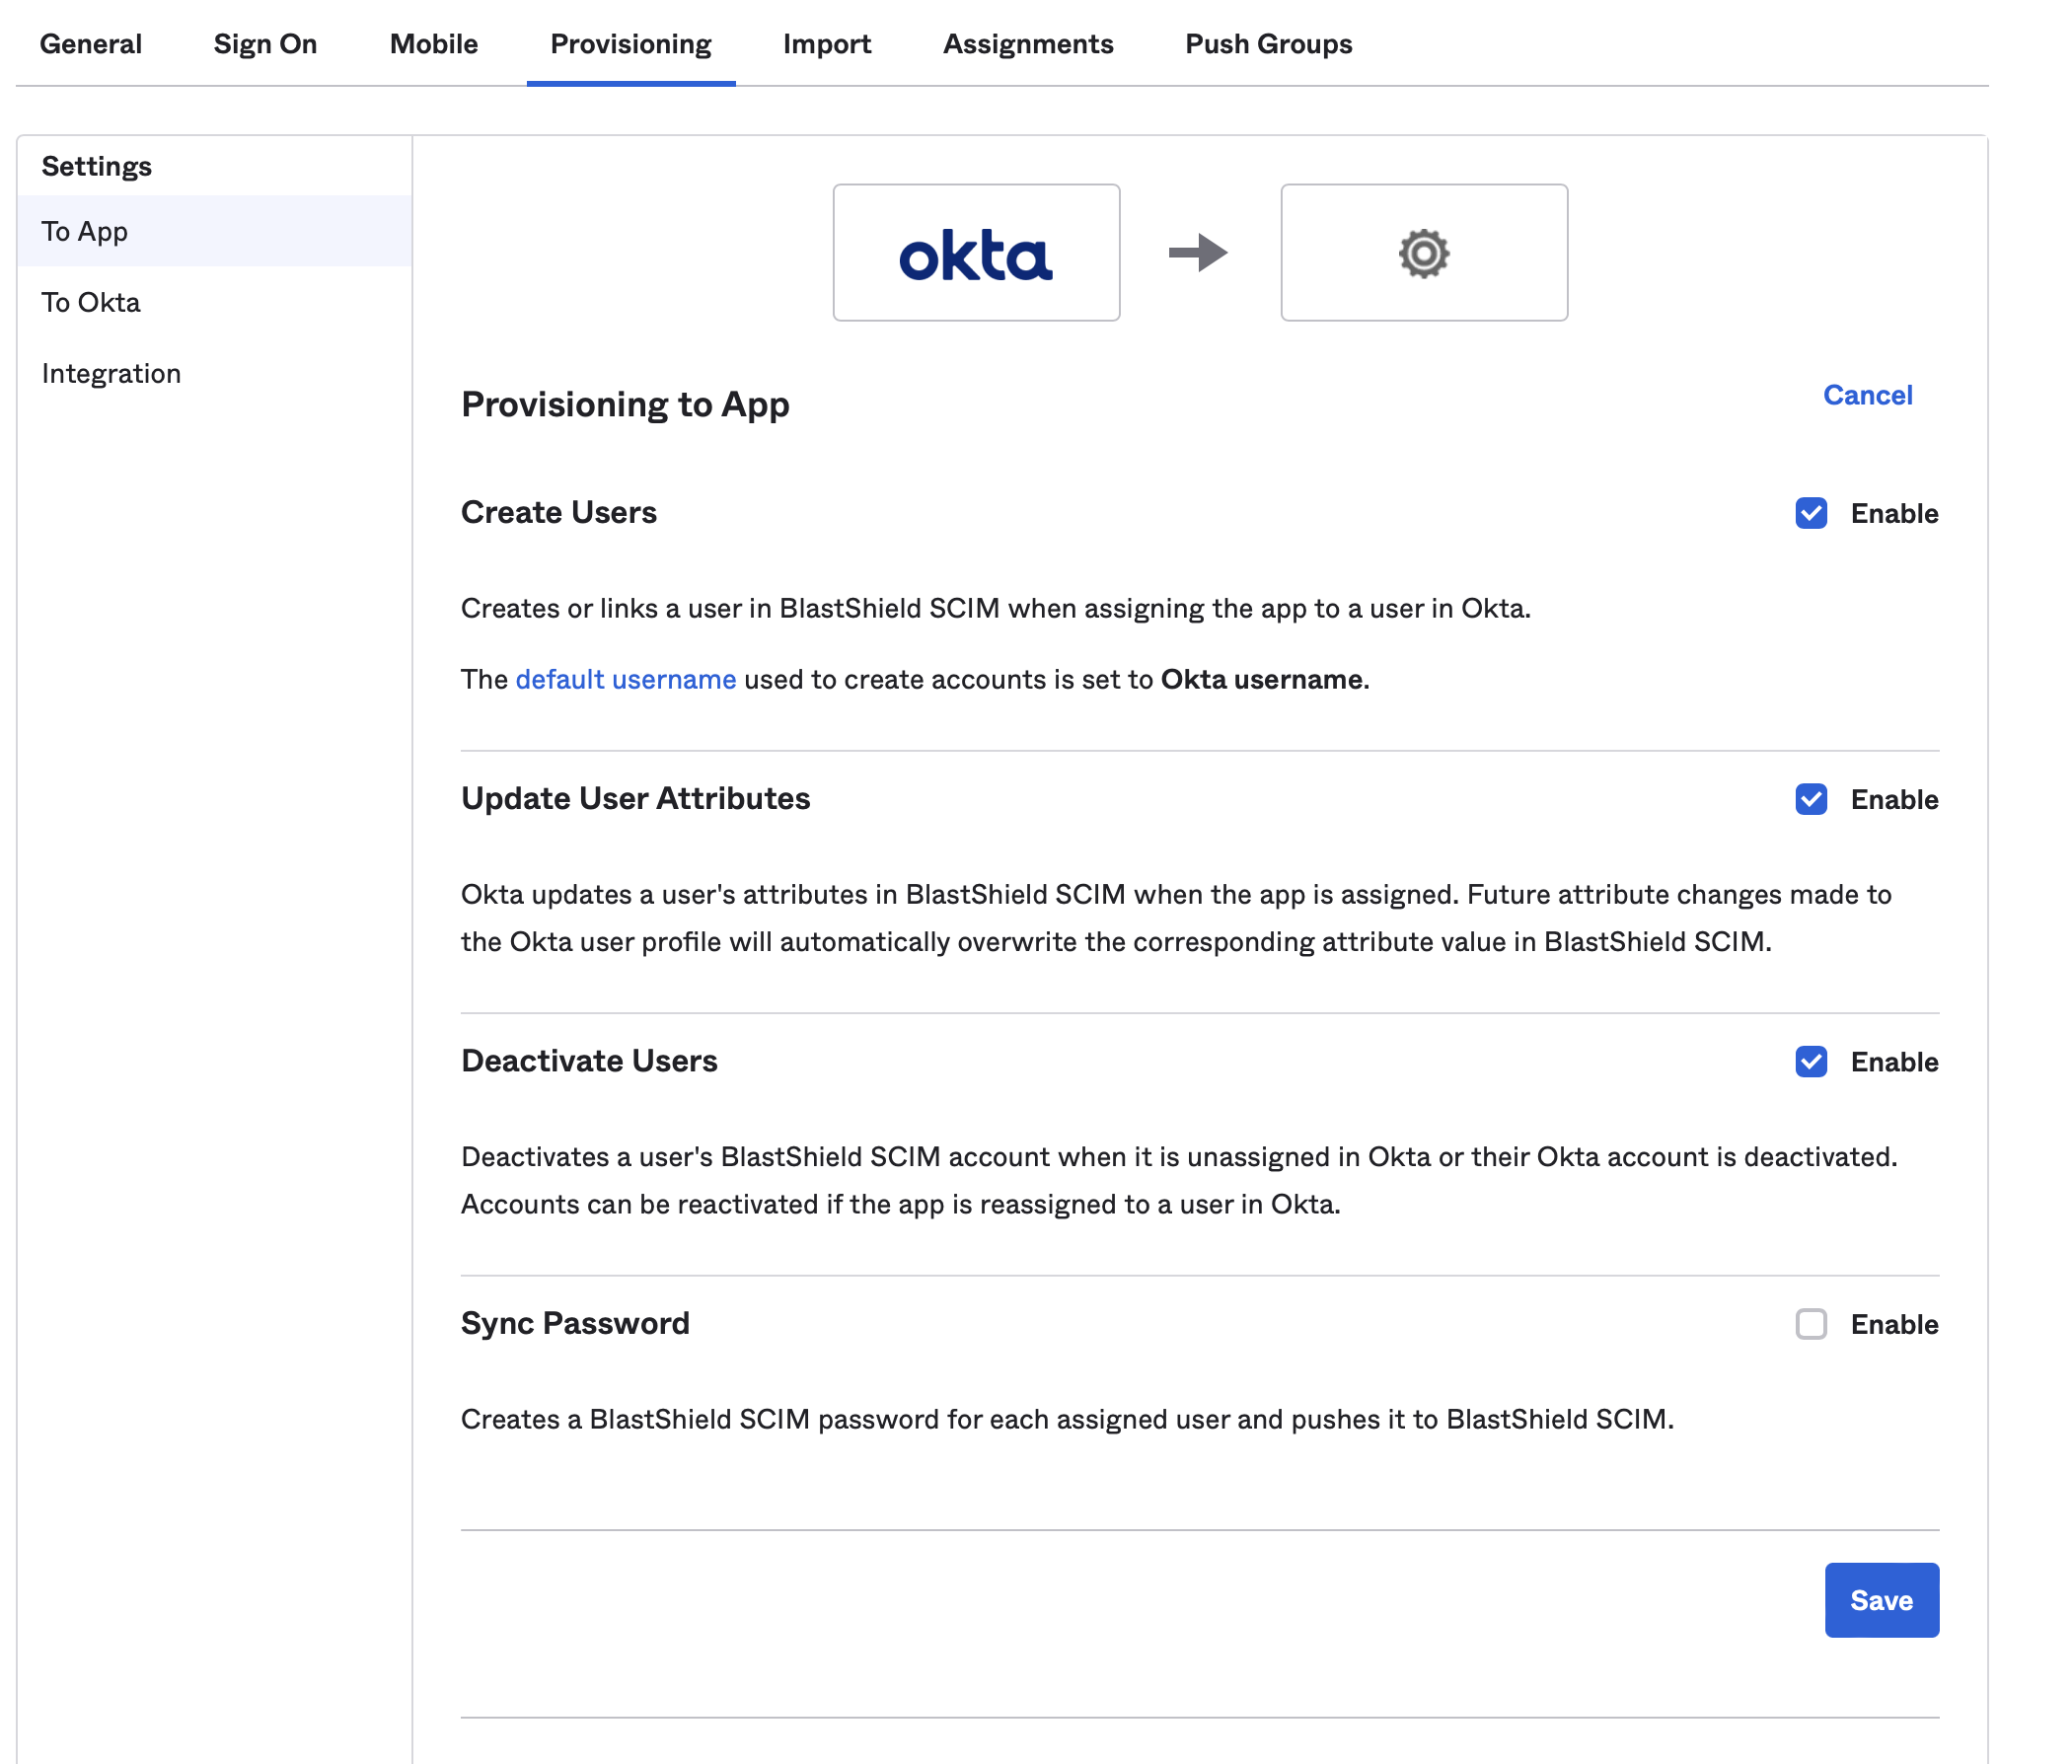
Click “Edit” next to “Provisioning to App” and enable “Create Users”, “Update User Attributes” and “Deactivate Users”, then click “Save”.
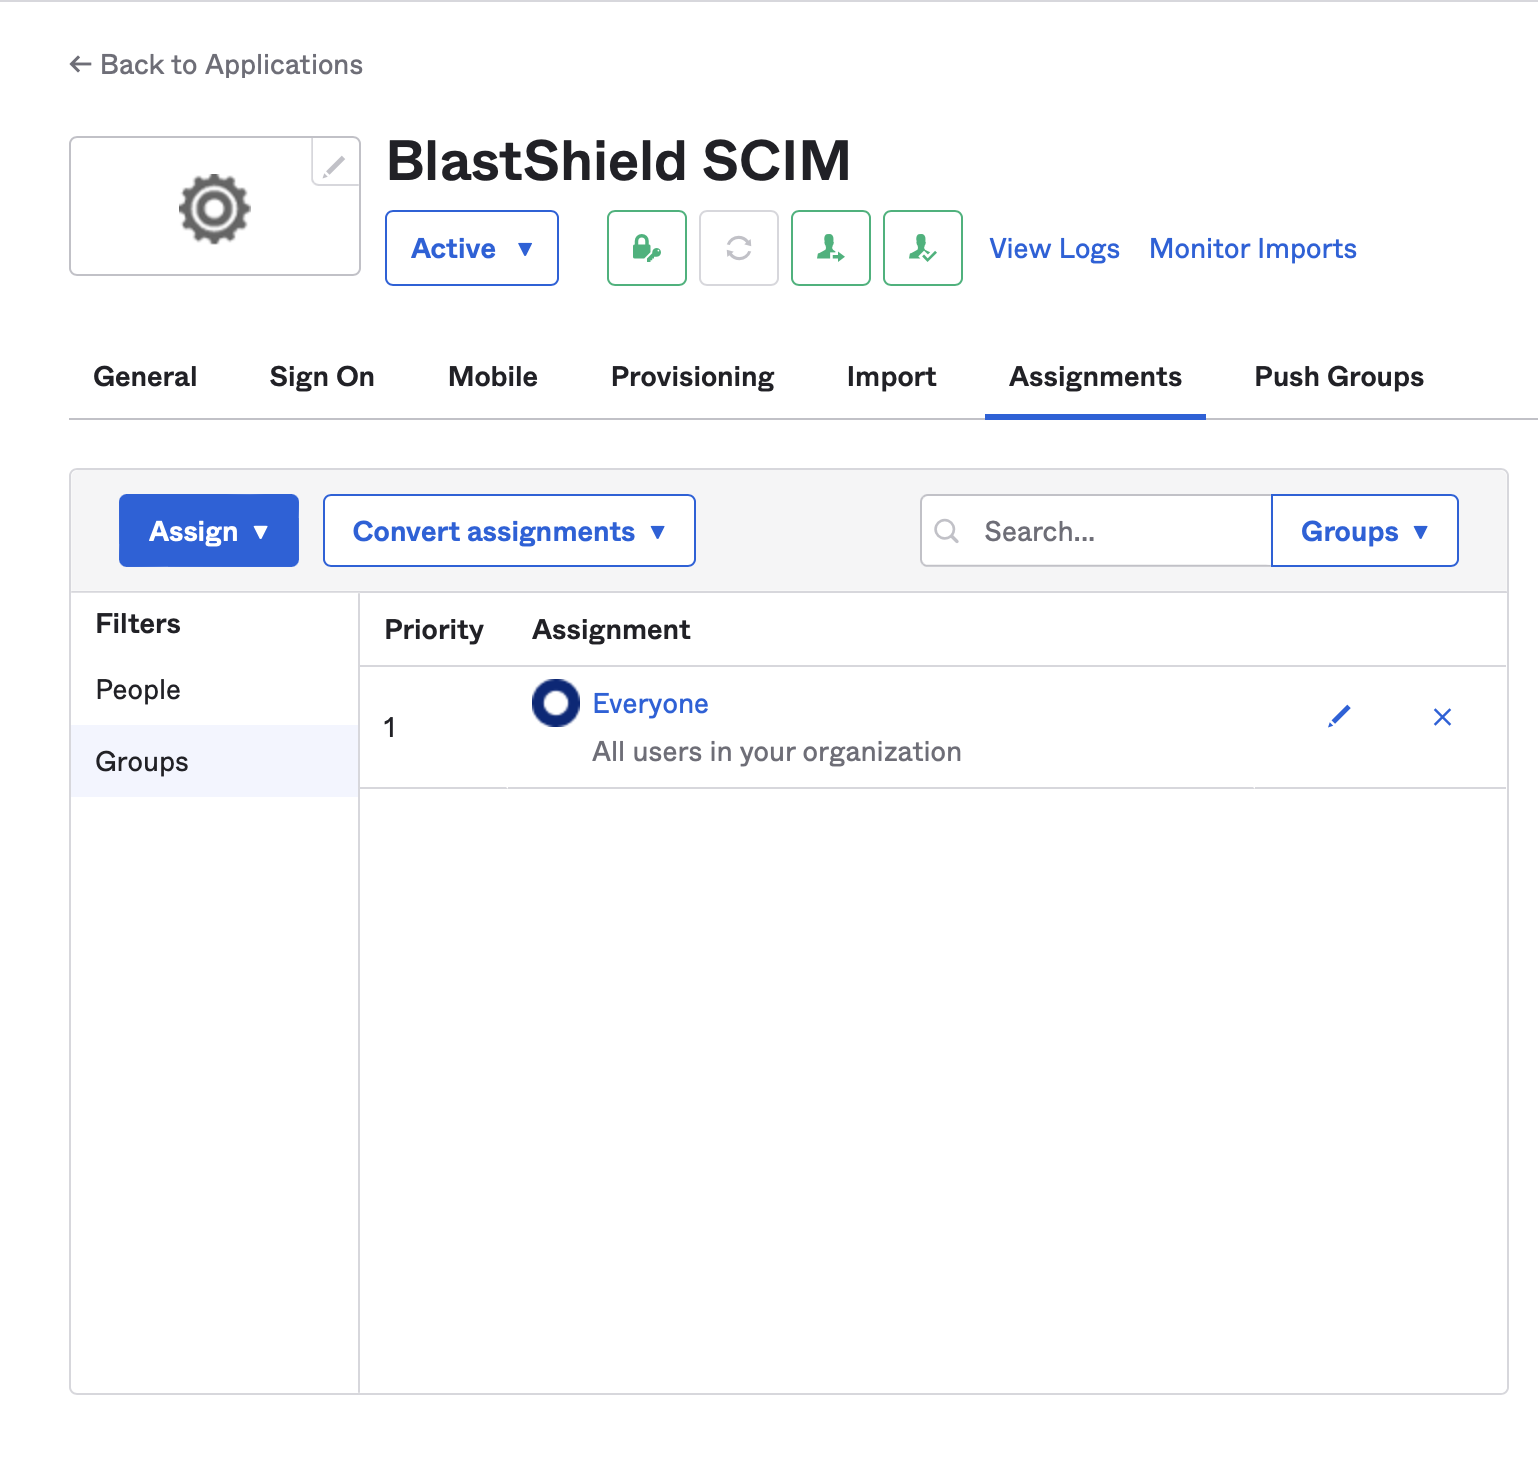
Click on the “Assignments” tab and assign the users and/or groups that you want to give access to your BlastShield Network.
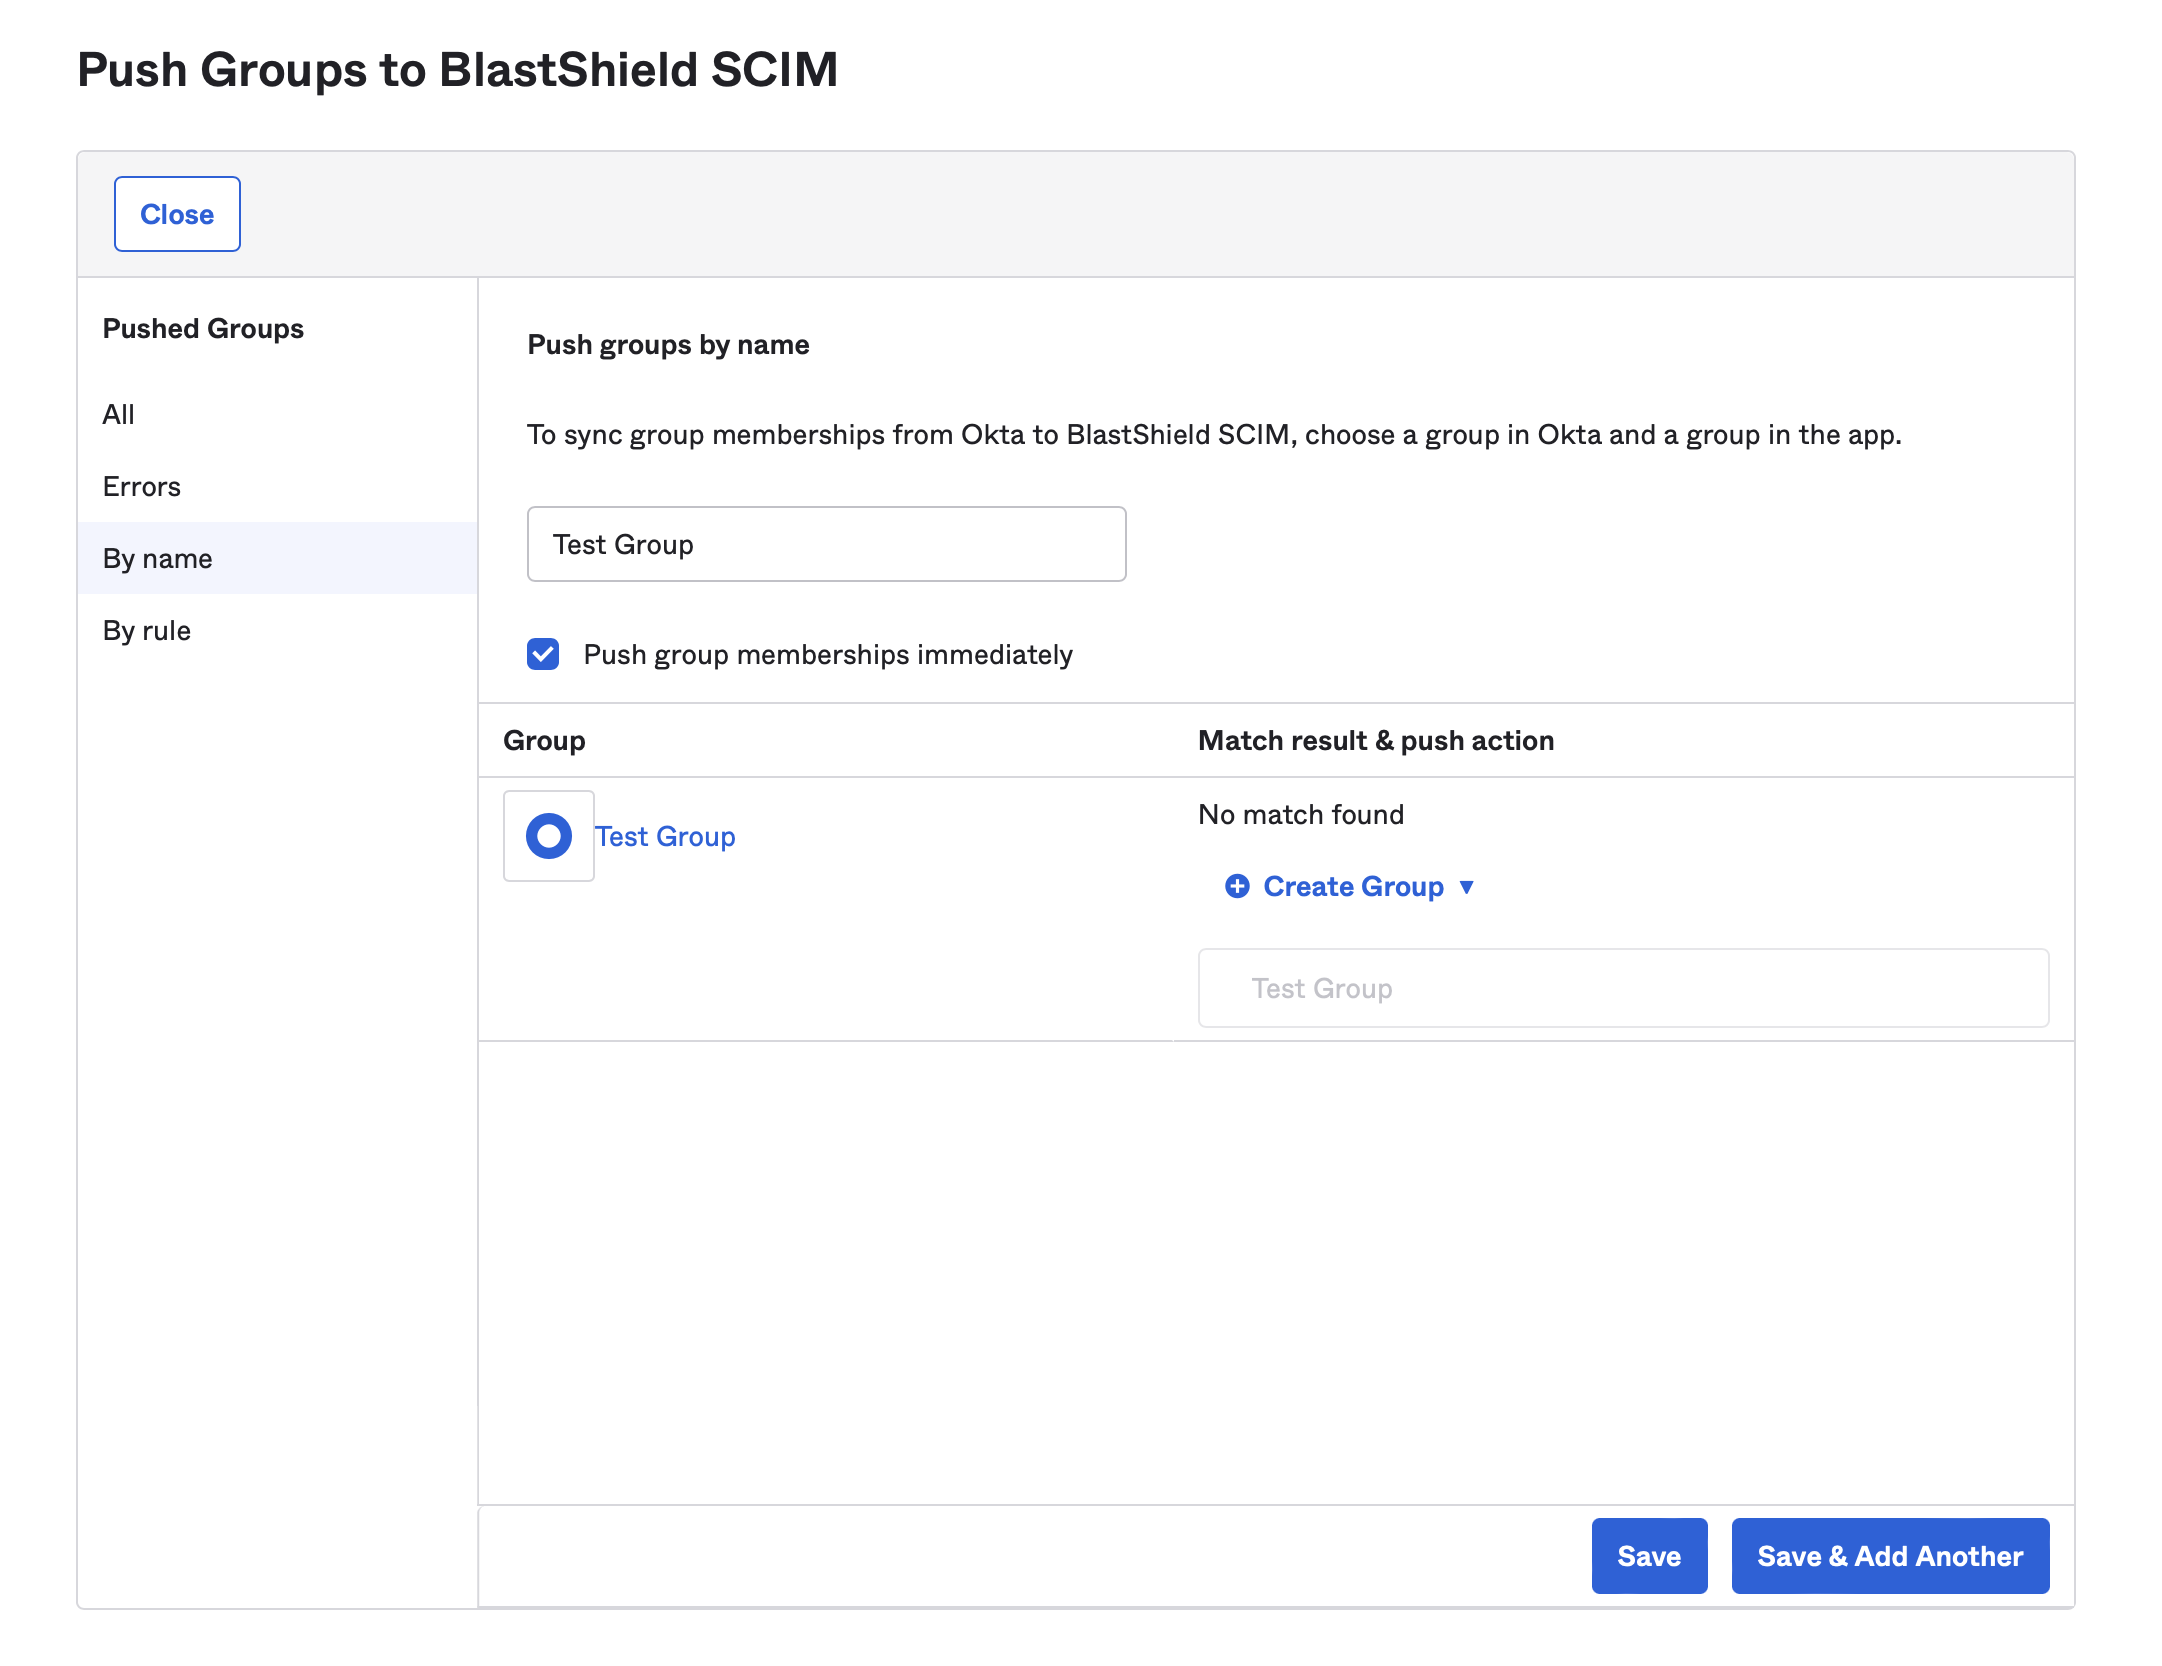
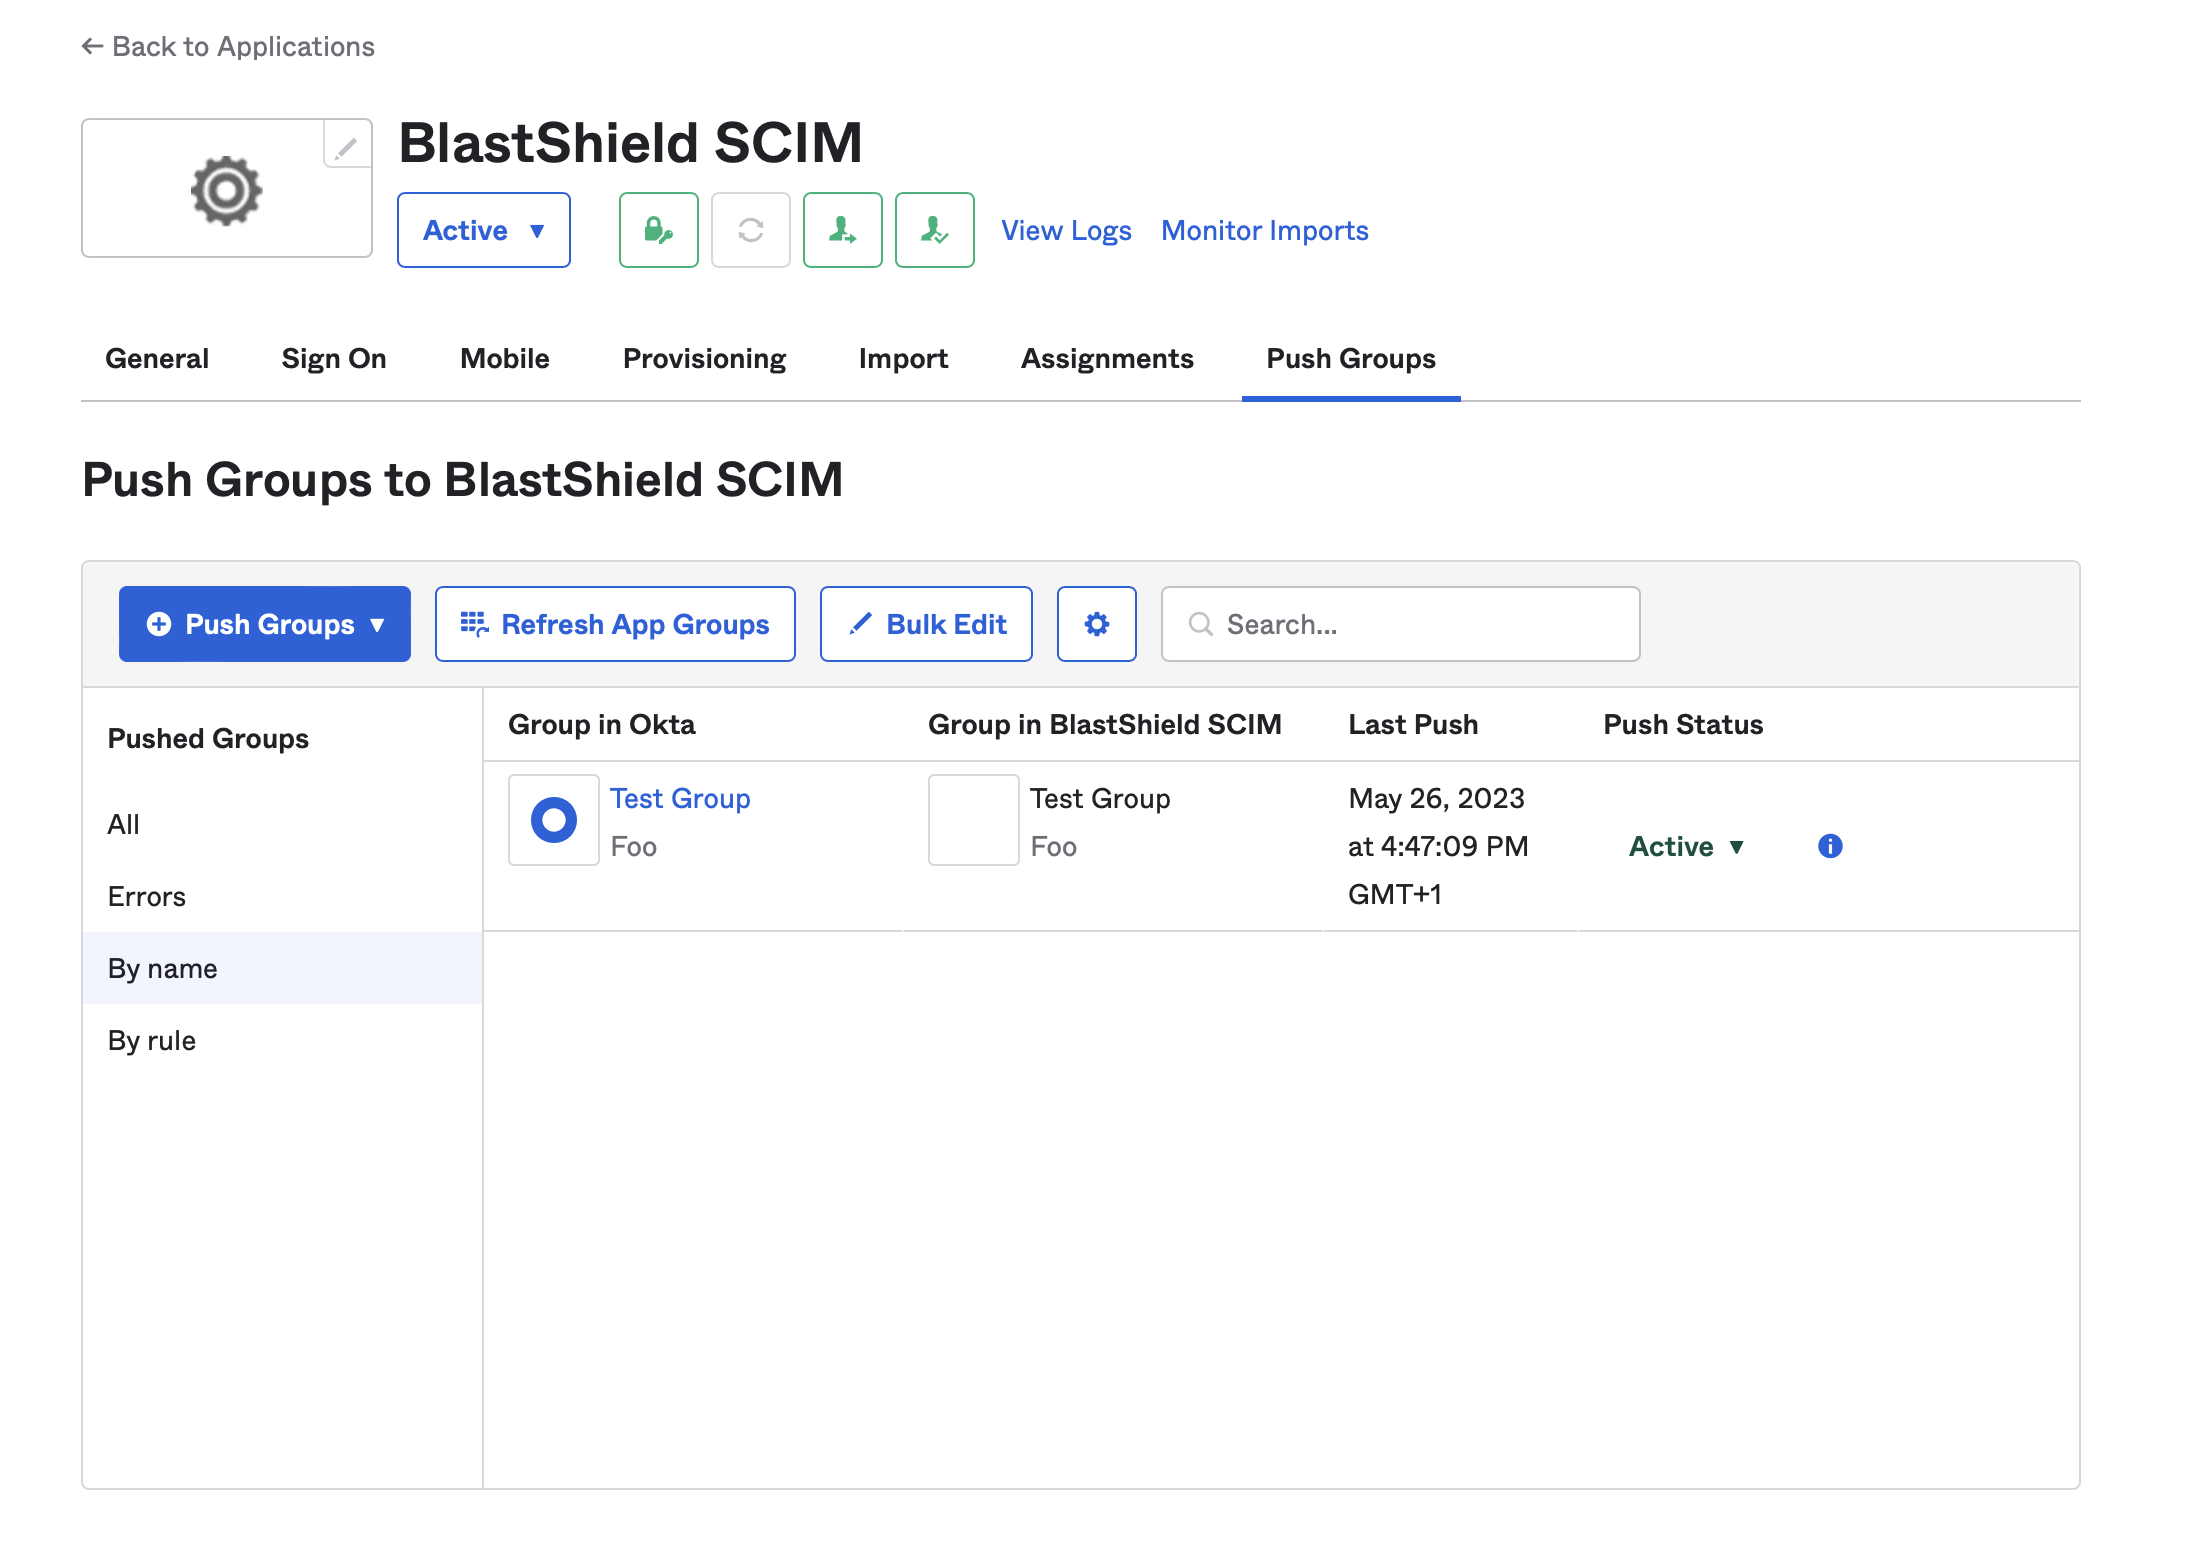
Optionally click on the “Push Groups” tab and push the groups that you want to import into BlastShield.
If you are using the BlastShield Mobile Authenticator app as the user authentication method you will find the BlastShield™ User Registration portal will now be available at the URL displayed in the BlastShield™ Orchestrator under REGISTRATION PORTAL > Registration URL. It will be of the format
https://<your-domain>.blastshield.app
Note
When this configuration is completed, users and groups which are assigned to the BlastShield™ application in Azure will be automatically provisioned into the BlastShield™ Orchestrator, and will be available to use in BlastShield™ policies. It is not possible to modify the provisioned groups from the Orchestrator, but you can add a provisioned user to Blastshield™ created groups. The choice of SSO credentials or BlastShield Mobile Authenticator for user authentication is a global setting.
If you are using the BlastShield Mobile Authenticator app as the user authentication method, you must first register a new user as explained here: Register a new user created by an external identity provider - Mobile Authenticator app. If you are using your SSO credentials for user authentication, you can skip this step.
Note: This is a one-time process. It is only required again if you want to reset the user authentication.
To connect to BlastShield™, use one of the following methods, depending on how you authenticate:
If you are using the Mobile Authenticator app for user authentication, connect using this method: Connect to BlastShield™ using the Desktop Client
If you are using your SSO credentials for user authentication, connect using this method: Remote User Access using an SSO credentials for user authentication