On-premise installation of an air-gapped Orchestrator on VMware ESXi and user authentication with the Mobile Authenticator app.
Introduction
The BlastShield™ Orchestrator is used to provision and manage all systems in a BlastShield™ network. This includes management of gateways, endpoints, remote users, groups, and policies. This article describes how to install a new Orchestrator into a fully air-gapped network. Once installed, you will use the Orchestrator to manage and provision all systems within the BlastShield™ Network.
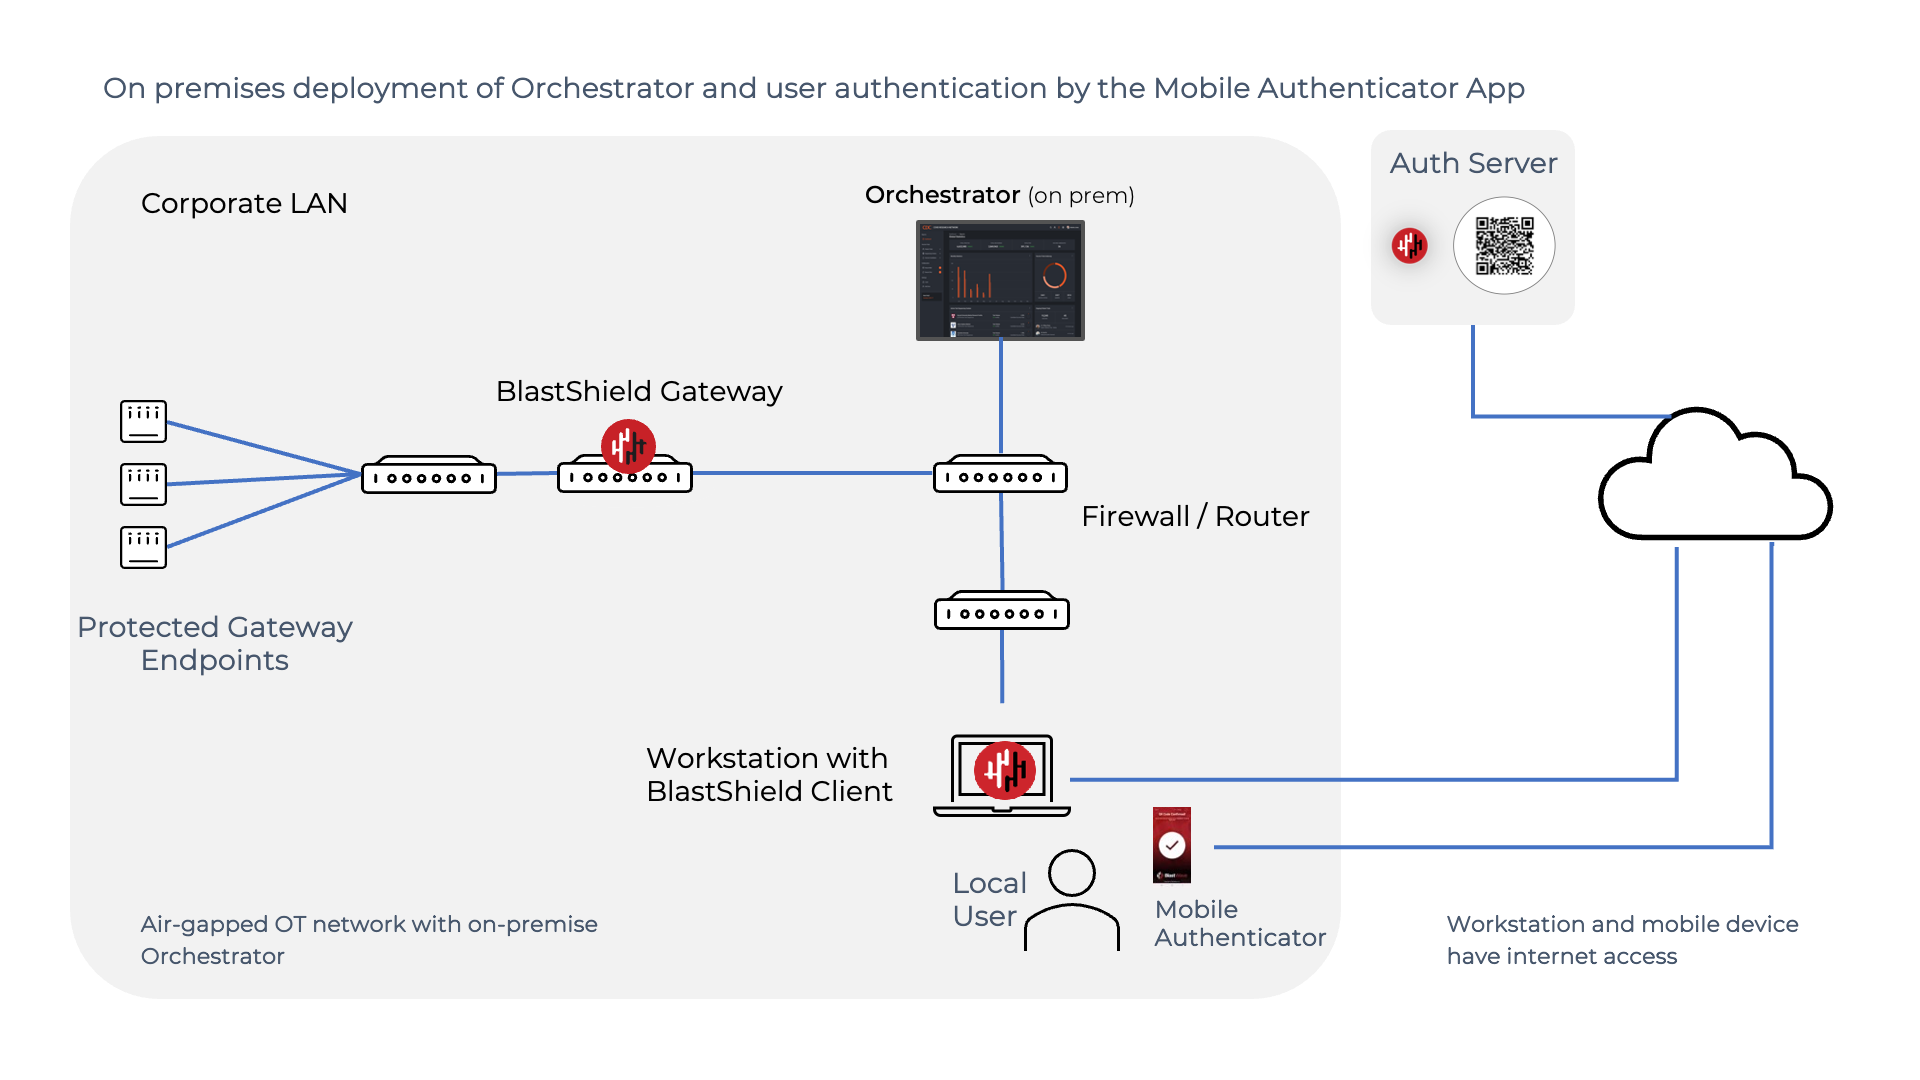
Air-gapped deployment with mobile authentication
In this scenario, the BlastShield™ Orchestrator, Gateways and Host Agents are air-gapped. Users will authenticate via the mobile authenticator app, which requires that the users have external access.
Deployment notes for an air-gapped deployment using the Mobile Authenticator
The Authentication Server is cloud hosted.
The Orchestrator is deployed on premises and is air-gapped.
Gateways and Host Agents are on premises and are air-gapped.
The users’ Mobile Authenticator apps and the user workstations are on-premises and have an external connection to the Authentication Server.
The workstations must be on the same network as the Orchestrator.
Devices that run the BlastShield Client must have their DNS set to the IP address of the Orchestrator (or forward the blastshield.app zone in any existing DNS server you might have).
As the Orchestrator will be self-hosted, you should provide your own certificate for the Orchestrator HTTPS web UI.
Request the Orchestrator BSI invitation file and the administrator BSI invitation file from BlastWave. This are used for registering the BlastShield network and for registering the administrator user.
The Orchestrator will use UDP port 12345 for communications. Please forward UDP Port 12345 inbound on the firewall to the Orchestrator.
Install a BlastShield Client on the administrator workstation. You can download the Client from here.
Download the Orchestrator firmware. This download link is provided below in Step 1.
Download the Orchestrator OVA file from here and keep it available so that you can upload it to your ESXi server.
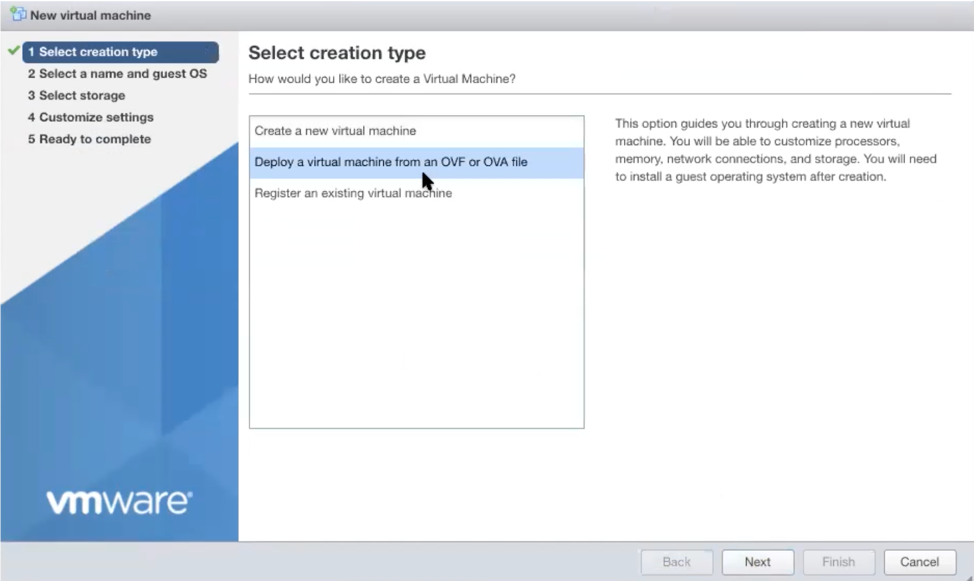
Using the VMWare ESXi new virtual machine installer, the Invitation (.bsi) file you received from BlastWave, and the OVA file you downloaded in step 1 you will install the software on your ESXi hypervisor and register it to the BlastShield™ Network. The process is explained below.
Install the BlastShield™ Orchestrator OVA file on the ESXi client.
From the ESXi host, go to Virtual Machines > Create/Register VM > Create a virtual machine from an OVF/OVA file
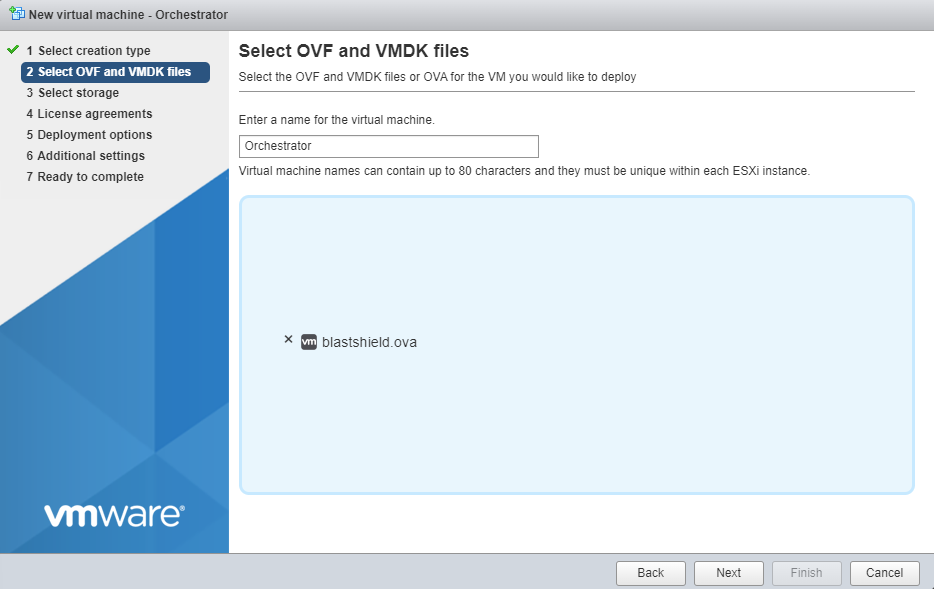
Enter a name and select the BlastShield™ OVA file.
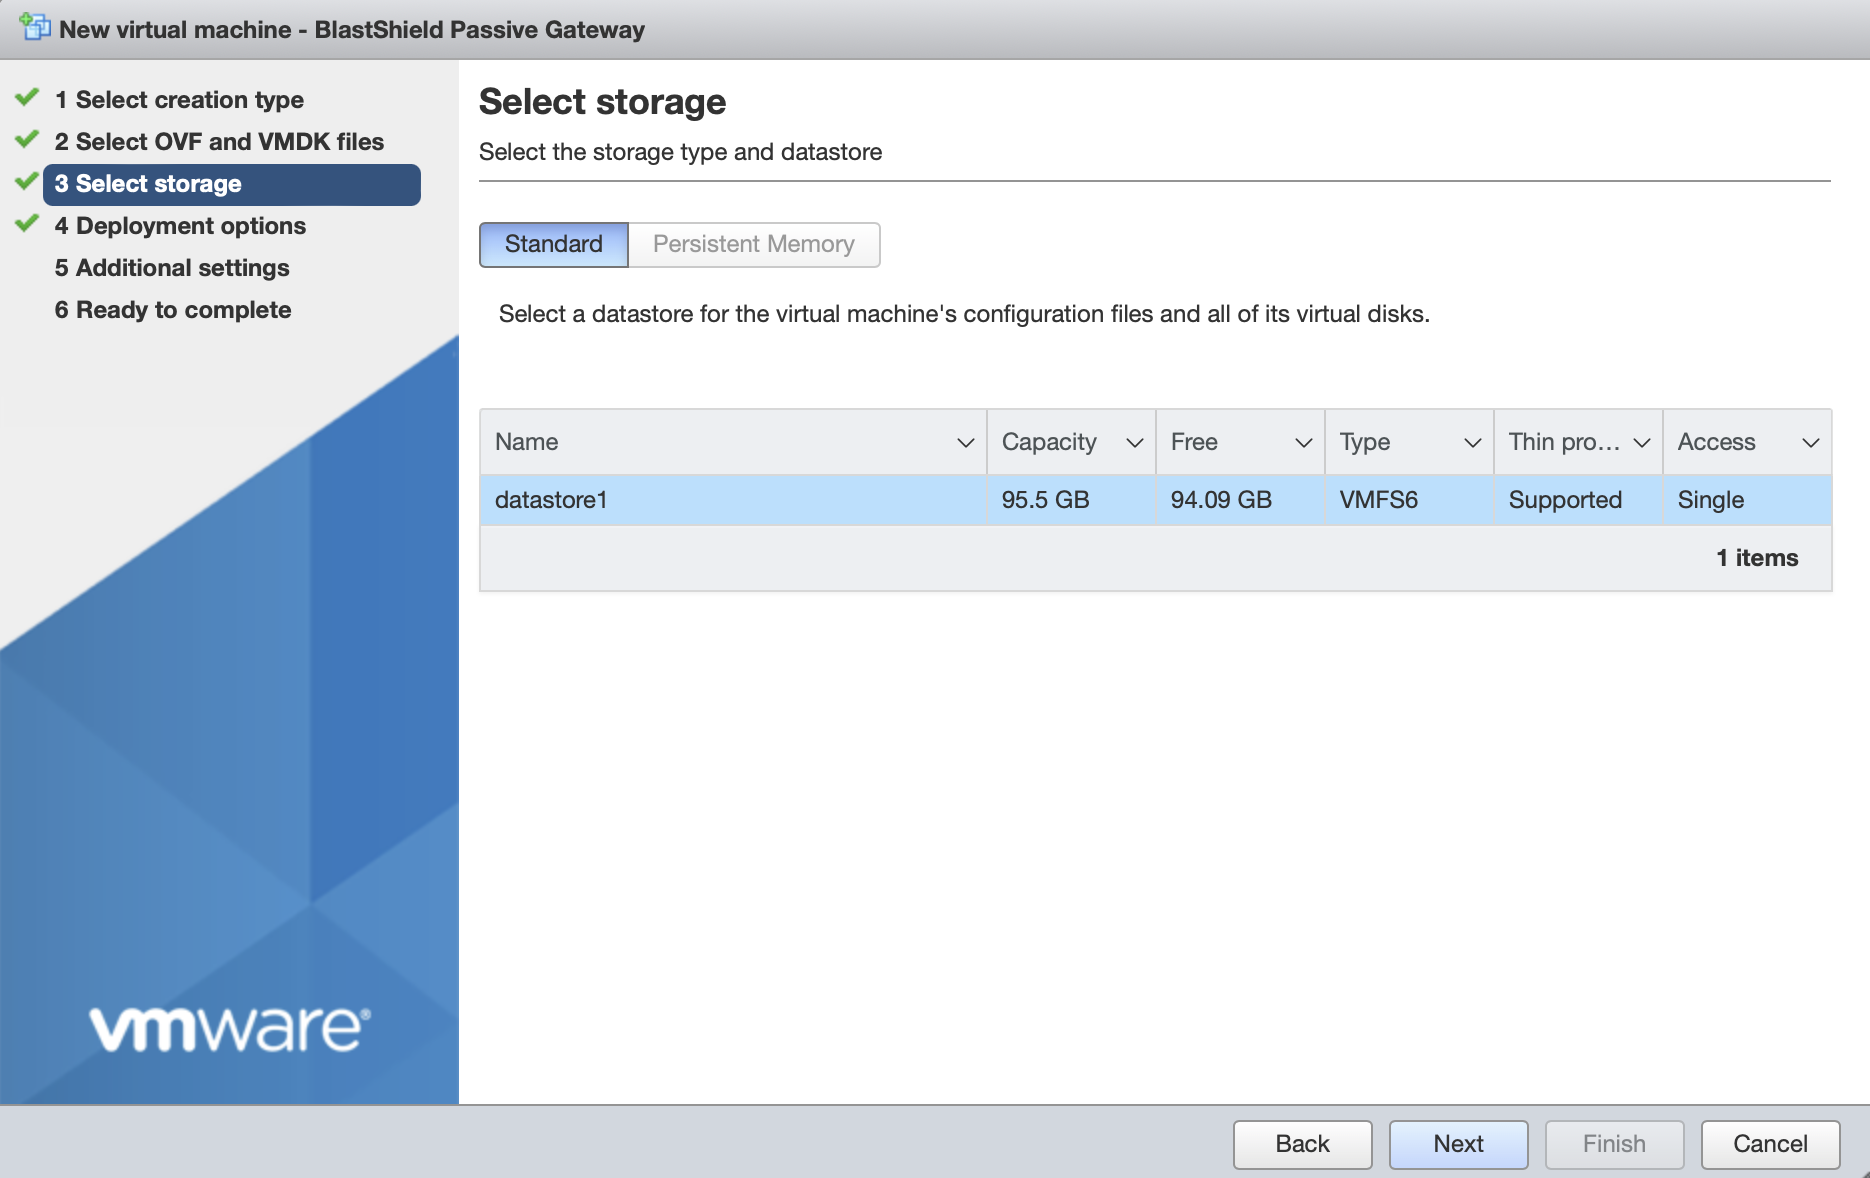
Leave the default datastore option.
Deployment options
'Network mappings' should use the default "VM Network" port group for the Public Network. Note that the Protected Network setting will not be used and the setting will be ignored.
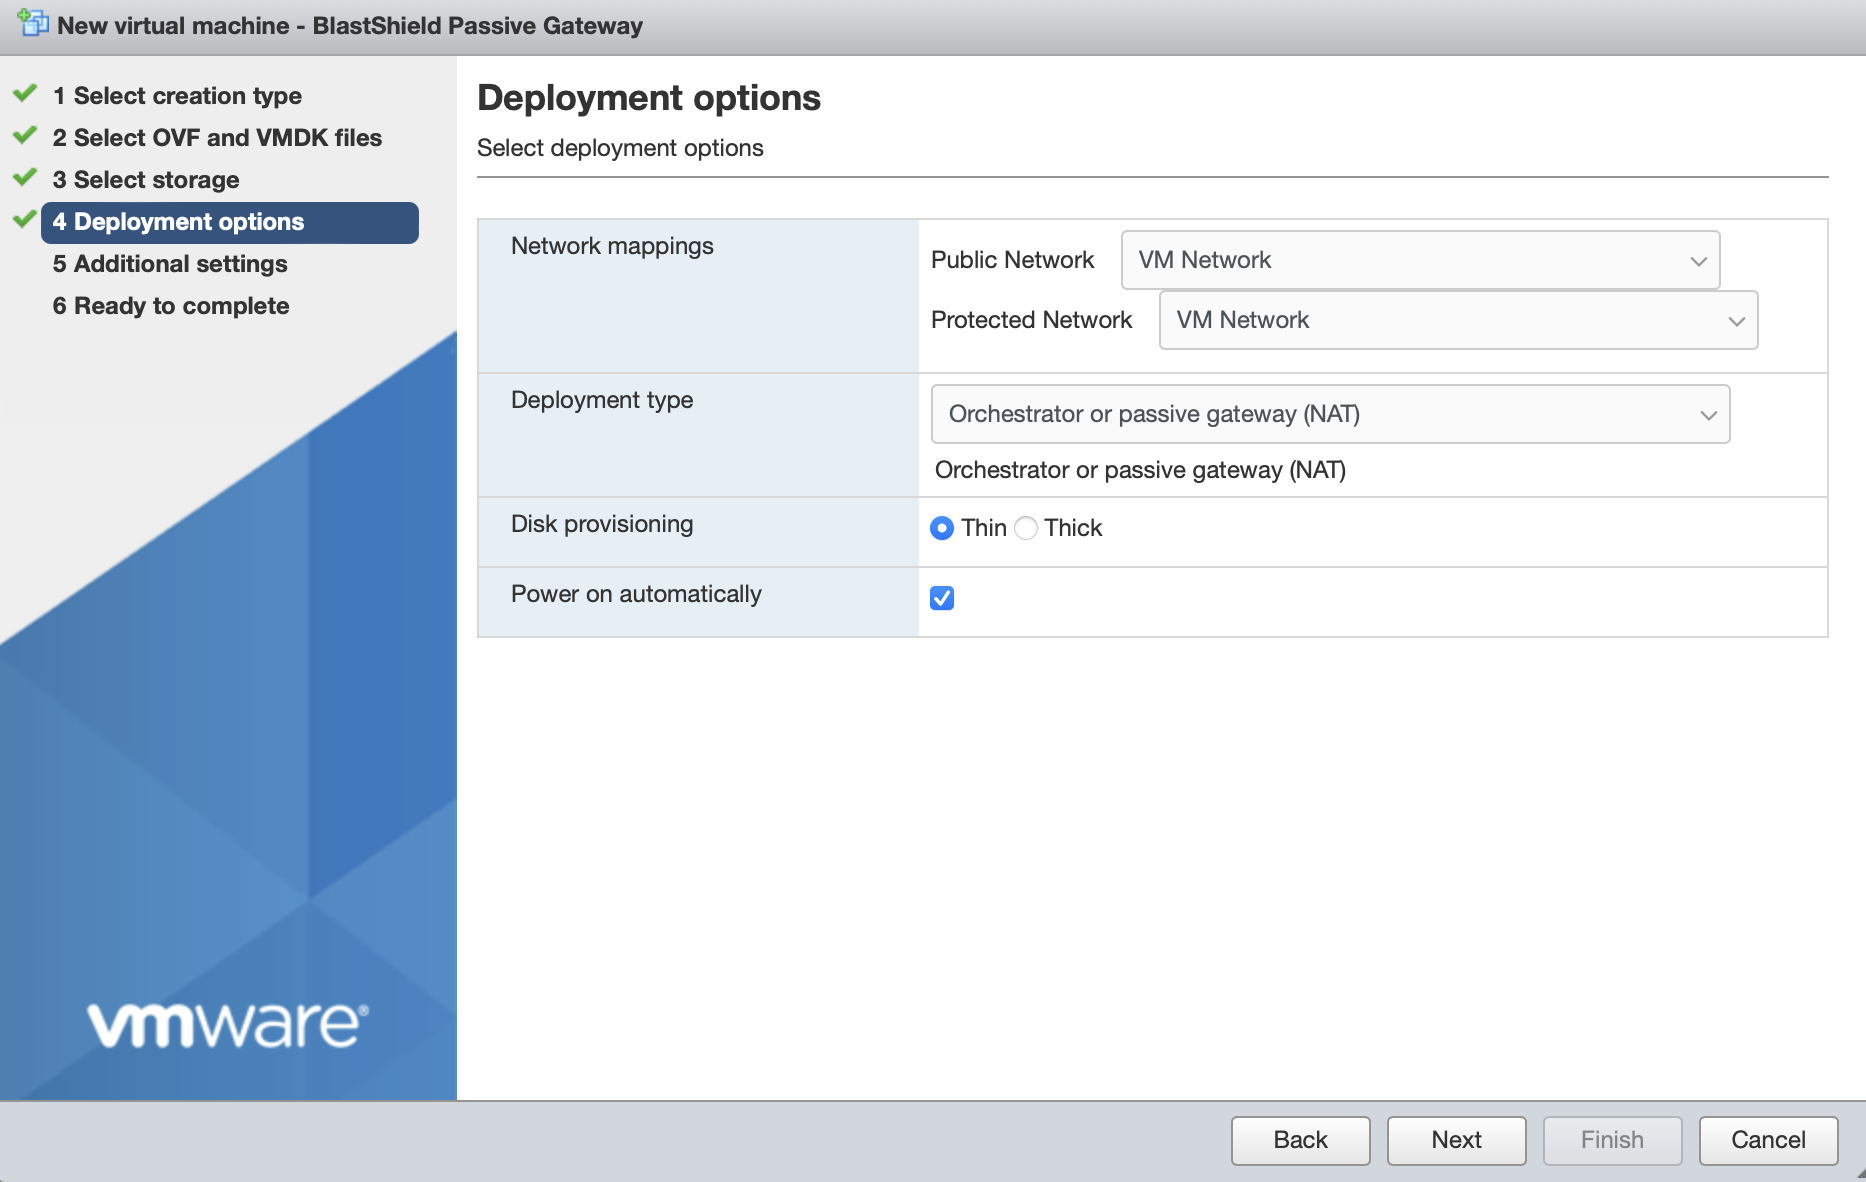
Deployment type should be set to Orchestrator or passive gateway (NAT).
Disk provisioning' and 'Power on automatically' should use the default settings.
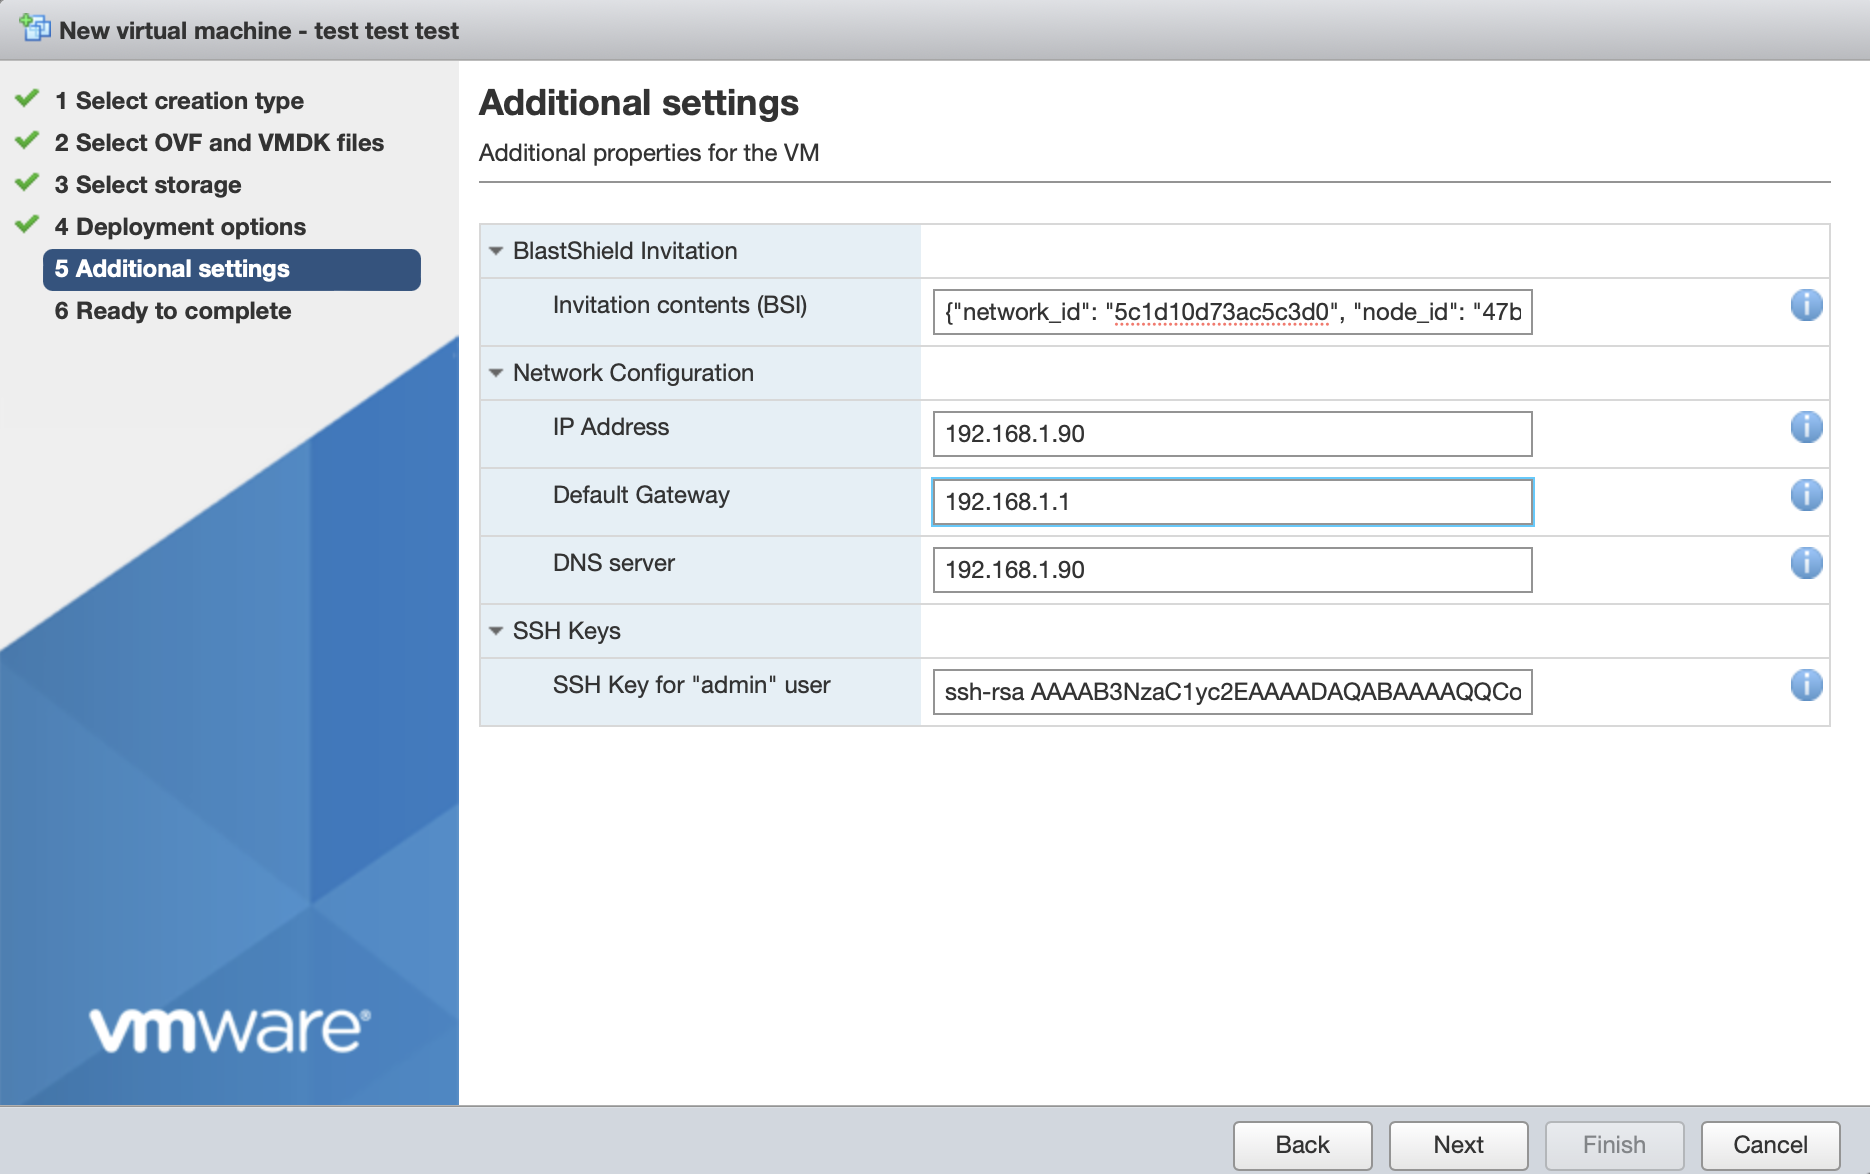
In Additional Settings, add the contents of the bsi file.
Paste the contents of the Orchestrator BSI file into the Invitation contents box.
Set the IP address and prefix length, Default Gateway and DNS server IP address, being sure to note that you must configure the DNS IP address the same as the Orchestrator IP address for an airgapped Orchestrator deployment (for a non-airgapped Orchestrator deployment you should provision the DNS to your network's preferred DNS server, please refer to the non-airgapped VMware installation for more details). Leaving the boxes blank would use DHCP.
Add your SSH public key (in one-line OpenSSH format) in the SSH Keys > SSH Key for "admin" user field.
The screen shot below shows example settings. Please use settings appropriate to your network.
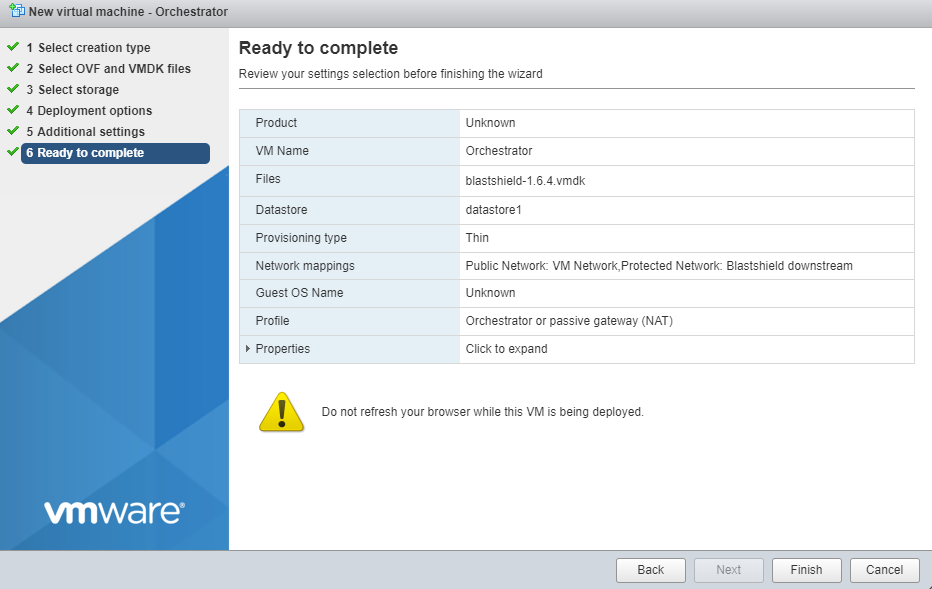
Click next, then click 'Finish' to complete the configuration and launch the VM.
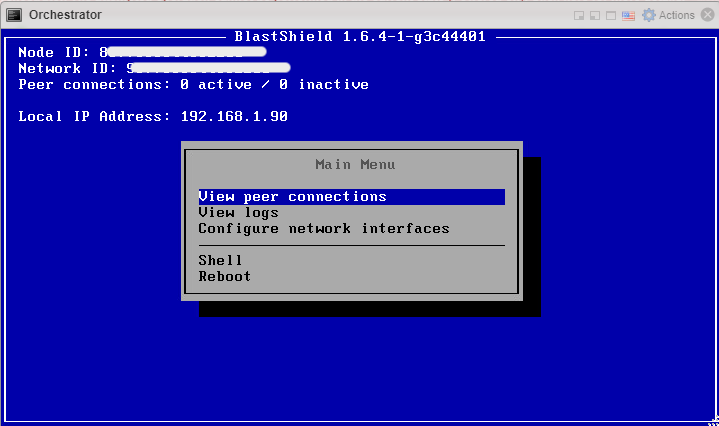
Once the Orchestrator has started, you will see the local maintenance interface displayed on the console. The local IP address of the Orchestrator is displayed. You will use this address to SSH to the Orchestrator in the next step.
Forward UDP Port 12345 inbound on the firewall to the Orchestrator.
SSH as admin into the new Orchestrator. Authentication is done by your SSH public key which was added during the VM setup.
Copy the content of
license_req.jsonwhich is generated in the home directory of the admin user.$ cat license_req.jsonReturn this content to BlastWave. BlastWave will reply with a license key.
Whilst still connected to the Orchestrator by SSH, run the
apply-licensecommand and hit enter.$ apply-licenseYou will see the following prompt:
License:At this prompt, paste the license key information to the command line and hit enter to start the Orchestrator.
License:{"license": "..."}
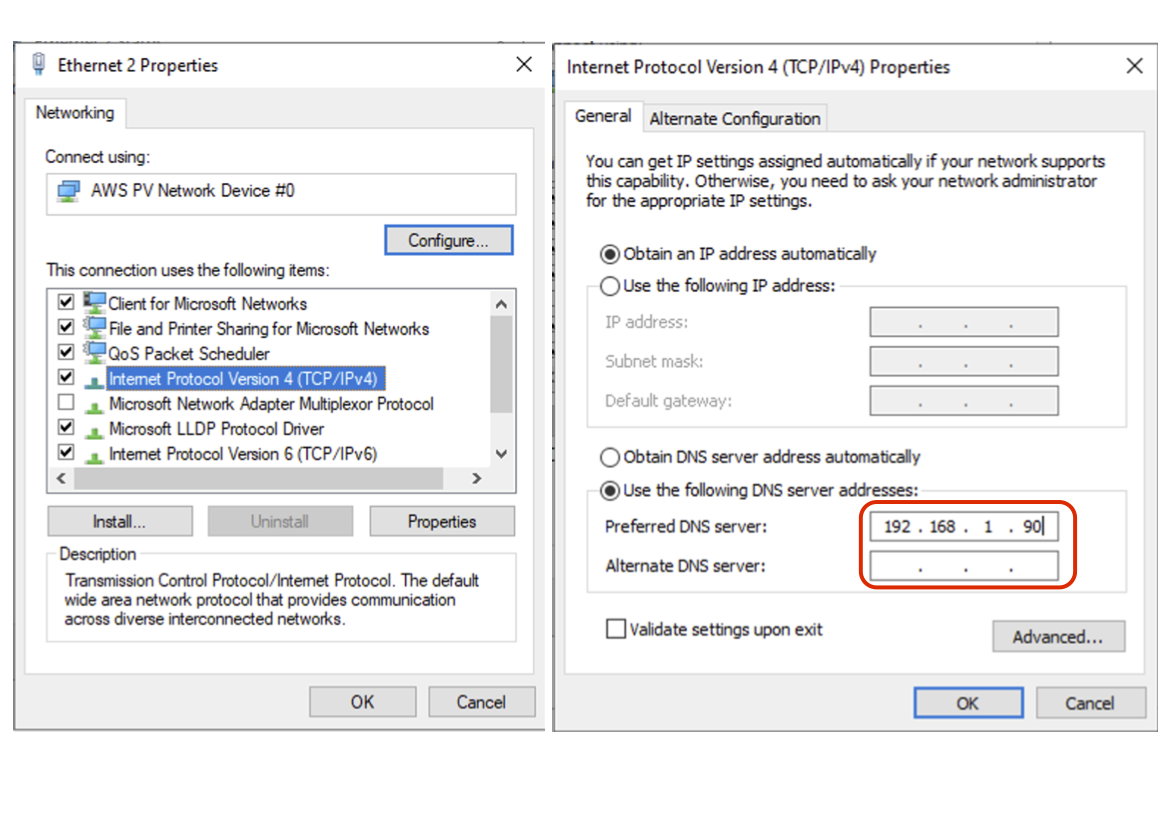
Any device running the BlastShield™ Client must have it's DNS set to the IP address of the Orchestrator.
In a Windows desktop OS, you can change the DNS settings in the network interface properties > TCP/IPV4 settings.
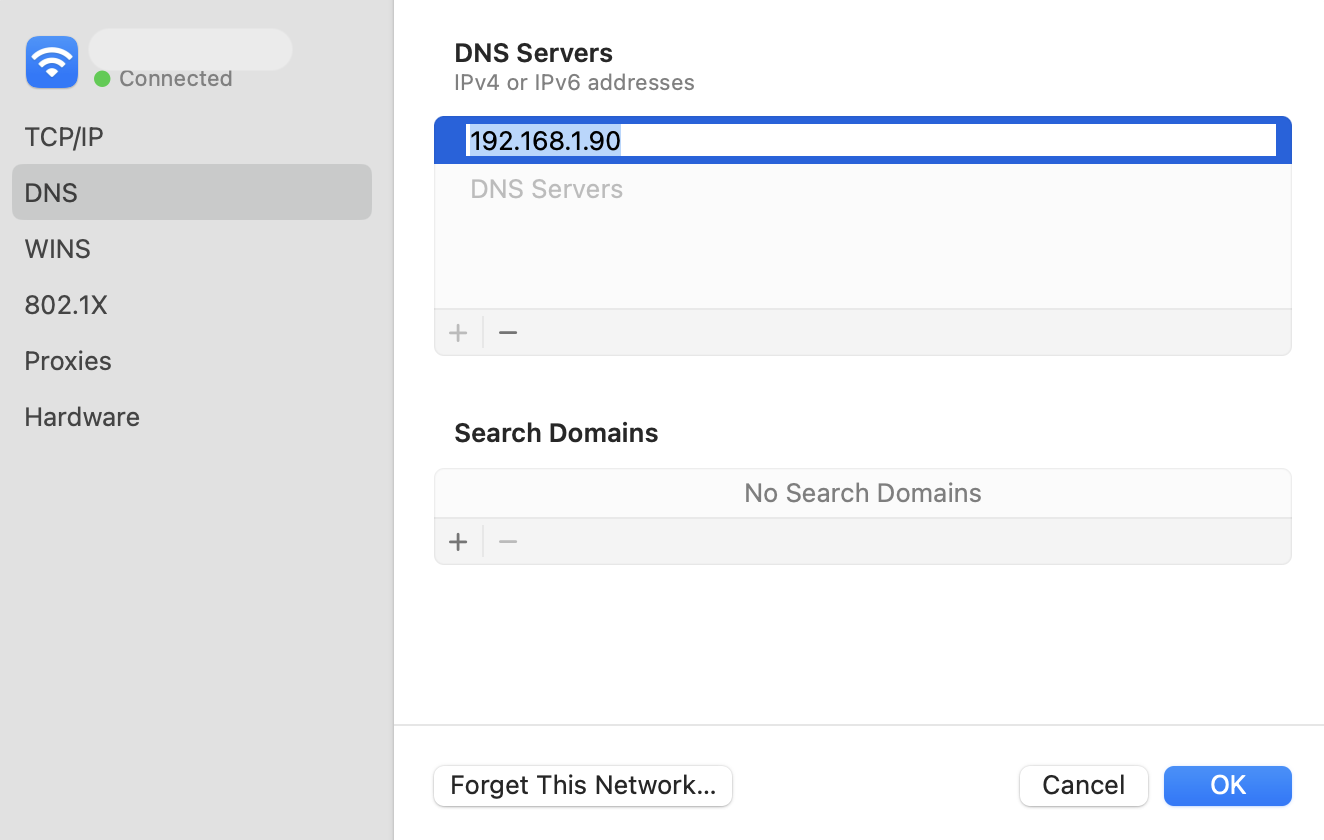
On macOS the DNS can be changed in the network System Settings
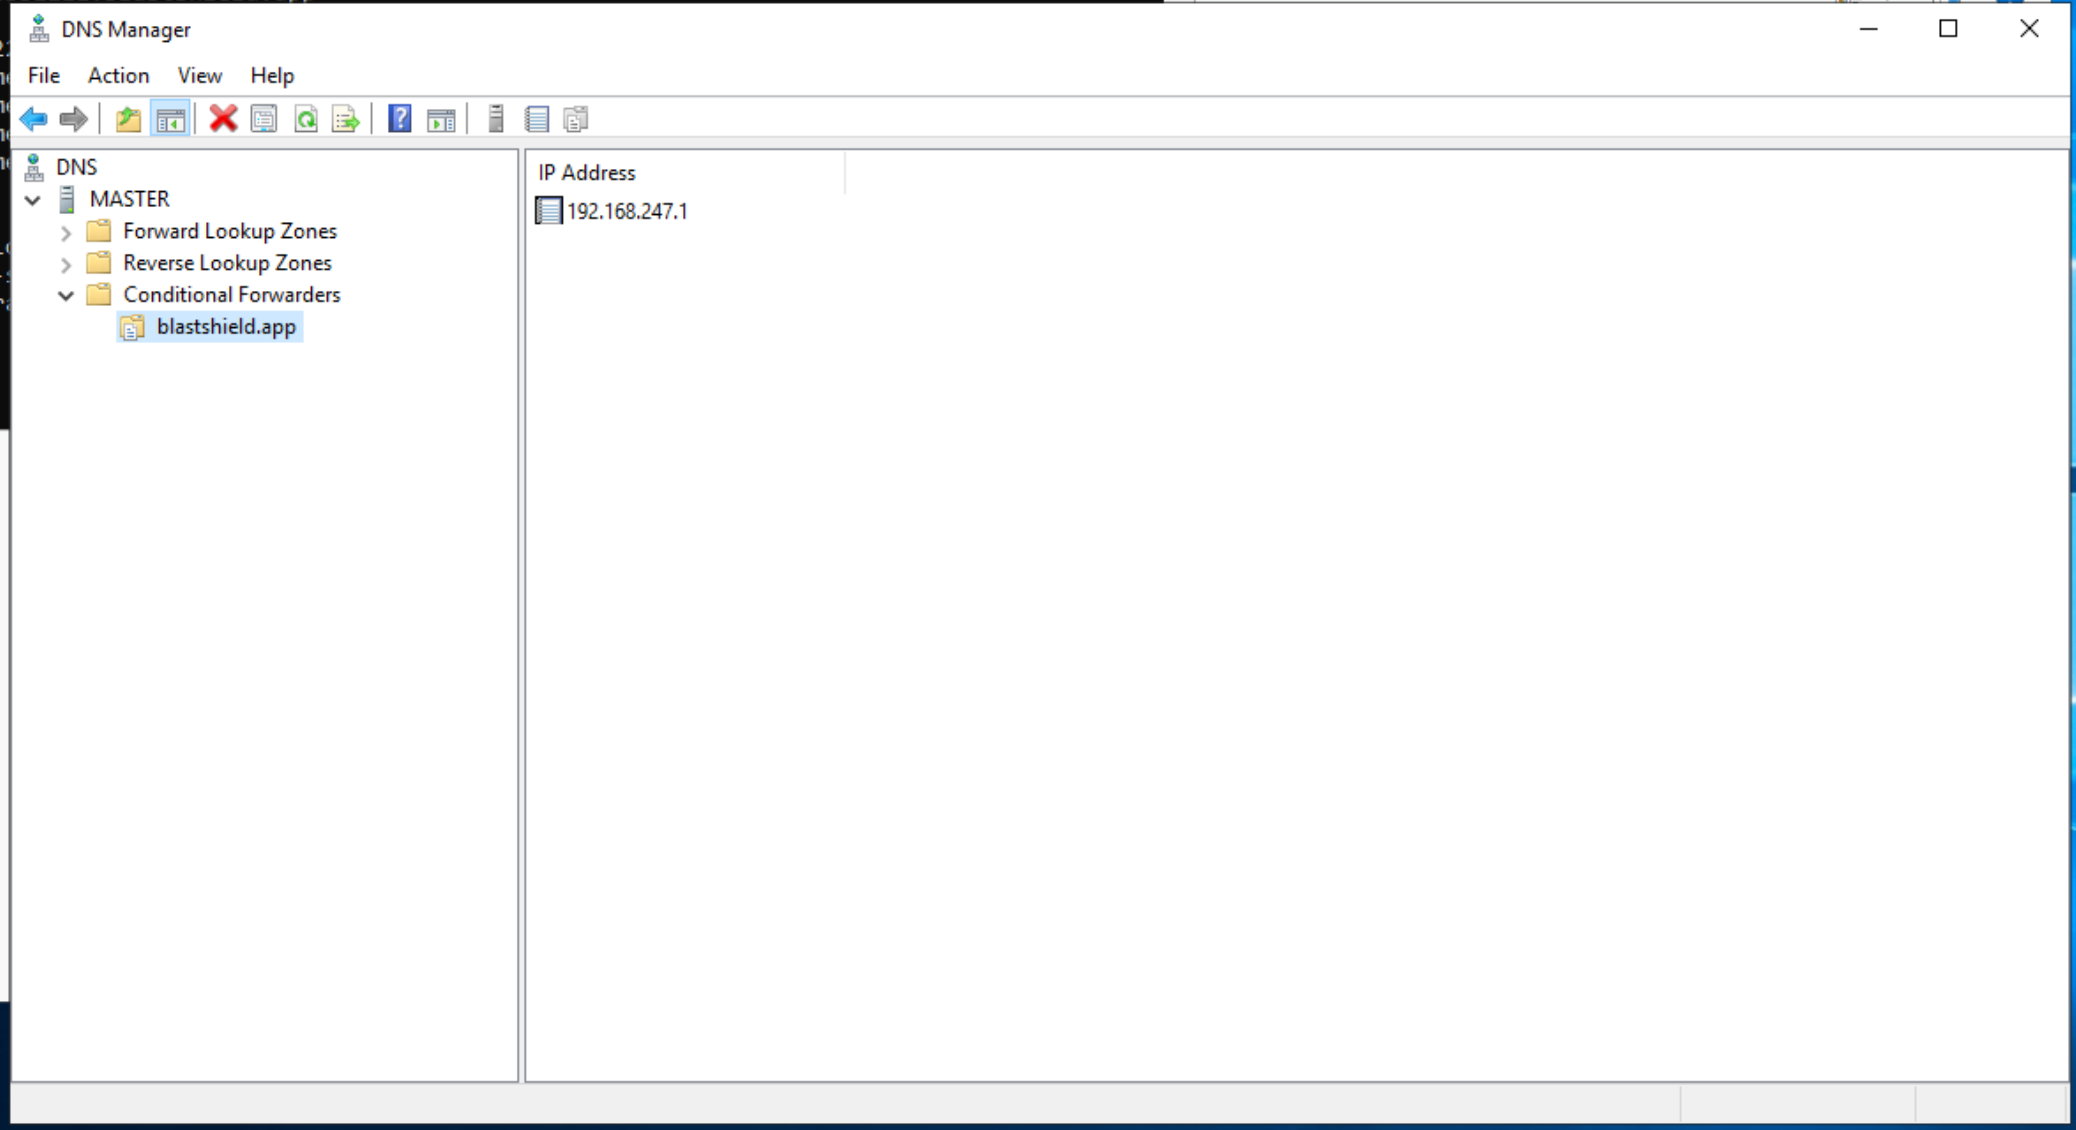
For networks which use an on-premise Microsoft DNS or an AD server for DNS, then a conditional forwarder can be added with the Orchestrator IP address as shown for the domain
blastshield.app. In the example images below, 192.168.247.1 is the IP of the Orchestrator.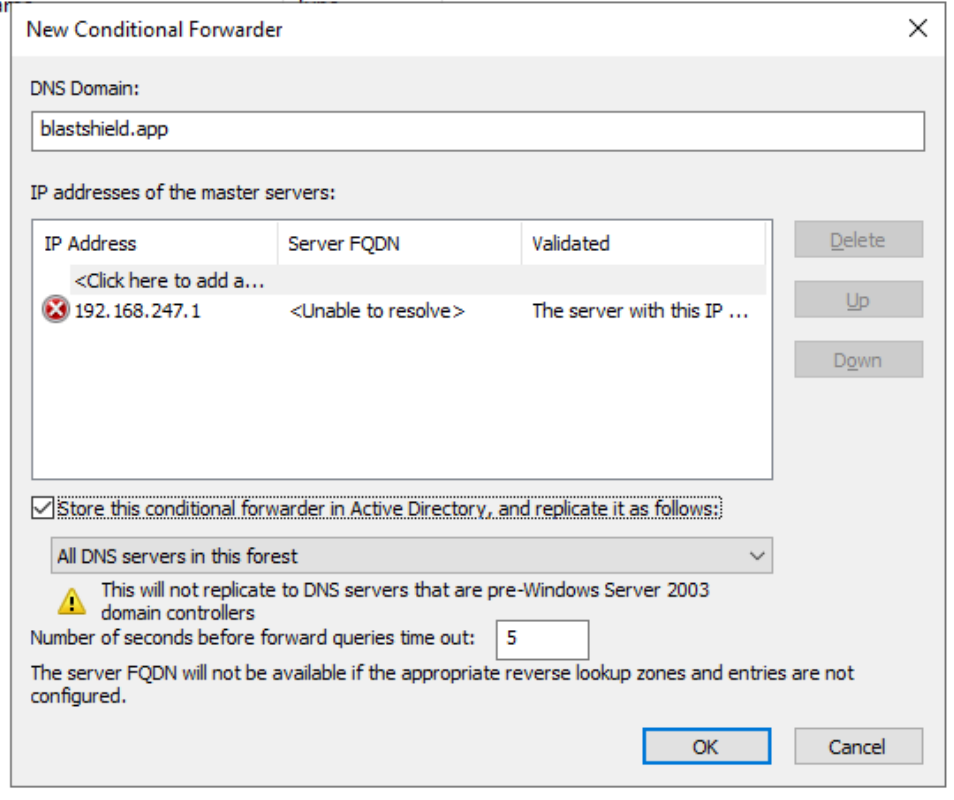
Here you will use the administrator BSI invitation file or invitation link which you received from BlastWave to register and connect to the Orchestrator as the administrator user.
If you are using the Mobile Authenticator app and you have received an administrator invitation (BSI) file then follow this process to register: Register the administrator user using an administrator (BSI) invitation file
If you are using the Mobile Authenticator app and you have received an administrator invitation URL then follow this process to register: Register the administrator user using a registraton URL.
You can download the Mobile Authenticator app here: Mobile Authenticator download links
You can download the Desktop Client here: Desktop Client download links
Go to the BlastShield™ Desktop Client on your computer and ensure the Connection Status shows that it is connected.
On the BlastShield™ Client, click on the Launch Orchestrator button.

Scan the displayed QR code with the BlastShield™ Mobile Authenticator App on your mobile device.

Verify your facial or biometric identity on your mobile device.
The Orchestrator administration user interface will open in your default web browser. At this stage the UI web server will be using a self-signed certificate for HTTPS, so you should acknowledge the browser security warning.
Now that you have installed and connected to the Orchestrator, you can add Host Agents, Gateways and new users. Please refer to the following sections to learn how to do this.